Configuration of agent for file system backup
Protection of the entire file system of a selected server
Requirement: successfully installed and visible in the Command Center agent of type File System.
Configuration of the agent to back up the entire file system should be done from the Protect-> File servers tab:

We click on the server of interest on which the File System agent is installed and in the Subclients section select default, which will redirect to the page with configuration of the backup content and definition of the Plan.
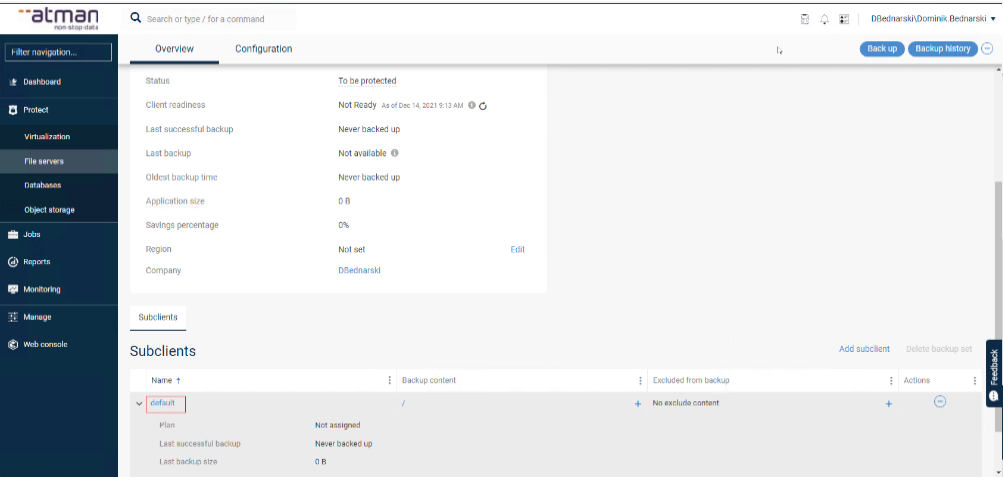
NOTE: the default object cannot be deleted
In the General section, we define the Plan, which defines the time, frequency and retention of the backup.
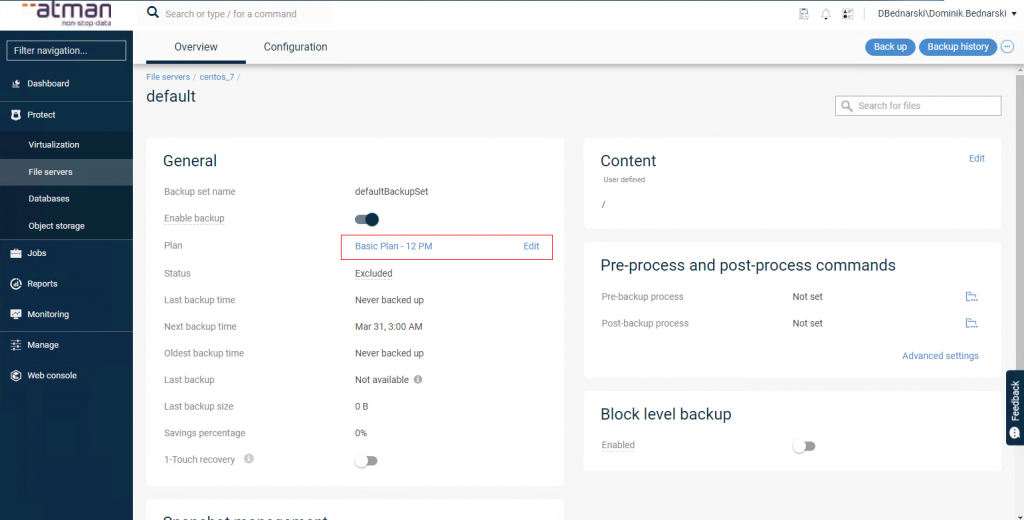
In the Content section, we indicate the contents of the Backup:
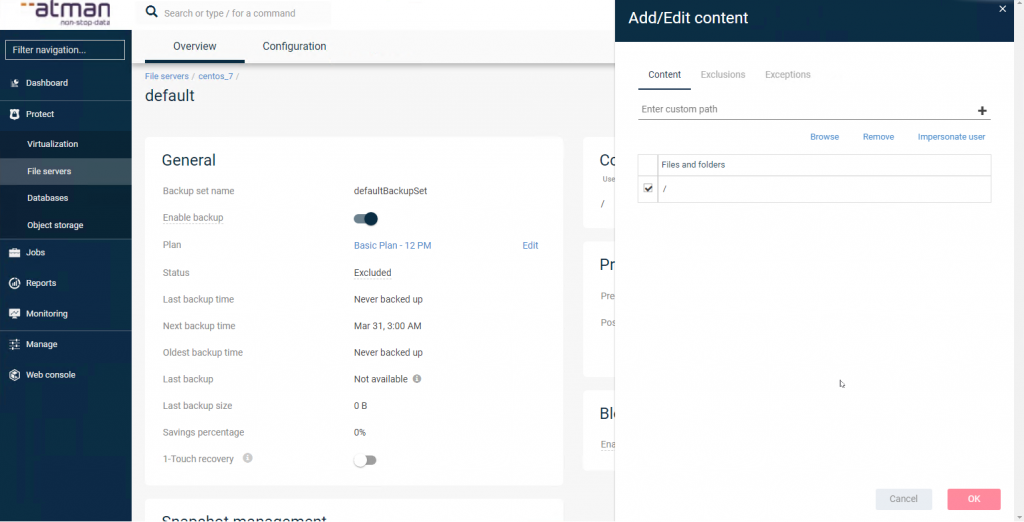
Here, we can indicate that the entire file system should be protected with or without system status.
The software supplier’s detailed documentation provides more information: https://documentation.commvault.com/commvault/v11_sp16/article?p=86668.htm
Protection of selected file system resources
Requirement: successfully installed and visible in the Command Center agent of type File System.
Configuration of the agent to back up selected file system resources should be performed from the Protect -> File servers tab:
We then select Add subclient which will redirect to the configuration page for the backup content and Plan definition.
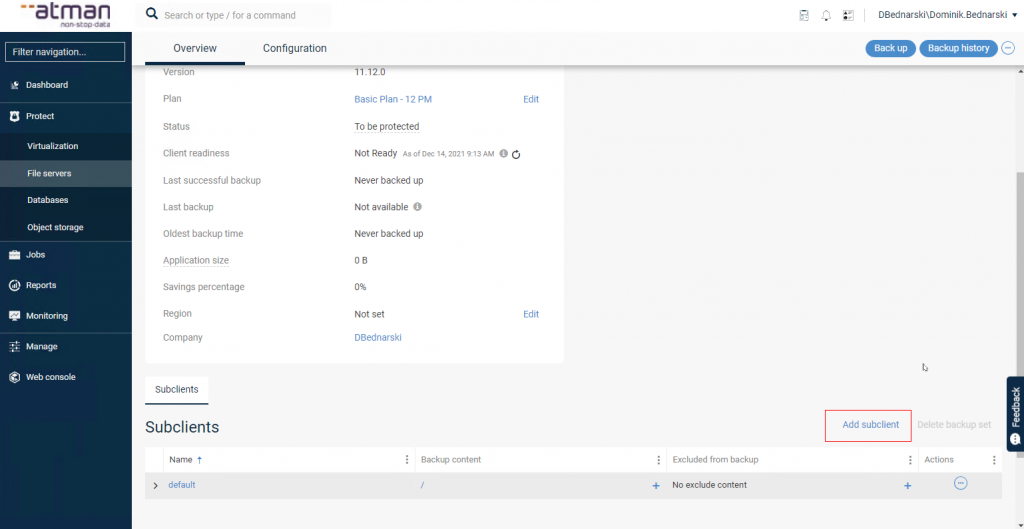
NOTE: the default object cannot be deleted
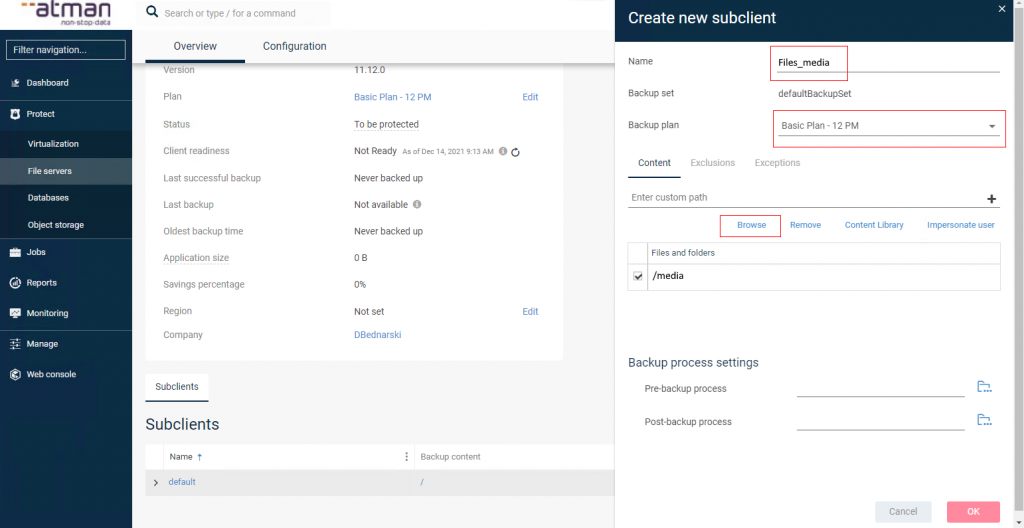
In the Add subclient window, we provide a name for the subclient We define a Plan, which defines the time, frequency and retention of the backup. We indicate the contents of the backup by clicking Browse.
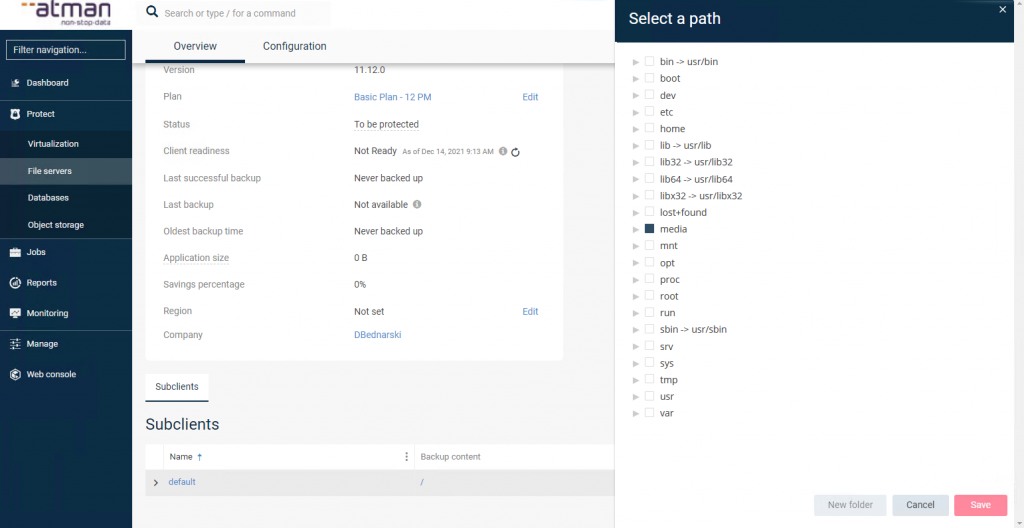
Using the drop-down tree, the path/directory/file can be indicated. It is possible to specify the resource permissions (for UNC paths) and also to exclude. Clicking Save, this saves the indicated resources and closes the current window. A further approval of Save saves the configuration of the newly created Subclient:
The software supplier’s detailed documentation provides more information: https://documentation.commvault.com/commvault/v11_sp16/article?p=86668.htm
The subclient can be modified at any time from the Subclients section:

NOTE: please note that the contents (copyable data/source) of different subclients must not be duplicated! The exception is the subclient -> default object. If you have configured the subclient -> default object according to the previous subsection, it will still protect all data except that indicated in another subclient. Therefore, do not modify the “Content” field for the subclient _ _ default object.
Configuration of exclusions
Configure the exclusions for the selected file system resource from the Protect -> File servers tab:

Select the Backup set where the Subclient of interest is located and select it

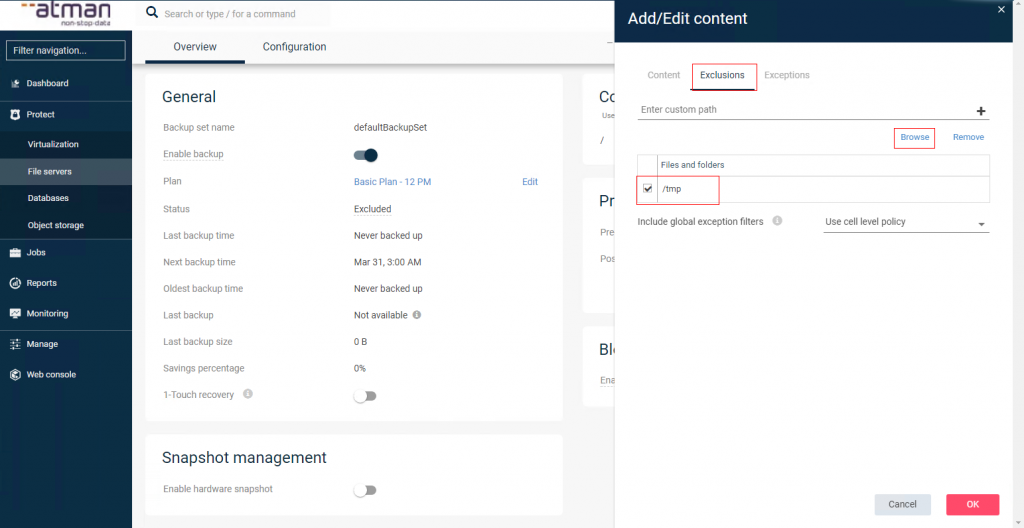
In the Content section, click edit:

In the newly opened window, we add exclusions in the same way as when configuring the contents of the backup:
Please see the link below for the manufacturer’s detailed information on exclusions: https://documentation.commvault.com/commvault/v11/article?p=11826.htm
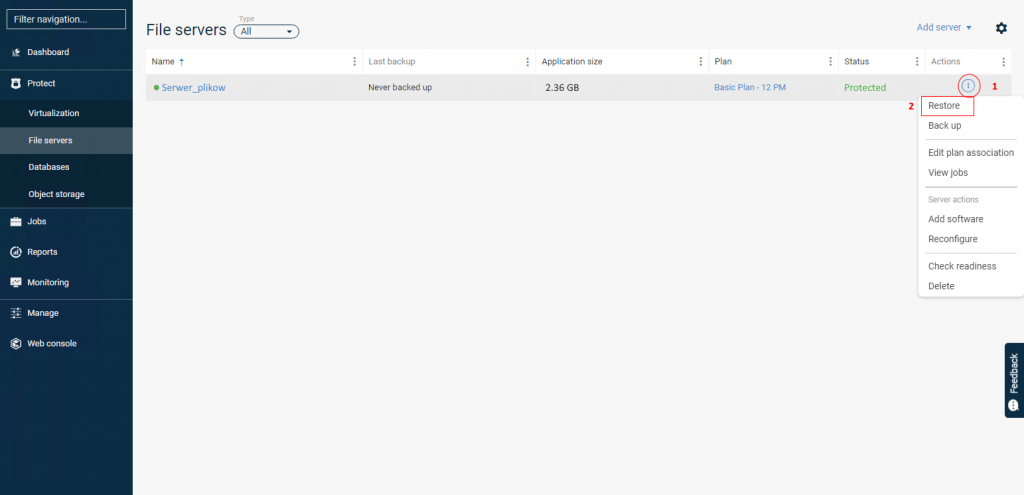
Data recovery
Restore data for the selected file system resource should be performed from the Protect->File servers tab, in the Actions column expand the hidden menu (1) and select Restore (2):
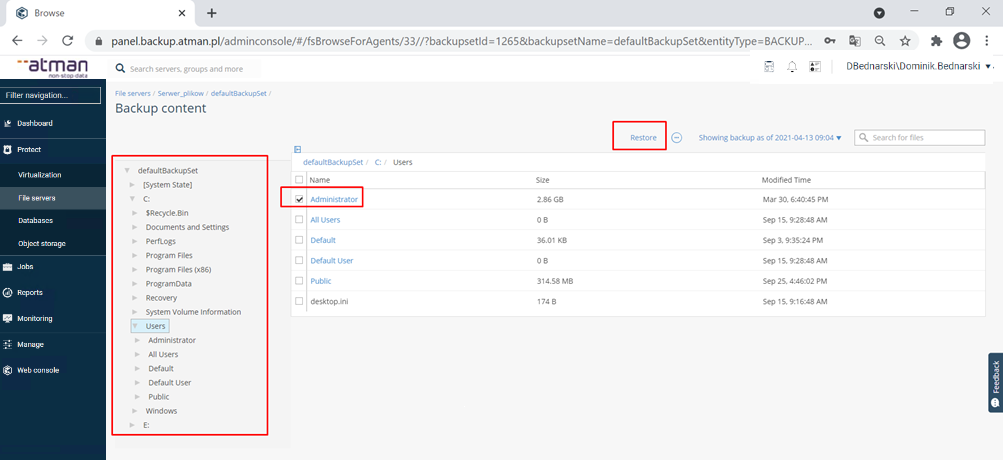
We select the Backup set in which the Subclient (1) of interest is located and click Select content and the OK (2) button.

The panel redirects to a preview of the contents of the backup. You can search for and indicate the specific backup files you want to recover. We can recover files according to the state of the machine from the last backup job or from a specific day. Finally, we click Restore which launches the window for the task options:
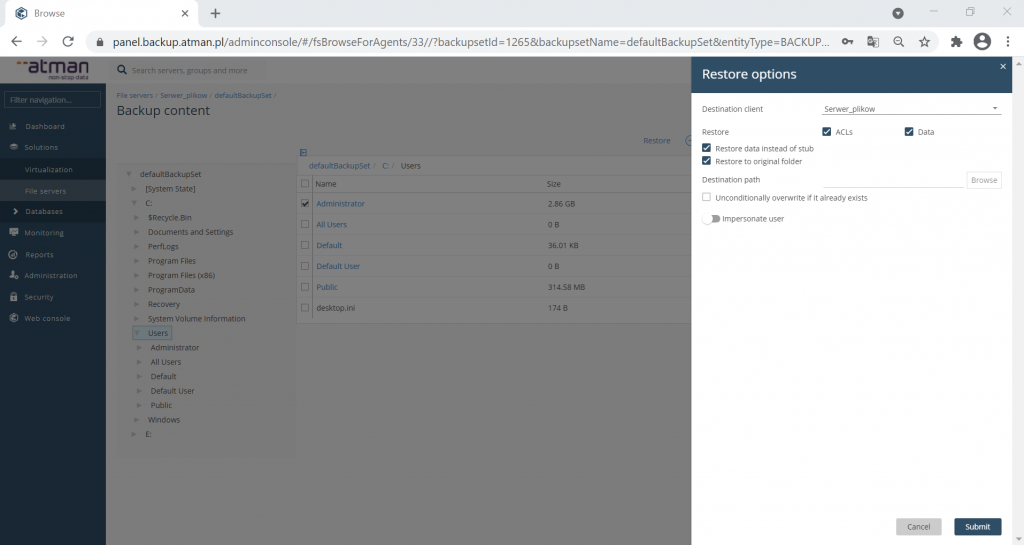
We select the options we are interested in and click Submit which will start the data restoration task:
We can monitor the job in the Jobs tab:

The software provider’s detailed documentation provides more information: https://documentation.commvault.com/commvault/v11_sp16/article?p=86723.html