Configuration of agent to back up entire virtual machines
Requirements: Installed client with Virtual Server agent:
If the File System agent has been downloaded from the Download Center and installed on a VSA Proxy machine. You can proceed to install the virtual machine agent.
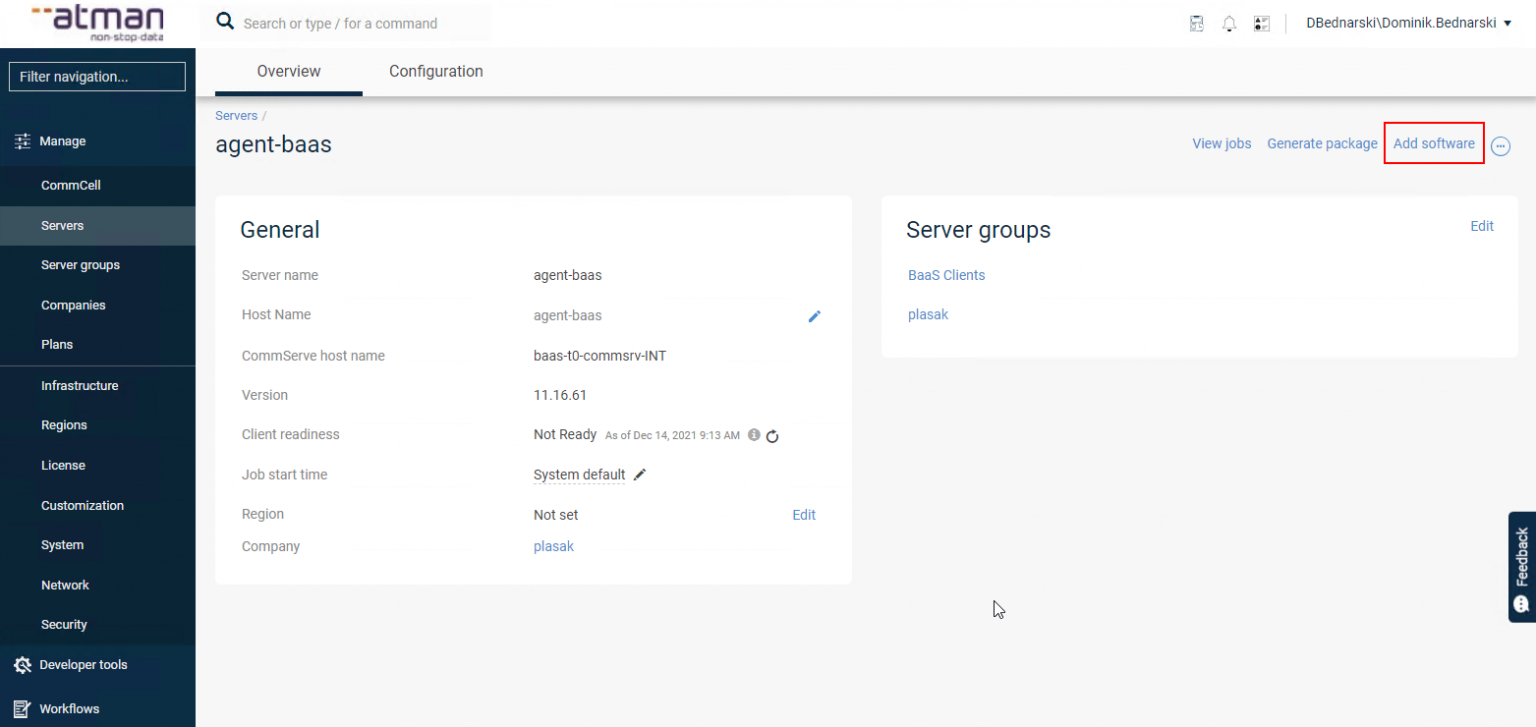
After logging into the panel, go to the Manage -> Servers tab:

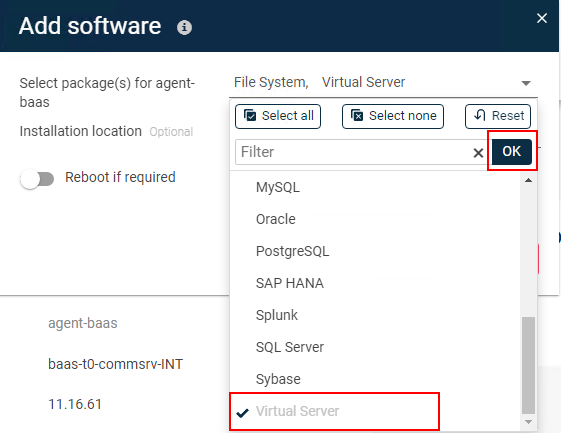
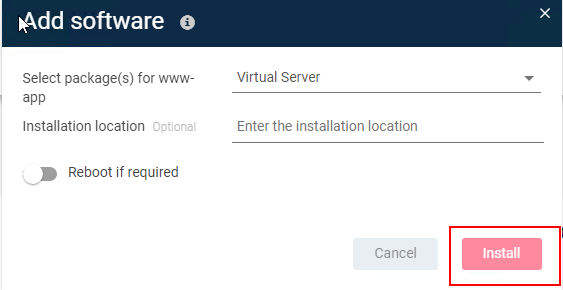
We find the server that we want to be the VSA Proxy agent. From the panel, we install the VSA agent that is the Virtual Server:
We can observe the installation process in the Monitoring-> Jobs tab. or click on View Jobs
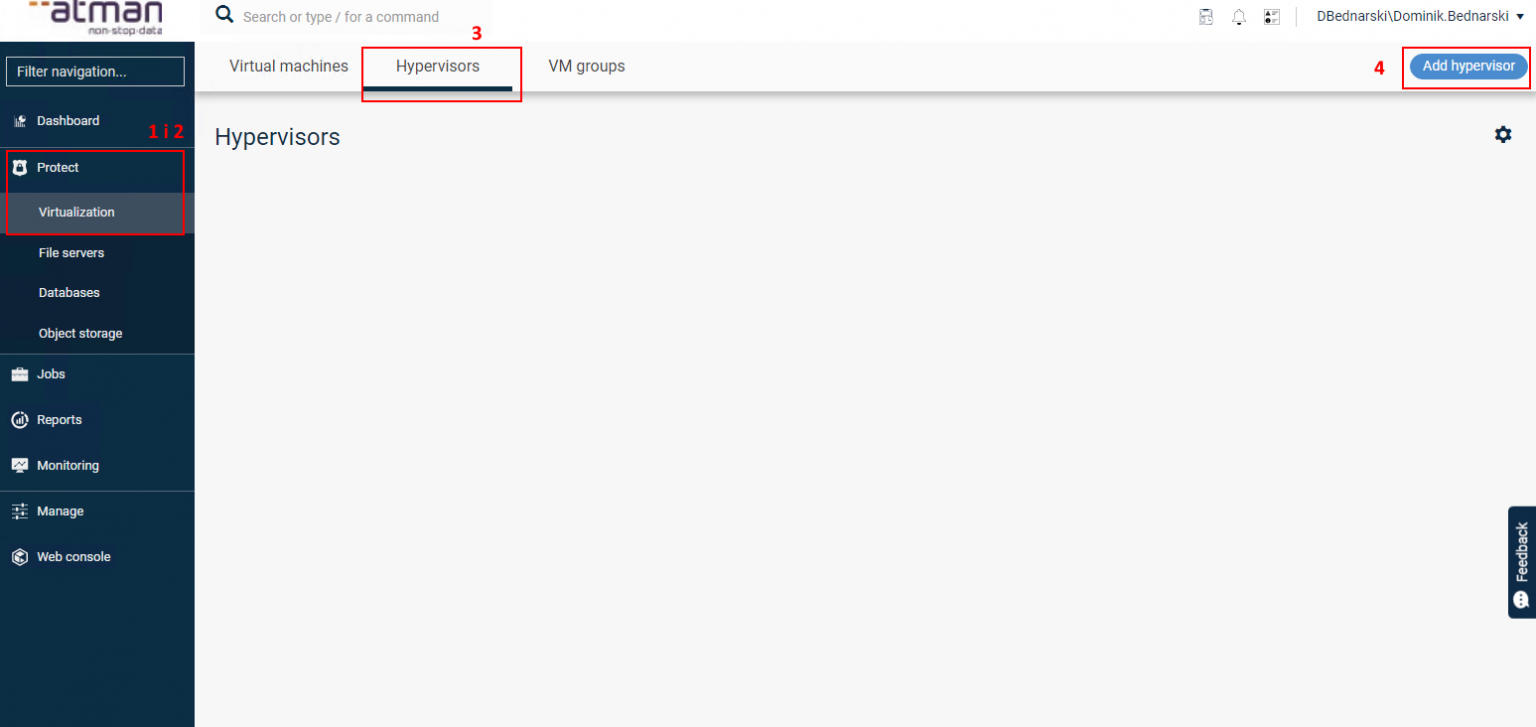
After installing the Virtual Server agent package, the virtual machine backup configuration must be carried out.
While logged into the Command Center, go to the Protect-Virtualisation (1 and 2) tab in the main menu on the left-hand side of the screen and then select the Hypervisors (3) tab. In the main section window, now select Add hypervisor (4):
For each type of Hypervisor the settings differ, the following is a sample configuration for supported virtualisers.
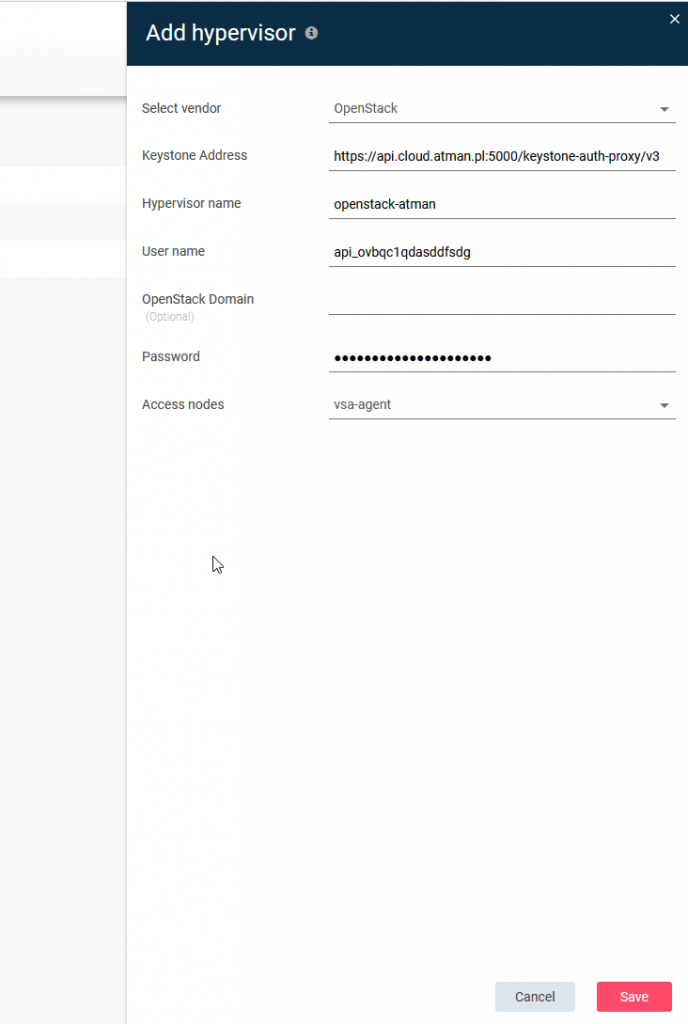
OpenStack (Atman Cloud) configuration
In the case of the OpenStack backup configuration, we need to create an instance in the project that is dedicated only to the installation of the VSA Proxy agent.
Select vendor: Openstack
Keystone address: (depending on the region used)
https://api.cloud.atman.pl:5000/keystone-auth-proxy/v3 (region waw1)
https://waw1-b.cloud.atman.pl:5000/keystone-auth-proxy/v3 (region waw1-b)
Hypervisor name give the name of the virtualisation client that will be visible in Atman Backup
Username: Login to Atman Cloud Portal
Openstack Domain: blank
Password: Password for the Atman Cloud Portal
Access node: server on which VSA agent was previously installed
To be able to log in via your SSO account to the Openstack project you need to generate an API account in the https://auth.atman.pl panel - link to documentation: https://docs.atman.pl/pl/cloud-pl/sso-w-cloud-atman/#konta-api
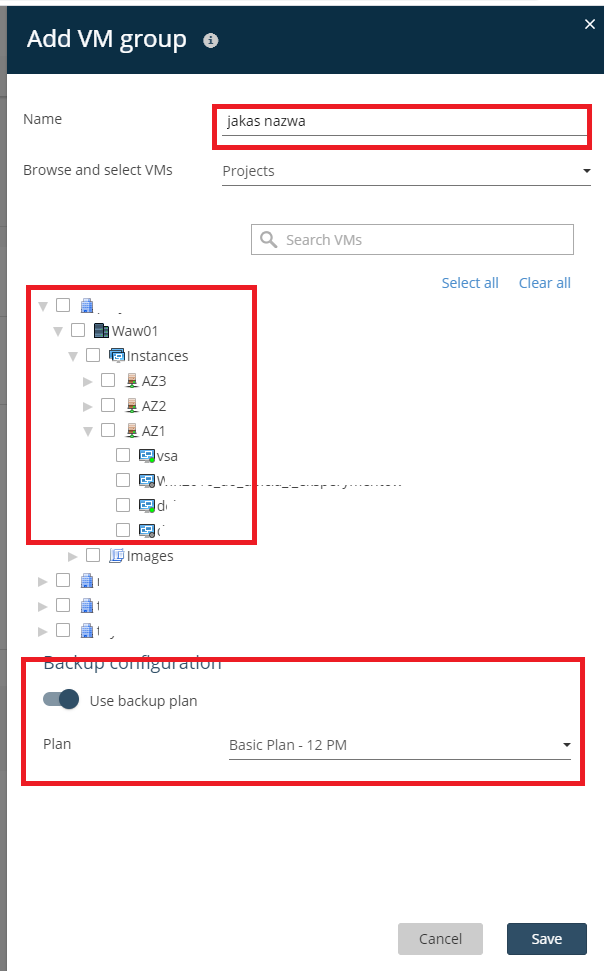
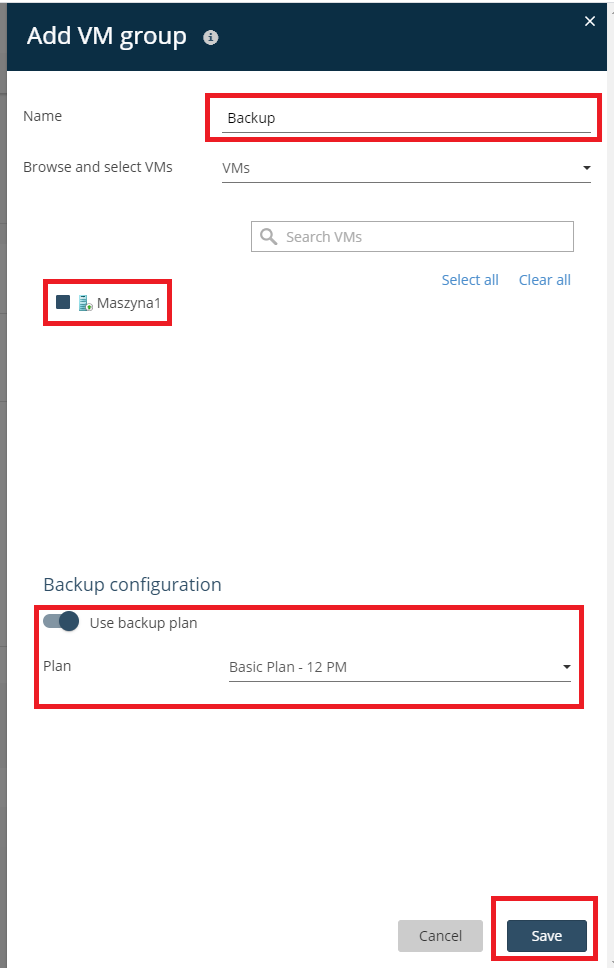
After clicking SAVE, we will be shown the VM Group configuration window: here we define which VMs we are backing up at the selected time/plan. In the plan, an instance that is a proxy agent cannot be added to the backup. If it is added, the backup will not take place.
The software provider’s detailed documentation provides more information: https://documentation.commvault.com/commvault/v11_sp16/article?p=87212.htm
The Atman Backup service is based on the Commvault solution. The Commvault system, when backing up an entire virtual machine, takes a snapshot of it, which takes up disk space in the Atman Cloud Project. When planning the backup of entire VMs, you should take into account sufficient free disk resources for snapshots as well as RAM/CPU for the Proxy VSA instance in the Atman Cloud projection. By contacting servicedesk@atman.pl, it is possible to disable charging for the additional resources required to back up entire virtual machines.
For the time being, the service provides backup and recovery as an entire instance. Restoring individual data from within a machine drive or restoring a single machine drive is not possible at present.
Hyper-V configuration
In the case of Hyper-V Cluster configuration, the installation of the Virtual Server agent must be performed on all nodes, before the backup configuration.
Select Microsoft Hyper-V and enter the parameters required for configuration
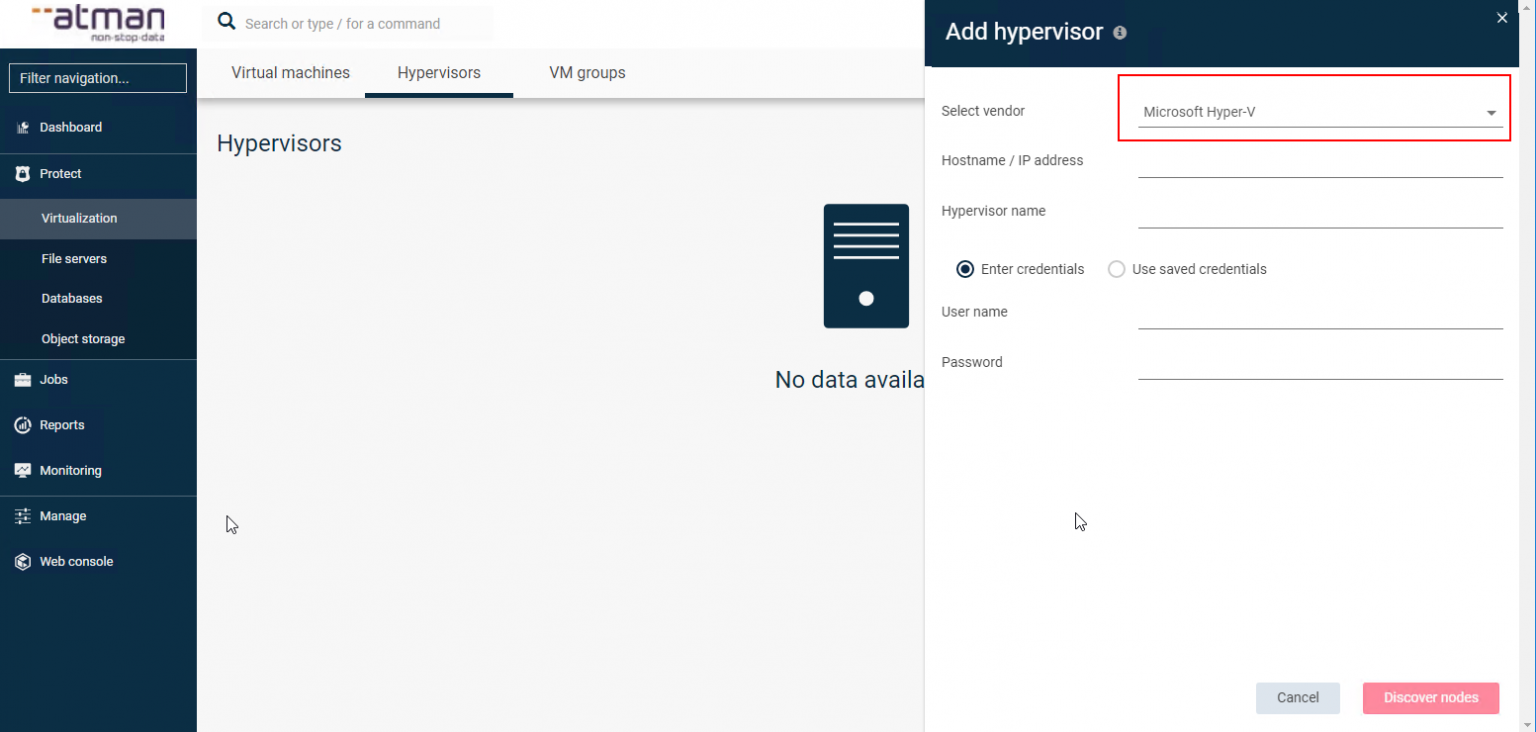
Hostname/ IP addres - is the hostname or interface address with access to the Internet (for network requirements, see Requirements)
Hypervisor name - give the name of the virtualisation client that will be visible in Atman Backup
Username_ - the value , which is returned by the whoami command in cmd.
Password - hyper-v administrator password.
If all parameters are correct, the agent will connect to the hyper-v and display the available nodes that are added in the panel:
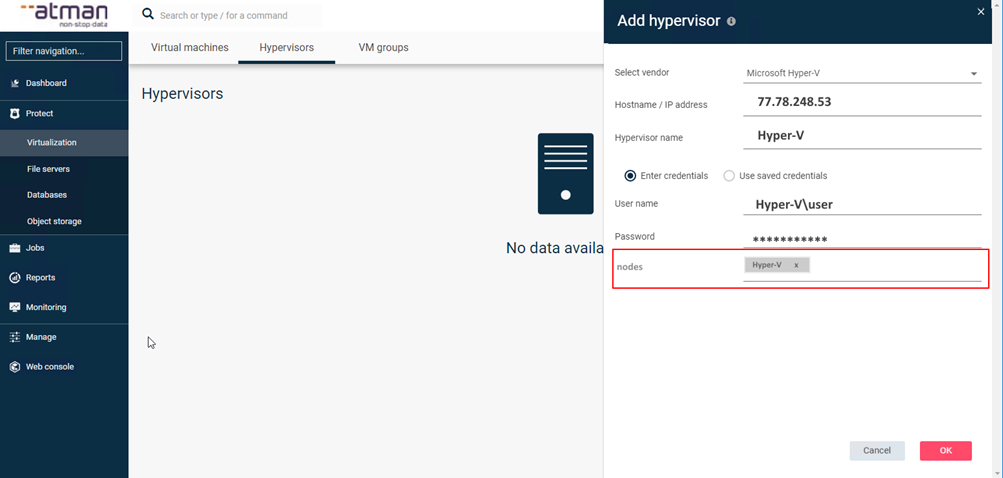
Clicking Save will take us to the backup configuration.
In this window, you can select the machines you want to protect and define the Backup Plan:
The software provider’s detailed documentation provides more information: https://documentation.commvault.com/commvault/v11_sp16/article?p=87210.htm
VMware configuration
The software supplier’s detailed documentation provides more information: https://documentation.commvault.com/commvault/v11_sp16/article?p=87214.htm
Installation of the Mono 5.16 component: https://documentation.commvault.com/commvault/v11_sp16/article?p=112518.htm