IP addresses
Within the Atman Cloud, the user has the possibility to operate with three types of addresses: fixed public, floating public and private. Public addresses are available in the number specified in the contract (order). The limit of purchased public addresses is reached by allocating both public fixed and public floating IP addresses.
Permanent public
This address is assigned to the instance (virtual machine) when it is directly plugged into the EXTERNAL network. The address is initially assigned from the DHCP, however, it will remain assigned to the machine interface until the interface is deleted or the machine is removed.
Deletion of the interface is done by selecting the DETATCH INTERFACE function from within the instance:
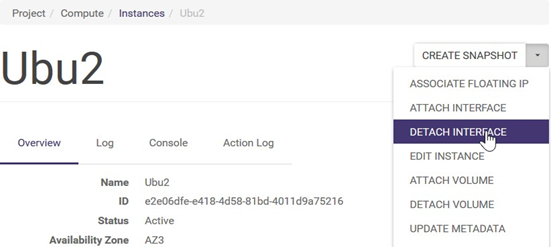
Note that reallocation of the same public IP address can of course occur but with very low probability. A very convenient and Atman recommended approach for production instances is to use floating IP addresses.
Floating public
A feature of floating public IPs (Floating IPs) is that, once allocated by the user to an environment, they remain allocated “in the ownership” of that environment until the user consciously releases them (removes them from the environment).
Such addresses are initially allocated from DHCP and remain unchanged throughout their life cycle until they are released.
Floating IP addresses can be arbitrarily bound to instances (virtual machines), reassigned between instances during the life of an instance or left unassigned. The idea is to bind a public floating IP address to an interface/port with a private address, thus providing automatic translation of these addresses.
STEP 1
Assigning a floating public IP address to the environment.
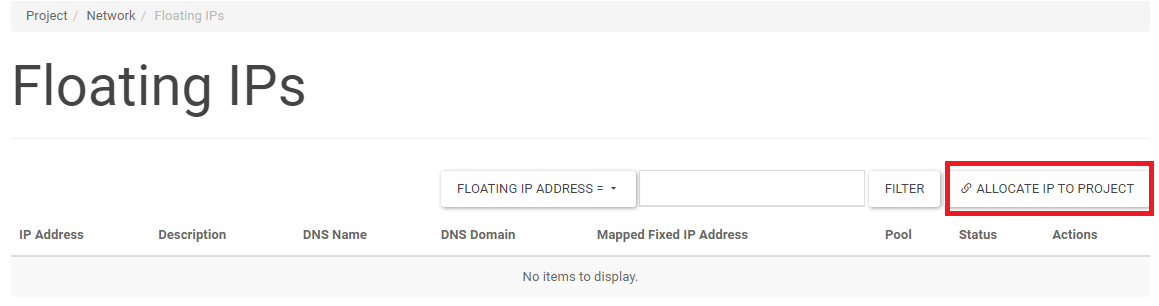
From the Project -> Network -> Floating IPs screen, select the ALLOCATE IP TO PROJECT action. A window will appear where you must click the ALLOCATE IP button.
In the window displayed below, we indicate the pool from which IP addresses are to be added (by default, this is the External pool, i.e. public addressing). We also indicate the number of IP addresses to be assigned to the project.
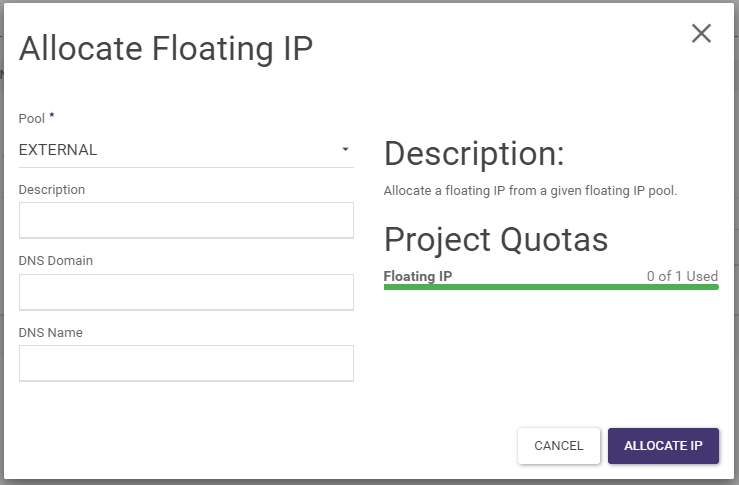
The addresses assigned to the project can then be added to any VMs within the project.
STEP 2
Assigning a floating IP address to the environment is done by:
launch the ASSOCIATE action for a given floating IP address on the Project -> Network -> Floating IPs screen

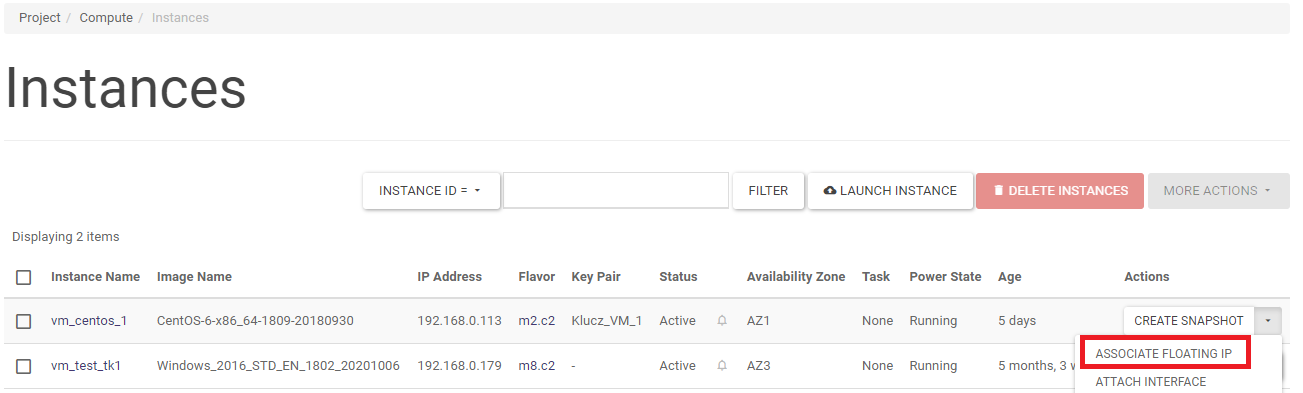
launch the ASSOCIATE FLOATING IP action for a given instance on the Project -> Compute -> Instances screen
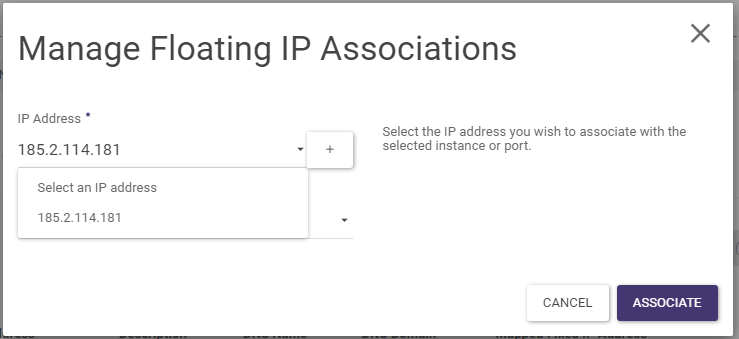
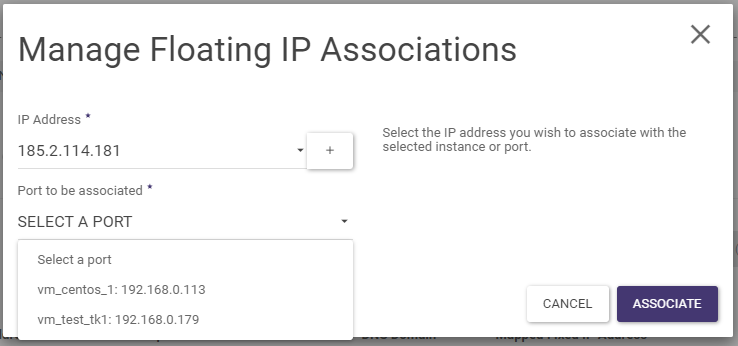
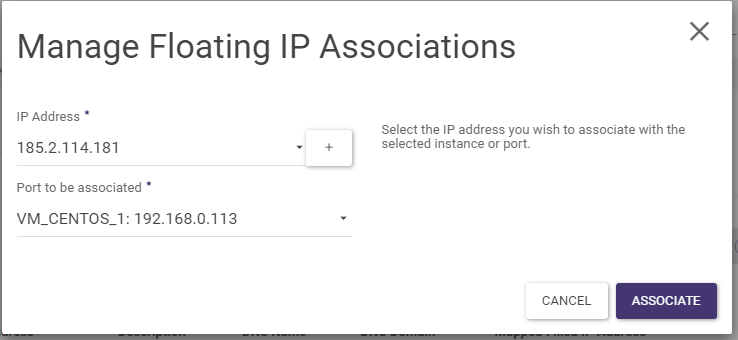
From the wizard, select the floating IP address and then the port to associate it with.
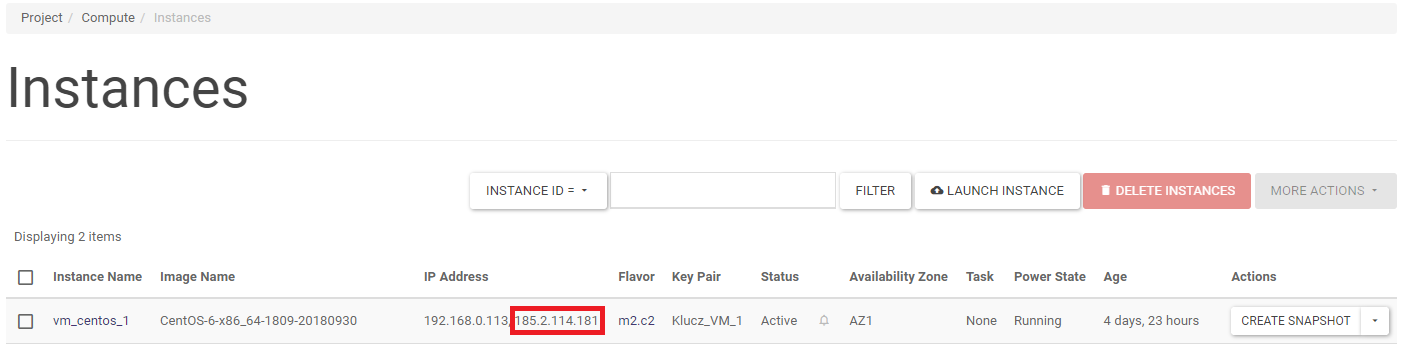
When the address is allocated in the list of instances in the Project -> Compute -> Instances section, this will be reflected as follows:
On the other hand, in the list of assigned IP addresses in the Project -> Network -> Floating IPs section, it will look as follows:

Private
The user has the option of assigning and assigning private addresses - see Network for more information.