Other
Image conversion
In order to import a machine from outside into a virtual server environment into Atman Cloud, the machine must first be converted to raw format. The following example illustrates the process of converting a vmdk file to raw using Atman’s recommended tool - qemu.
STEP 1
Machine image storage
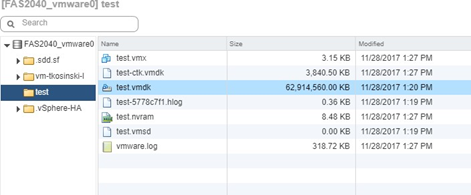
From the VMWare vSphere Web Client, download the file (here: as test-flat.vmdk)
STEP 2
Conversion. Linux:


Windows:
The qemu software must be downloaded:

Once unpacked, the software is ready for use - run PowerShell from the terminal where the qemu-img.exe file is saved.
The following command converts the vmdk file to raw format:

Upload (import) a file to the cloud
Using the API:.

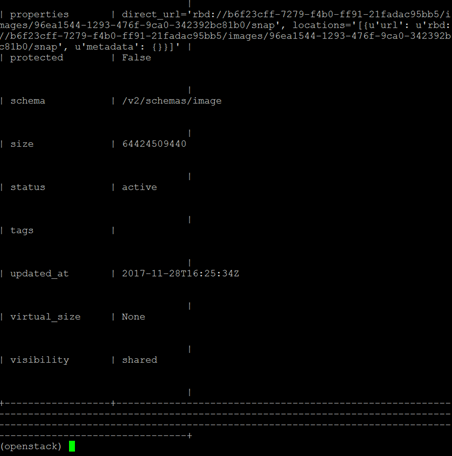
Once completed, the properties of the created/uploaded image will appear in the terminal:
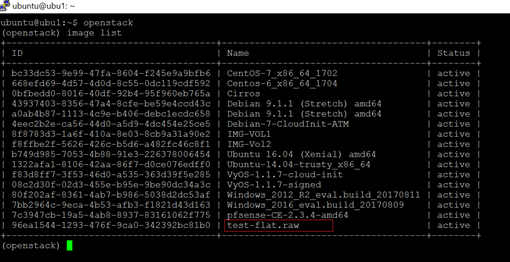
Checking that the file has been imported to the cloud:
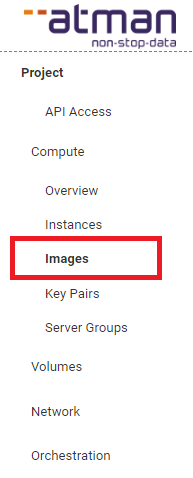
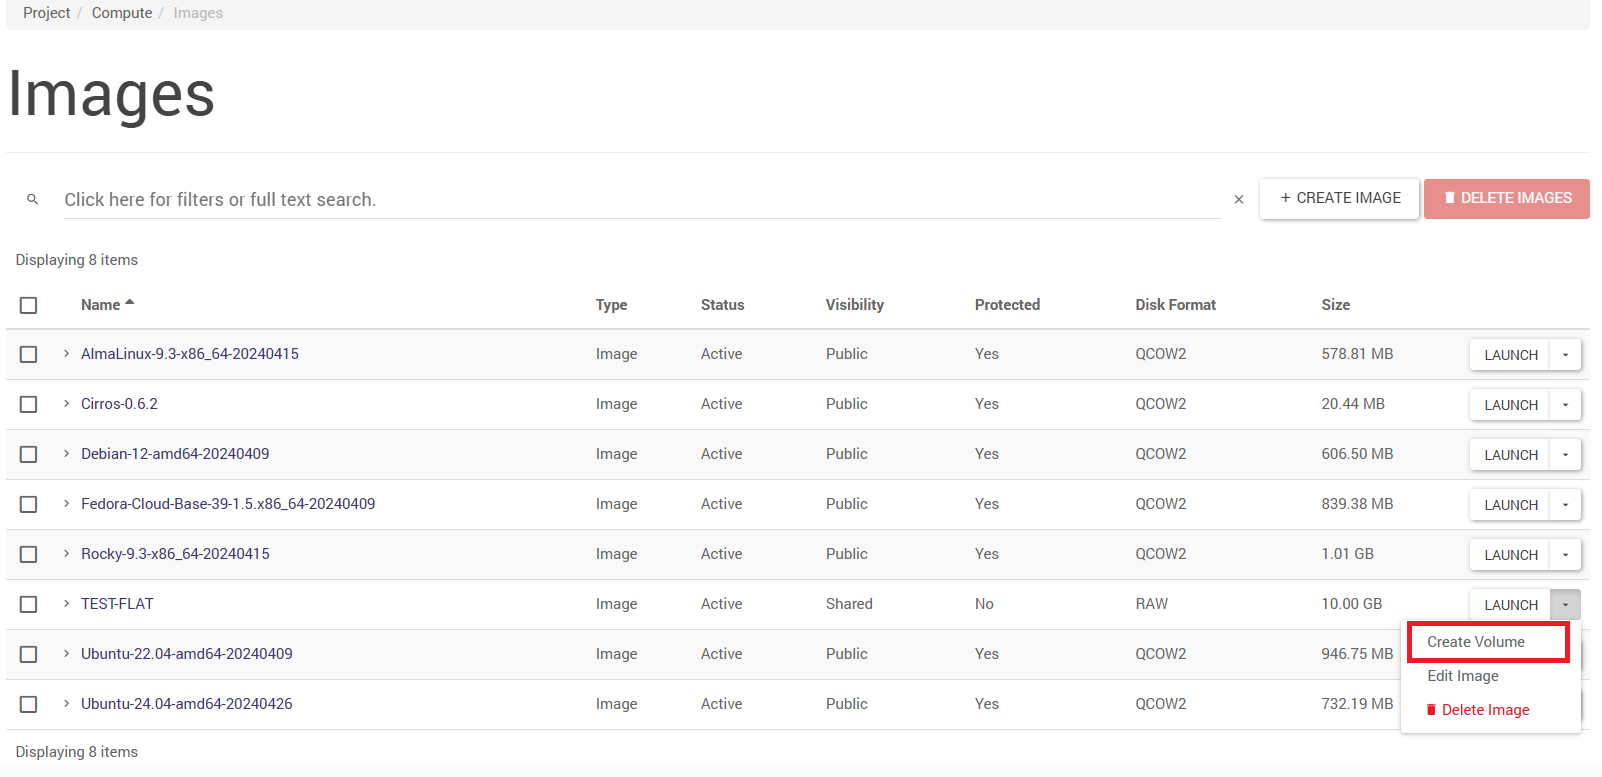
Upload from the local machine to the cloud using the Horizon panel under Project -> Compute -> Images:

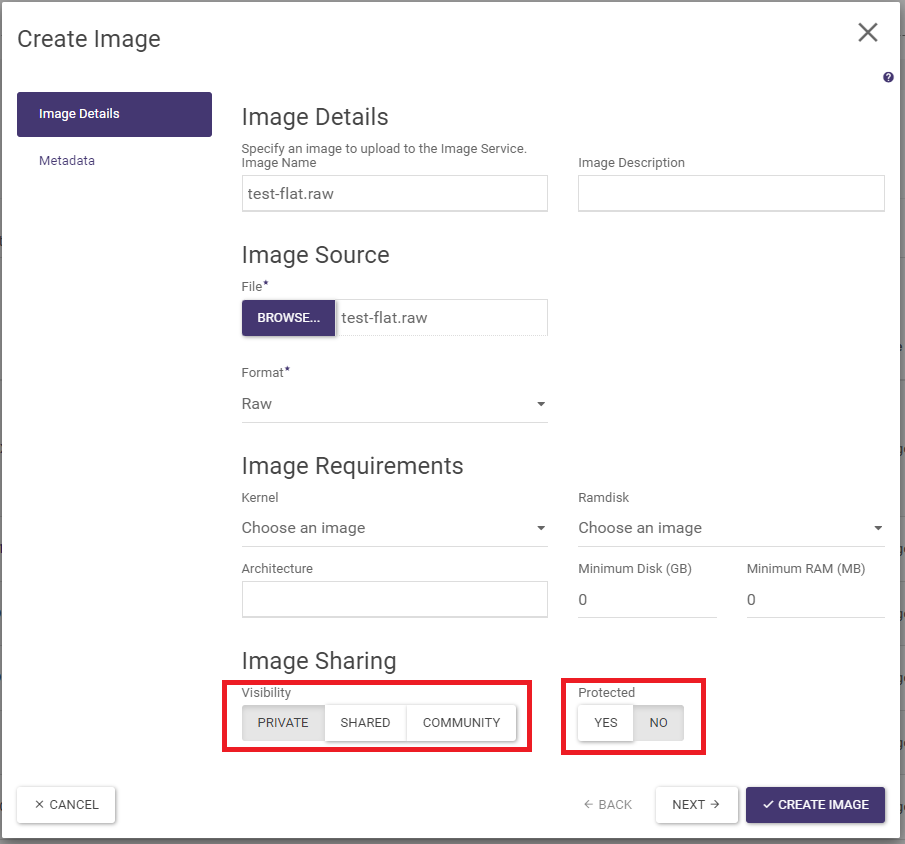
At the bottom of the wizard, set the parameters:
a) Visibility=Private
b) Protected=Yes or Protected=No.
Parameter designation:
Private - the image will only be visible within the given environment/project, not visible to others (this option must be selected)
Shared/Community - these options should not be used
Protected - it will not be possible to delete such an imageud)
Unprotected - deletion of image allowed
When uploading an image, a status bar will appear in the wizard showing the progress of the work:

After creating an image with the image wizard, refresh the view

…by clicking on another tab in the menu and clicking again on the Project -> Compute -> Images tab:
When the view is refreshed - the image is imported into the environment and ready for use.

Third way:
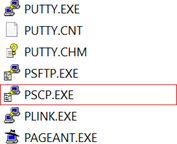
For very large files, poor connectivity, session dropouts, etc. - an alternative path that works well is to copy the image from the local machine to a remote machine running on Atman Cloud, and then use the API to upload the image.
The next step assumes that there is a Linux Ubuntu machine (IP:195.167.156.60) on the Atman Cloud with enough space to accommodate the image. The easiest way to copy is to use the scp command or its Windows equivalent of pscp (this tool is part of the standard Putty software package).
Linux:

Windows:
Use with Windows PowerShell:

Once the image has been copied, run the command from the virtual machine to which the image was copied:

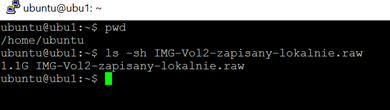
It can be observed that at the same time in the Horizon panel in the Project -> Compute -> Images tab, a new entry will appear in the list with the saving information:

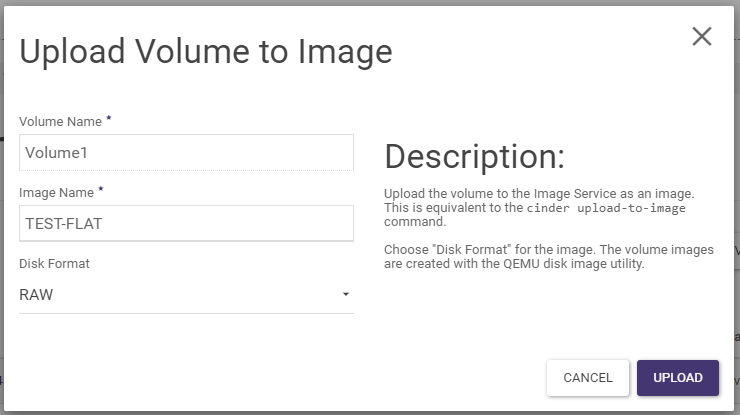
Download (export) a file from the cloud
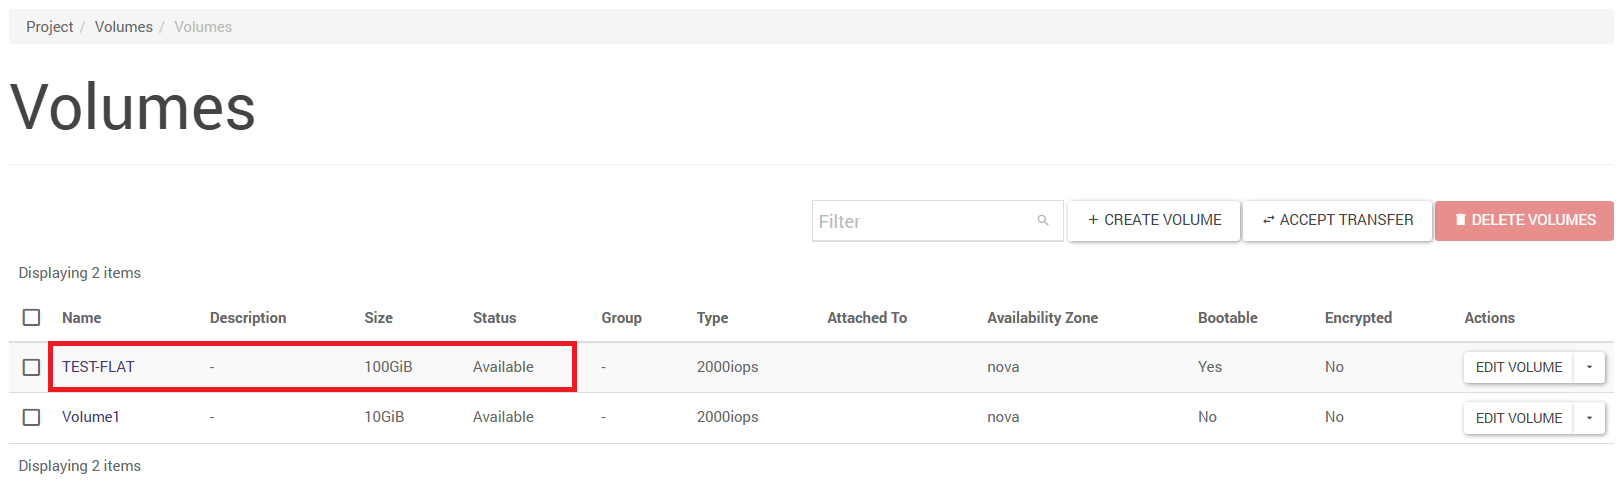
To export an image from the cloud to a local workstation, a volume image must first be created (tab Project -> Volumes -> Volumes, action for the selected volume “upload to image”):

Once the image has been created, using the API you can save the image locally by executing the command:

Create a machine from your own (imported image)
The following steps should be followed:
creation of a volume from an image
creation of an instance (virtual machine)
STEP 1
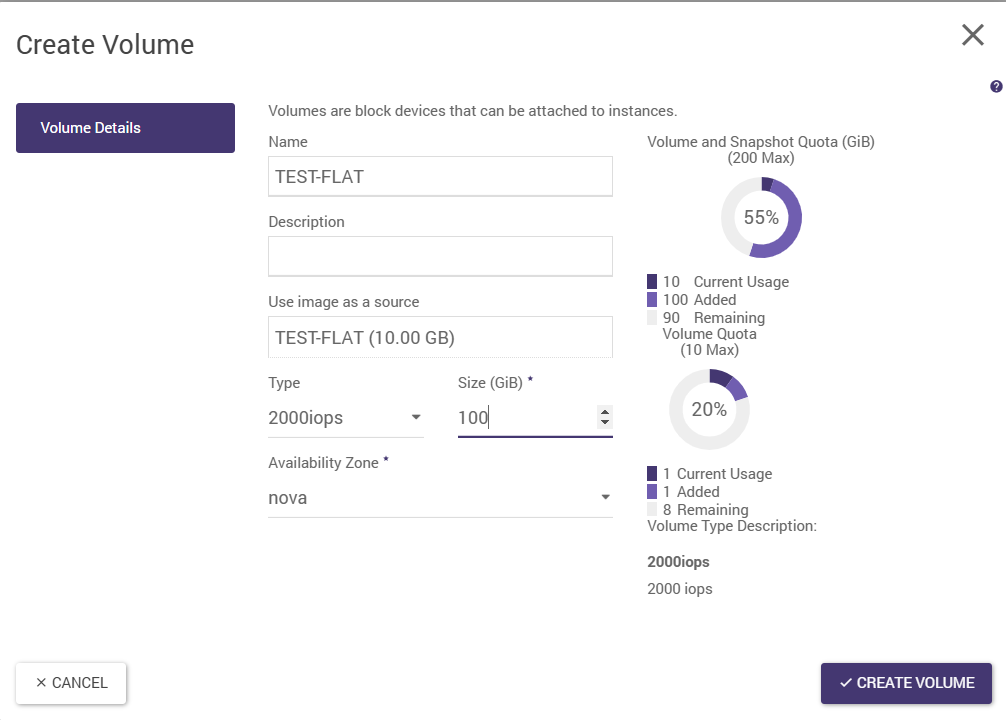
Create a volume from an image under Project -> Compute -> Images.
From the Horizon panel:
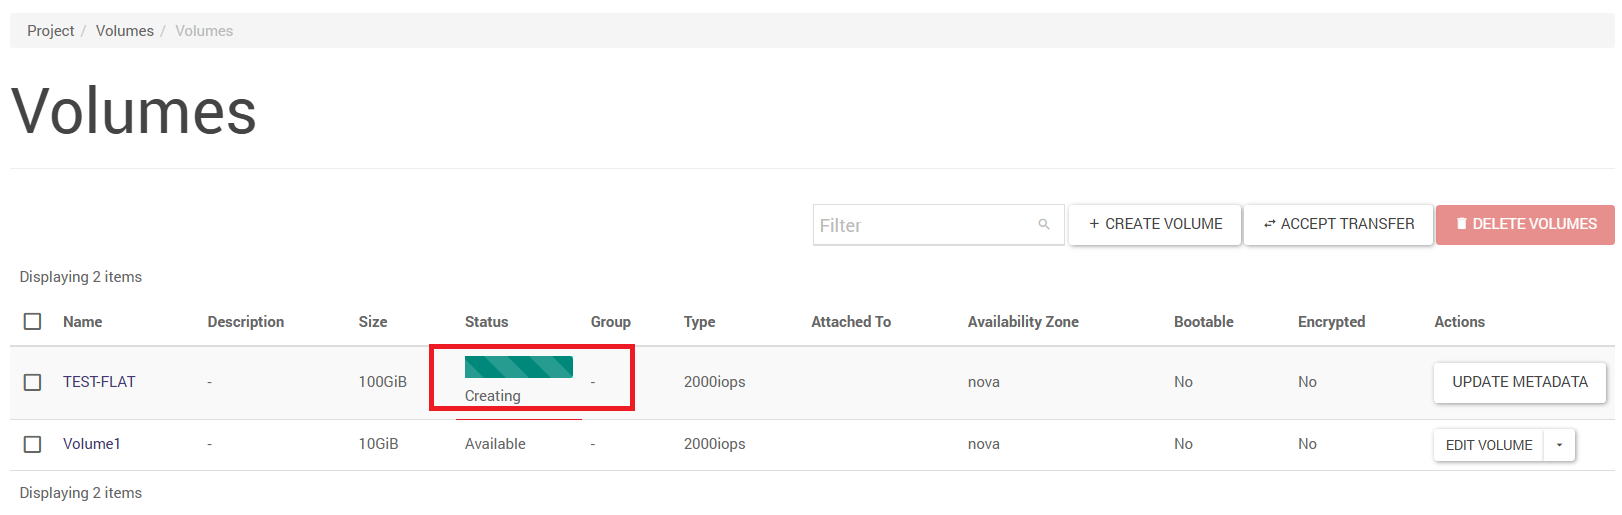
And after a few moments the volume is ready
Using the API:
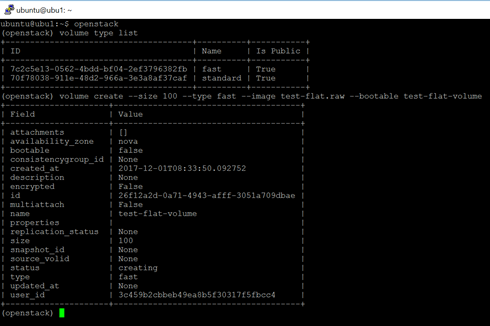
The command “volume type list” - lists the available storage profiles. In this case, the fast profile is used.
The command “volume create” - creates a volume. The -size property specifies the size in GB, -type is the storage type (see above), -image is the name of the image used to create the volume, -bootable (no value specified) will set the volume flag to bootable. Finally, enter the name of the newly created volume.
STEP 2
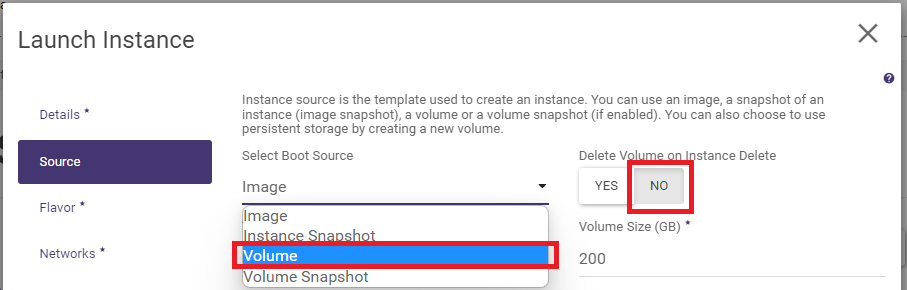
Create an instance from the volume under Project -> Compute -> Instances.
The standard path in the Horizon panel is to use the wizard. Select Volume as the source and indicate the volume created from the image. It is worth ticking the “NO” option for the “Delete Volume on Instance Delete” property. - This facilitates many later potential operations on the volume.
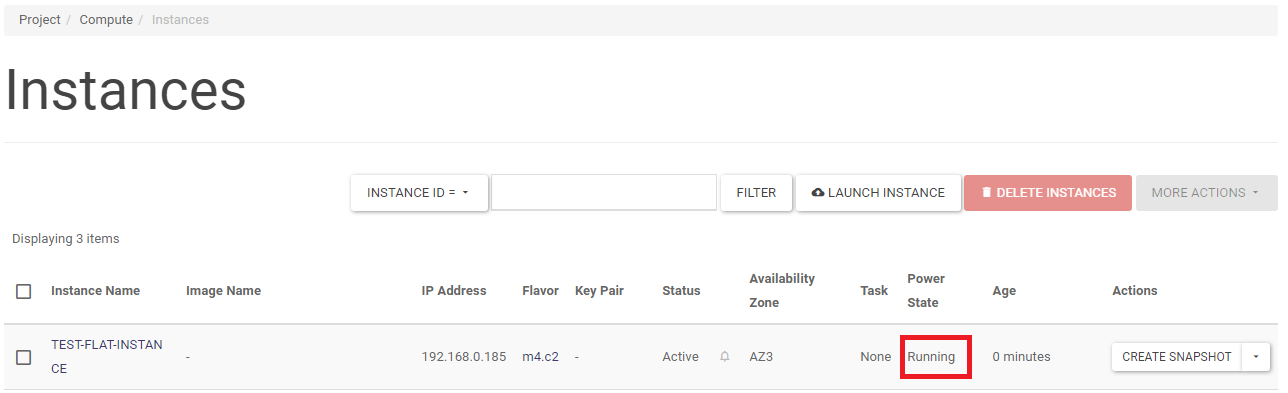
Creating instances - the Instances tab shows progress - creating a machine.
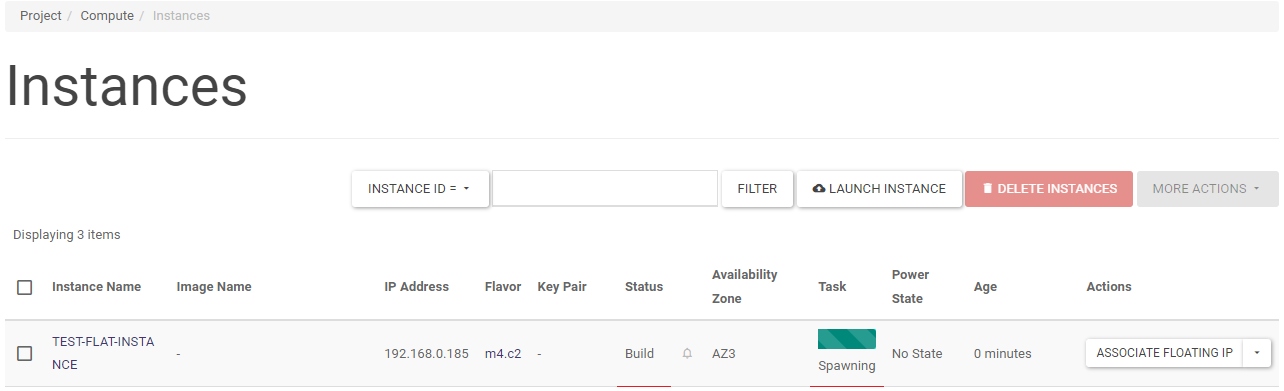
And after a while - the machine is ready: