Snapshots
Description of the snapshot copy
In OpenStack/Atman Cloud, a snapshot is a backup of an instance’s main drive, from which a new instance can later be started with the saved data. Snapshots can be used for two main purposes:
as a system backup: saving the instance’s main disk to an image and then booting a new instance from it with the retained data.
as a template: Adjusting the base image and saving it for use as a template for new instances.
Note that OpenStack snapshots are single disk copies and can be inconsistent if the instance operating system is not aware of the snapshot creation(e.g. while the instance is running). This is because the hypervisor freezes the instance to create the ‘delta’ file before resuming the instance. Additionally - creating a snapshot - consumes resources, so it affects the quota of the project(a new image is created). In short, a snapshot is an Openstack image with additional parameters:
Name |
Value |
|---|---|
image_type |
snapshot |
instance_uuid |
|
base_image_ref |
|
image_location |
snapshot |
Taking a snapshot of an instance
STEP 0
Ensure that space (quota) is available to create an additional volume of at least the size of the original volume.
STEP 1
From the Project -> Compute -> Instances screen, in the list of actions, click CREATE SNAPSHOT. A window will appear where you need to enter the name you want to give the copy.
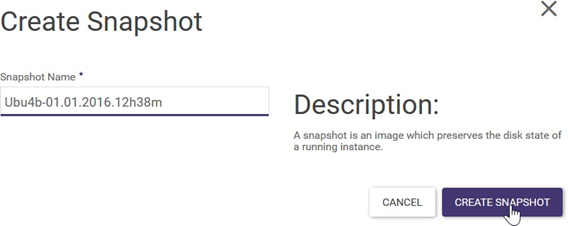
STEP 2
When you click CREATE SNAPSHOT, a snapshot copy is created, which immediately appears in the Project -> Compute -> Images list.
Returning an instance to a snapshot copy state
You cannot directly restore (roll back) the current state of the instance to the state of the snapshot copy. However, you can create another machine from the snapshot copy. Creation involves running the instance creation wizard:
a) from the Project -> Compute -> Instances screen using the LAUNCH INSTANCE button or
b) from the screen Project -> Compute -> Images with the LAUNCH button on the right for the selected image - snapshot copy
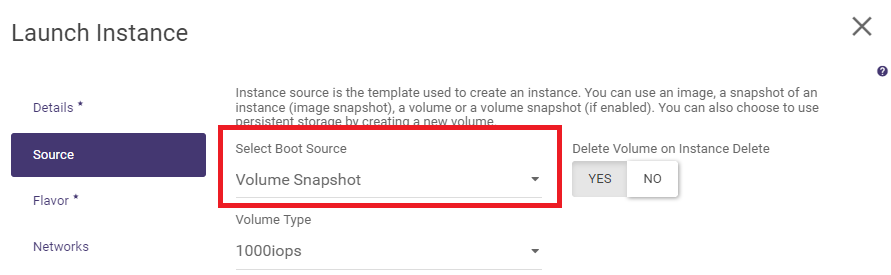
For path (a), remember to select the appropriate source boot, which in turn is automatically set for path (b):
Deleting a snapshot copy of an instance
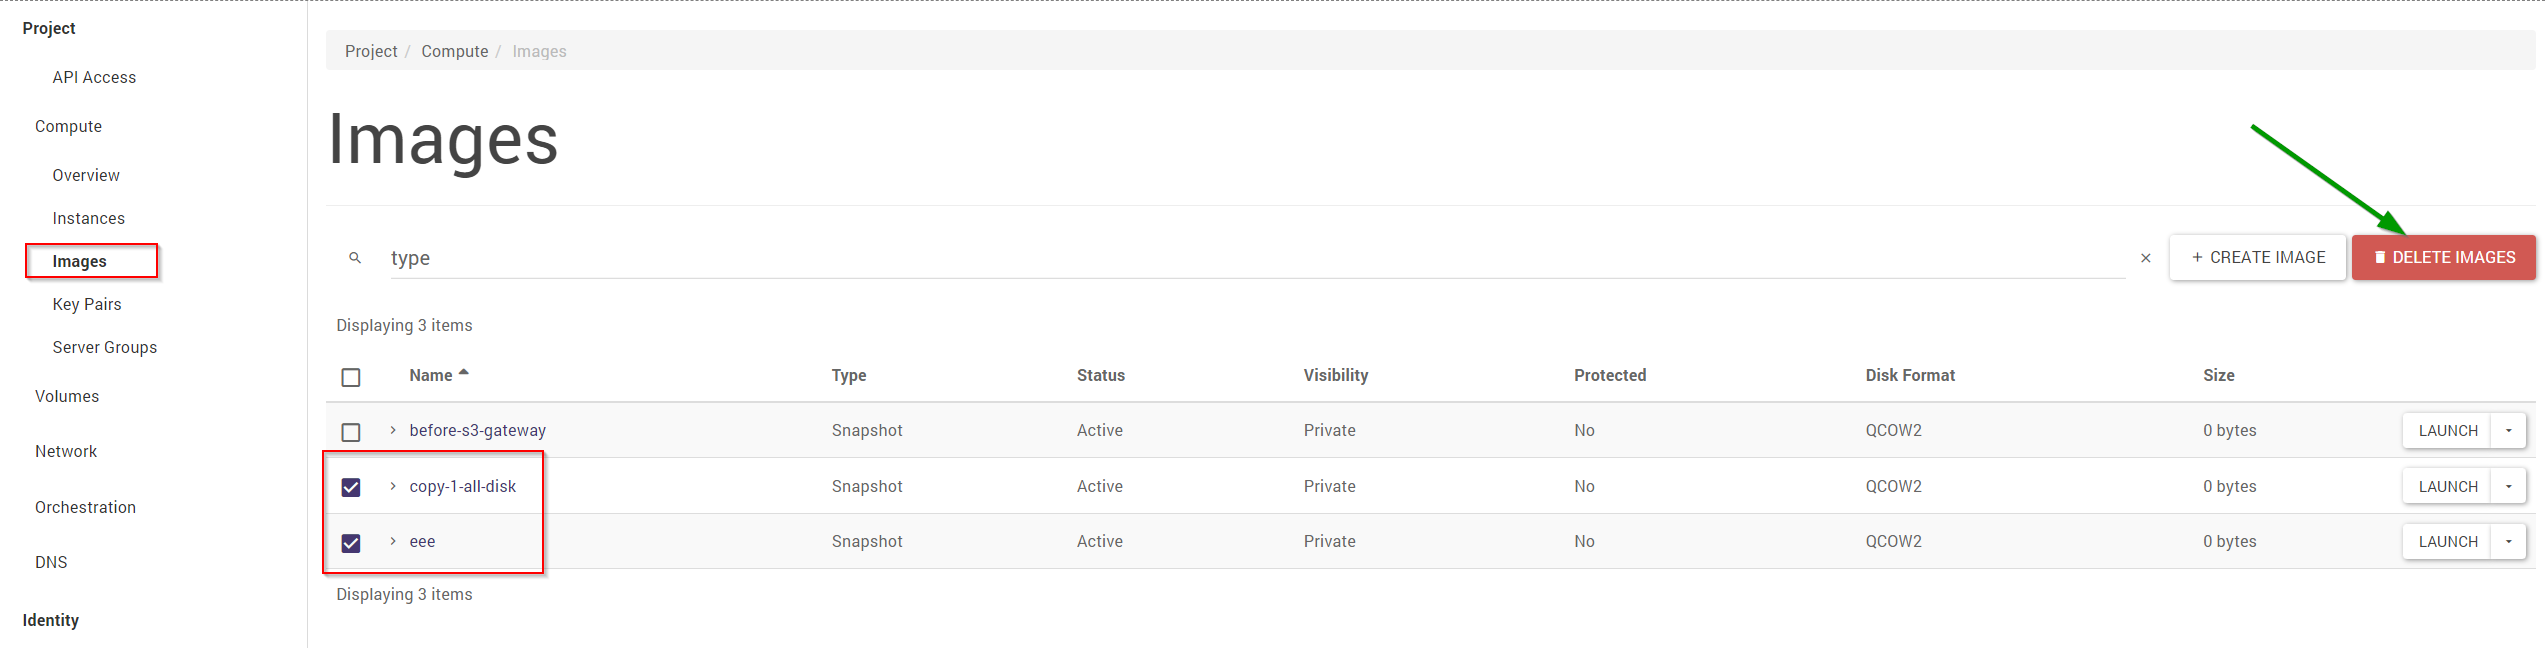
To delete the snapshot of the entire instance, log into the web panel and then:
a) from the Project -> Compute -> Images screen, select the snapshots you are interested in by clicking on the checkbox (tick the box)
b) with the snapshot already selected, click the DELETE IMAGES button
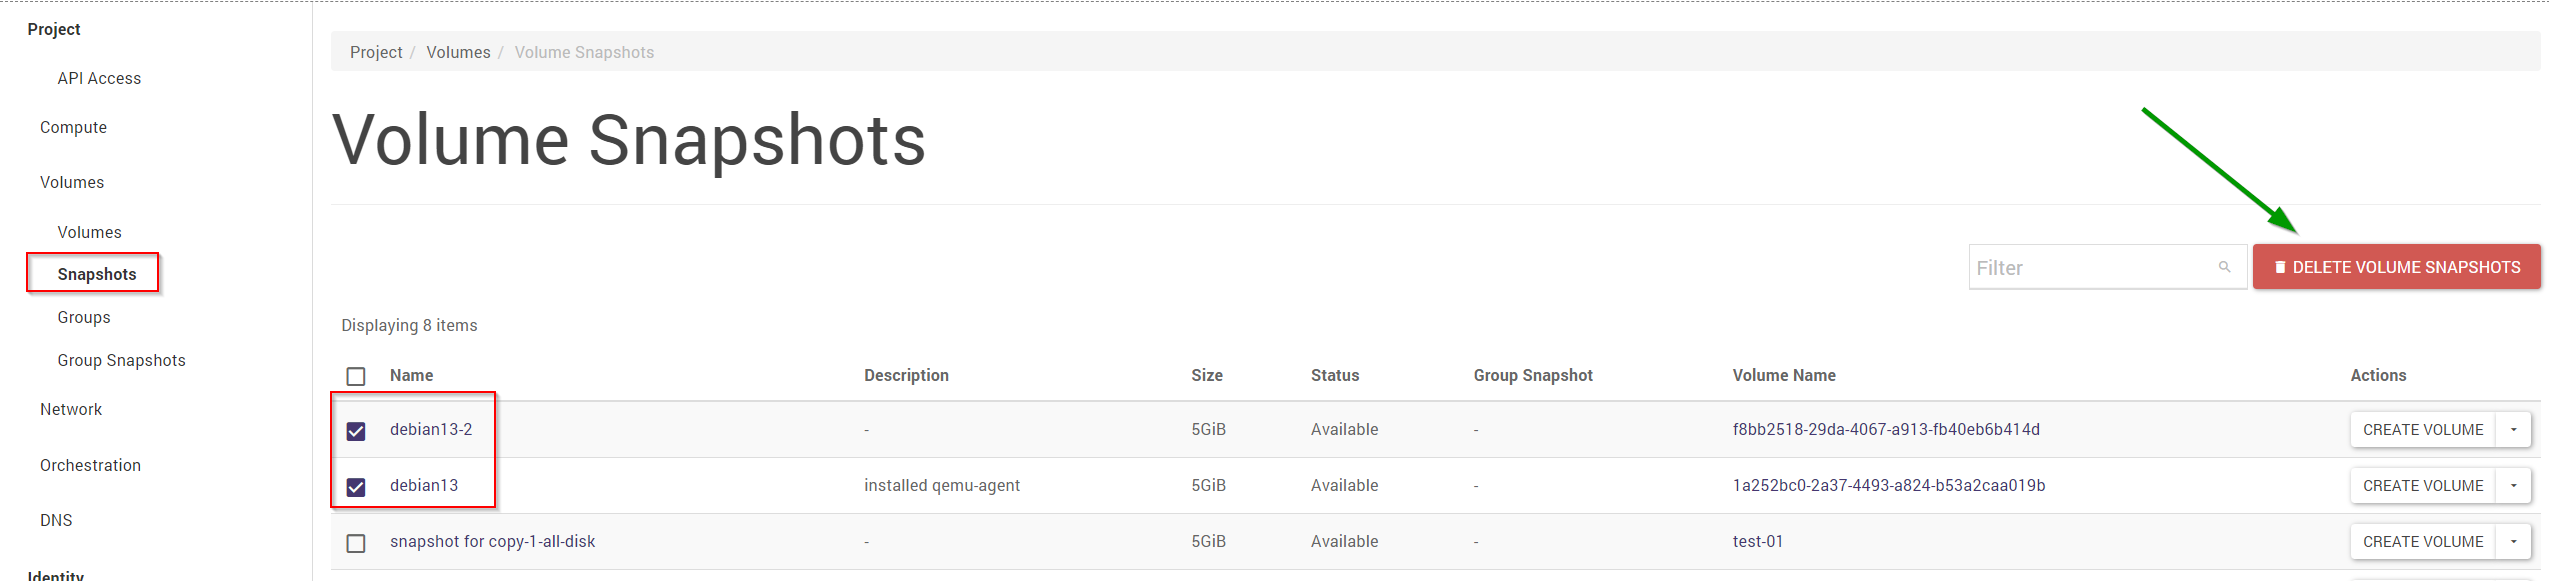
If you want to delete a volume snapshot, you must from the web panel:
a) from the Project -> Volumes -> Snapshots screen, select the snapshots you are interested in by clicking on the checkbox (tick the box)
b) with the snapshot already selected, click the DELETE VOLUME SNAPSHOTS button