Volumes (storage space)
Volume creation
STEP 1
From the main menu (left side of the screen), expand Project -> Volumes and then click Volumes. In the central part of the screen, click Create Volume. A wizard will appear:
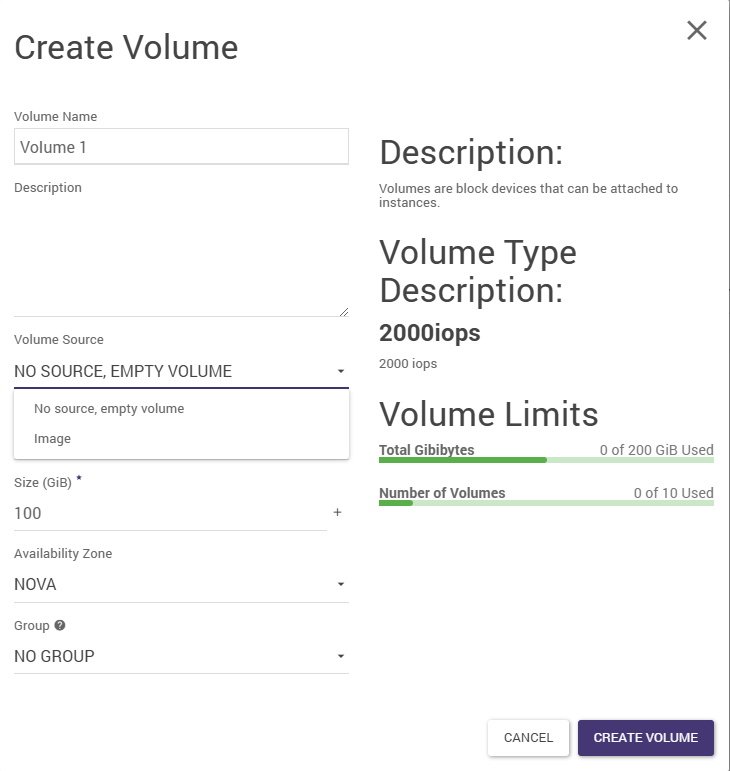
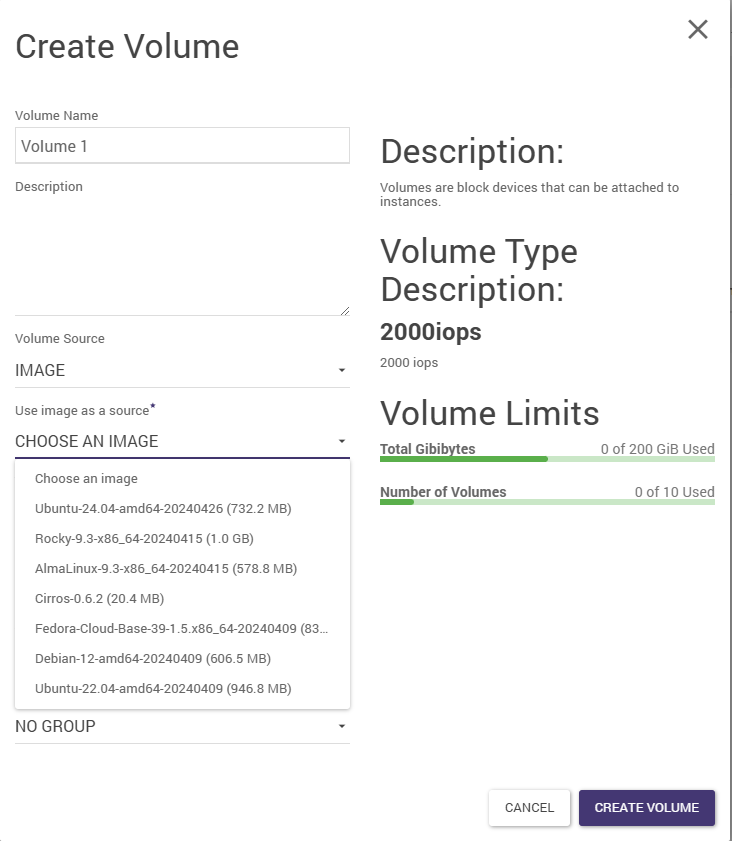
In it, we successively specify the name of the volume, the source (here the selected Linux Ubuntu)….
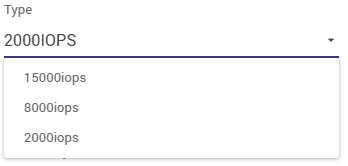
… followed by size and type.
Disk space resources are offered by Atman in 4 variants:
Standard (2,000 IOPS),
Fast (8,000 IOPS)
Ultra (15,000 IOPS),
Rapid (25,000 IOPS).
differing in performance (IOPS - see contract, order). Depending on the space ordered and made available, the User specifies the desired space type here.
STEP 2
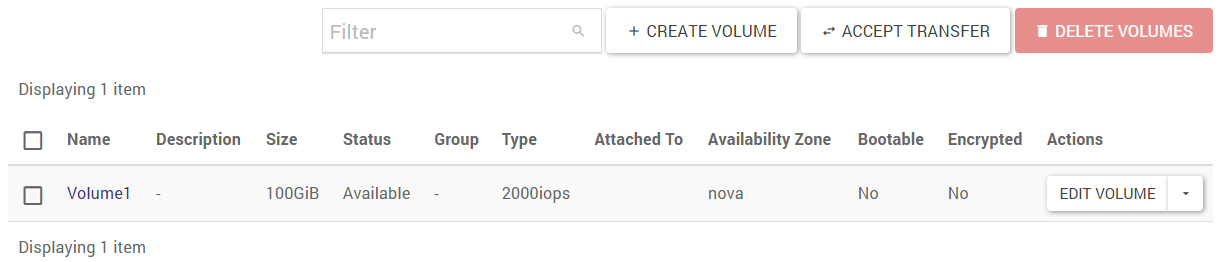
When the Create Volume button is clicked, the newly created volume will appear in the list of volumes.
Volume deletion
On the Project -> Volumes -> Volumes screen to the right of the volume, select the DELETE VOLUME action. You can only delete a volume that is not assigned to a machine.
Volume editing
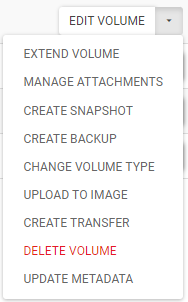
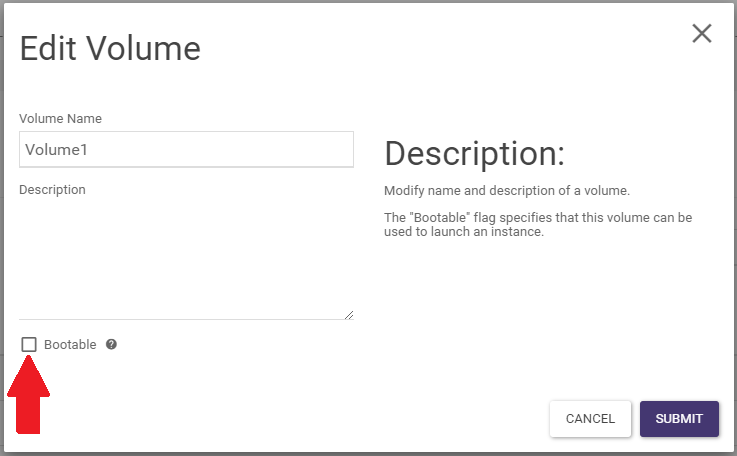
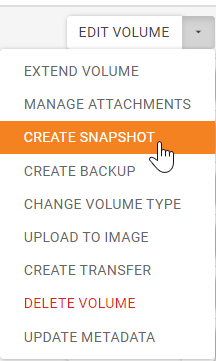
On the Project -> Volumes -> Volumes screen to the right of the volume, select the EDIT VOLUME action. It is possible to change the name and also to specify the bootable flag for the volume.
Change of type
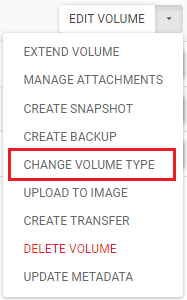
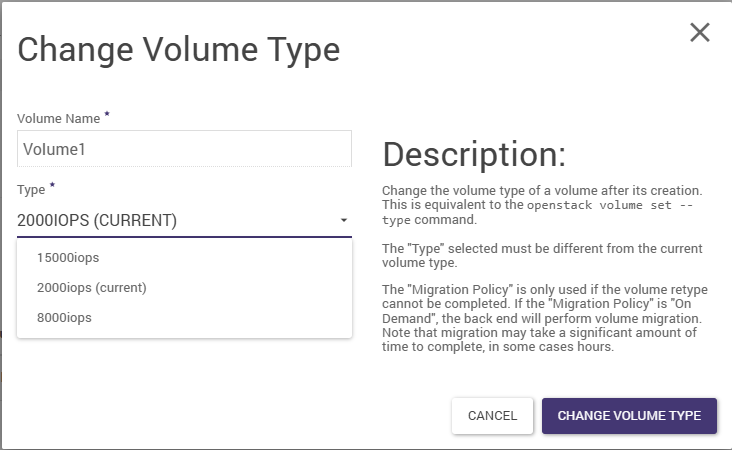
You can change the volume type (standard <-> fast) by selecting the CHANGE VOLUME TYPE action on the Project -> Volumes -> Volumes screen to the right of the volume. The change may take a significant amount of time depending on the size of the volume and the type of data.
The volume type can be changed if the volume is additional and not connected to the instance.
The volume type cannot be changed for:
the main volume of the instance
a secondary volume, but connected to a running instance of the
Set the Migration Policy type change wizard to ON DEMAND.

Correctly unmounting a volume in Windows
The volume should be unmounted as follows:
STEP 1
We log into the Windows instance. Then on the system, we go to Control Panel -> System and Security -> Administrative Tools -> Computer Management -> Storage -> Disk Management.
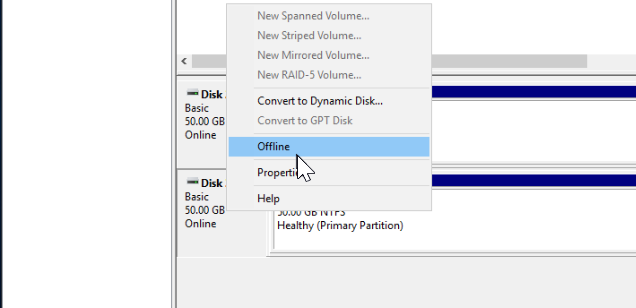
STEP 2
In the field next to the partition, right-click and select Offline.
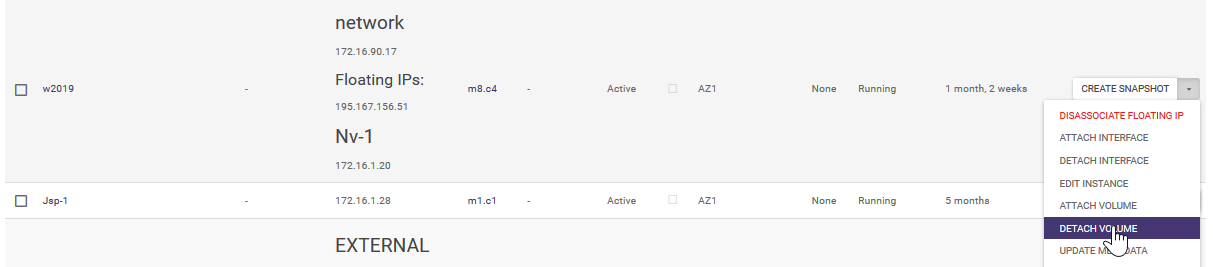
STEP 3
We go to the cloud panel - panel.cloud.atman.pl. In the Compute -> Instances tab, we find our instance and select DETACH VOLUME from the side drop-down list.
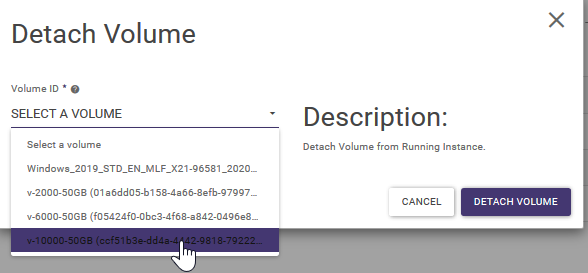
A window will open in which we select the volume we wish to unmount and then click DETACH VOLUME.
In this way, we can unmount the volume from the instance without any problems.
If you do not unmount a volume from within the operating system, the ability to unmount a volume from an instance may hang.
Changing the size of the system volume
If the system disk is resized, it is necessary to delete the instance (without deleting the volume), then resize the volume and create a new instance using the same volume.
STEP 1. SNAPSHOT CREATION.
If the instance was created with the Delete on Terminate option checked, the system volume will be deleted together with the instance. To avoid this, create a snapshot of the volume first.
Display the list of volumes (by selecting Compute -> Volumes from the menu), click on the arrow in the drop-down menu next to the selected volume and click on Create Snapshot.
STEP 2. REMOVAL OF INSTANCES.
We display the list of instances (by selecting Compute -> Instances from the menu), click on the arrow in the drop-down menu next to the selected instance and click on Delete Instance.
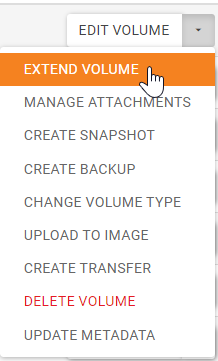
STEP 3. VOLUME RESIZING.
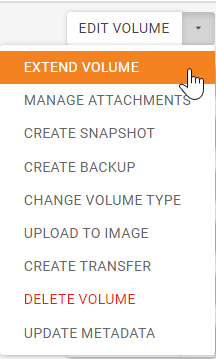
Przy wybranym wolumenie klikamy na strzałkę w rozwijanym menu przy wybranym wolumenie i klikamy na pozycję Extend Volume. Podajemy nowy rozmiar wolumenu i potwierdzamy klikając na przycisk Extend Volume.
STEP 4. RE-CREATE THE INSTANCE.
Przy wybranym wolumenie, klikamy na strzałkę w rozwijanym menu przy wybranym wolumenie i klikamy na pozycję Launch as Instance. W wyświetlonym oknie określamy nowe parametry maszyny wirtualnej.
STEP 5. RESIZE PARTITION.
Depending on the operating system selected, it may be necessary to change partition sizes.
Changing the size of the additional volume
If the secondary drive is resized, it is necessary to unplug the volume from the instance, then resize the volume and plug the volume back in.
STEP 1. DETACH THE VOLUME FROM THE INSTANCE.
First, we log into the instance operating system and unmount the volume on the system. For Linux we use the umount command, instructions for Windows can be found above. This is particularly important for Windows instances - Windows will not allow you to unmount a volume that has disk operations running on it. If you try to unmount the volume, it will lock itself in the Detaching state, unlocking such a volume requires contacting our support.
We display the list of volumes, click on the arrow in the drop-down menu next to the selected volume and click on the Extend Volume item. Enter the new volume size and confirm by clicking Manage Attachments.
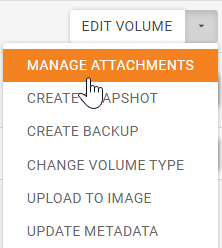
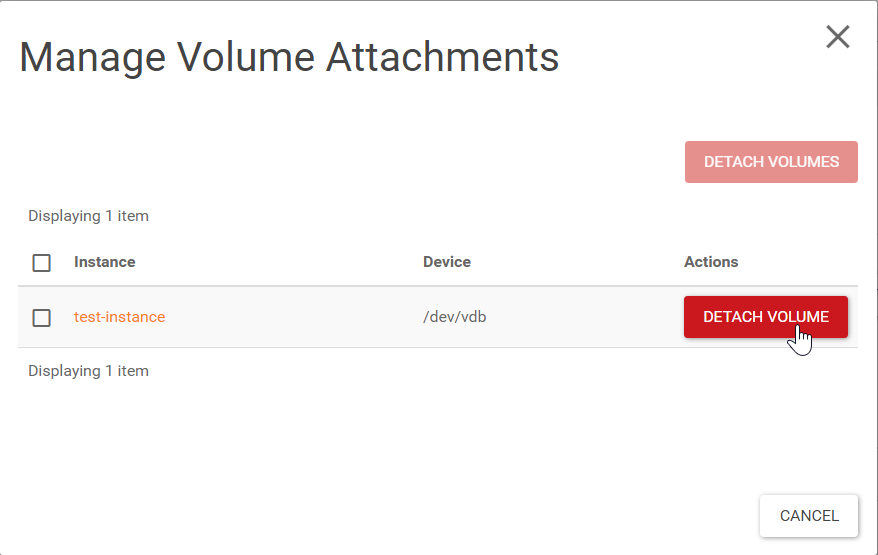
In the window that appears, click on the Detach Volume button.
STEP 2. CHANGE VOLUME SIZE.
Przy wybranym wolumenie klikamy na strzałkę w rozwijanym menu przy wybranym wolumenie i klikamy na pozycję Extend Volume. Podajemy nowy rozmiar wolumenu i potwierdzamy klikając na przycisk Extend Volume.
STEP 3. RECONNECT VOLUME.
With the volume selected, click on the arrow in the drop-down menu next to the selected volume and click on Edit Attachments. In the window that appears, indicate the instance to which the volume is to be attached.