DNSaaS - DNS zone management
Atman Cloud customers have the option to delegate DNS domains to cloud-based authoritative servers.
The desire to delegate a domain should be notified by email or via the ticket system to the customer service office. The following elements should be included in the content:
project name in Atman Cloud;
e-mail address (this will be visible in the SOA);
the name of the delegated domain - FQDN.
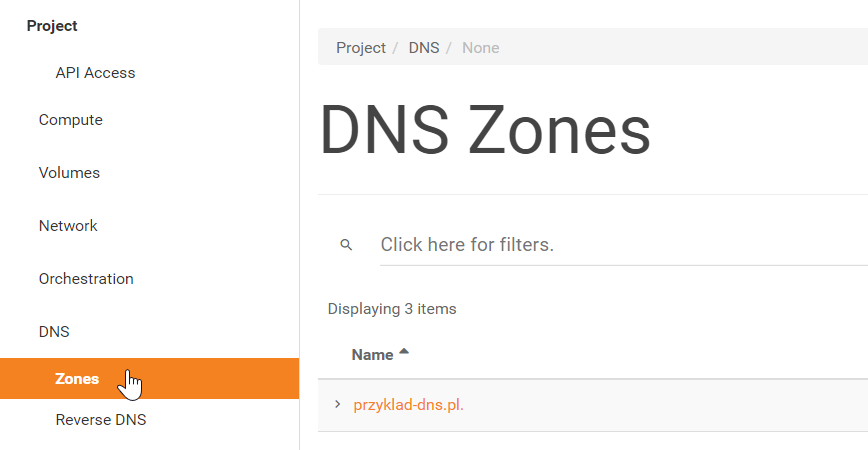
Once submitted, the domain will be added to the customer’s project in the cloud panel (panel.cloud.atman.pl) and will be visible under Project -> DNS -> Zones.
Our dns servers are located under the following domain names. The customer should delegate their domain to these.
dns1.cloud.atman.pl
dns2.cloud.atman.pl
dns3.cloud.atman.pl
DNS zone management
The dns zone can be managed in several ways, including:
the web browser panel, Horizon;
CLI openstack;
using the Terraform tool.
Management from the web panel
We log into the cloud panel - panel.cloud.atman.pl.
Next, we go to the Project -> DNS -> Zones tab and select our domain and then go to the Record Sets tab. From this level we can view the records currently in the zone and we can also add new ones.

To create a new record, click on the button in the top right corner - Create Record Set.
A new window for configuring a new record will then open.
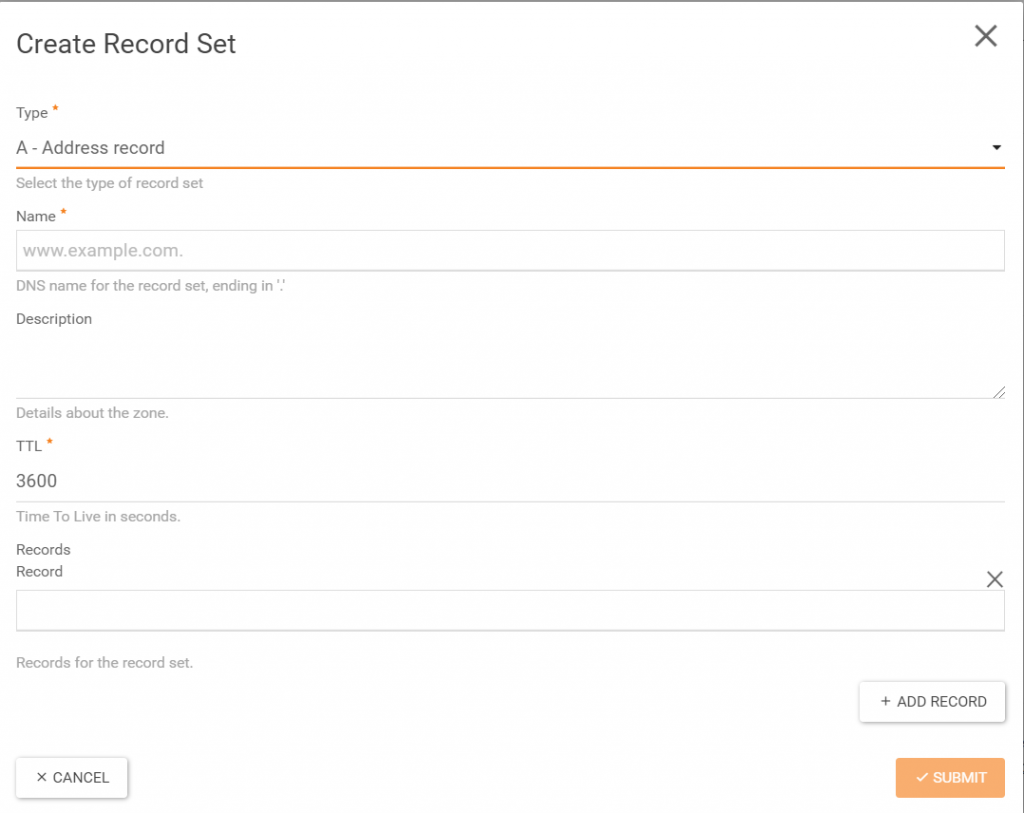
Fill in the fields in the format above and click the Submit icon.
Management via CLI
To manage a DNS zone, we need a station with the Openstack CLI installed. Below is an example of how this can be done on a station running Ubuntu 18.04. The CLI can be installed as follows:
$ apt install python-openstackclient python-designateclient.
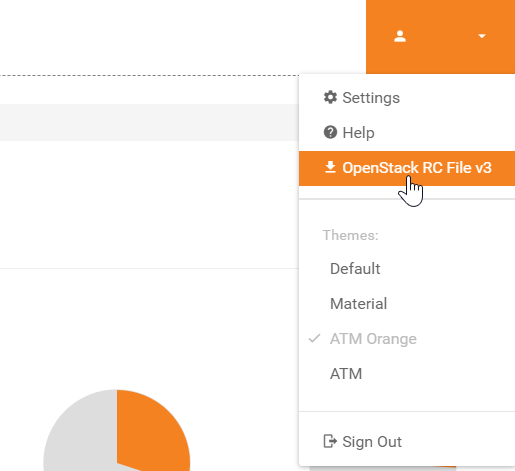
We then download our openrc.sh file with access data. This is accessible from the browser panel.
We load the access data using the command:
$ source openrc.sh.
We move on to Openstack’s CLI:
$ openstack (openstack)``.
We can check the current list of domains assigned to the project using the following command:
(openstack) zone list.

Checking the list of records in the zone:
(openstack) recordset list <zone name>
Example:.
(openstack) recordset list przyklad-dns.pl.

Adding new records “.
Adding a Type A record
(openstack) recordset create <our_domain_name> --type <record_type> <record_name> <dns> --record <address_IP>
Example:.
(openstack) recordset create przyklad-dns.pl. --type A test1 --record 192.168.1.21.
The result is:

Example of adding a CNAME record:.
(openstack) recordset create przyklad-dns.pl. --type CNAME test --record przyklad-dns.pl.
For floating IP addresses, it is also possible to set PTR records.
Display of ptr records:
(openstack) ptr record list.

We can edit the PTR records according to the following example:
(openstack) ptr record set Waw01:1dd7dbab-5f49-4951-a276-8bd078ba310b przyklad-dns.pl.

We can delete individual records as follows:
(openstack) recordset delete <id_zone or name_zone> <id_record>
Example:.
(openstack) recordset delete example-dns.pl. 35dac887-9577-4ea8-907b-7cae3d1d9fee
Link to Openstack documentation https://docs.openstack.org/python-designateclient/latest/user/shell-v2.html
DNS zone management using the Terraform tool
To manage the DNS zone in this case, we need a system with the Terraform software installed.
We create a file with the extension .tf.
The file should include, among other things, the following parts of the configuration.
Provider configuration:.
provider "openstack" {
user_name   = "<nazwa użytkownika>"
tenant_name = "<nazwa projektu>"
password    = "<hasło>"
auth_url    = "https://api.cloud.atman.pl:5000/v3"
region      = "Waw01"
domain_name = "Default"
}
DNS record configuration:.
resource "openstack_dns_recordset_v2" "nasza_domena" {
zone_id     = "<id_domeny>" # id naszej strefy, można podejrzeć w panelu www lub CLI np.  9d7329dc-1772-4ee5-a77e-1a9b11592a97
name        = "<nazwa_domeny>" # przyklad-dns.pl.
description = "<opis>" # opis
type        = "<typ rekordu>" # np. A, TXT, MX, CNAME, itd.
records     = ["<addres_IP / nazwa dns>"] # w zależności od typu np. 217.17.34.10 lub test.przyklad-dns.pl.
}
We then initialise our project:
`$ terraform init
We look at what will be changed:
$ terraform plan
Making a difference:
$ terraform apply
Link to Terraform documentation https://www.terraform.io/docs/providers/openstack/r/dns_recordset_v2.html
Known Limitations.
The TXT record has a limit of 255 characters. If the DKIM key received has more characters, it should be split into several parts. More information available at: https://support.google.com/a/answer/11613097?hl=en