VPN on FortiGate
Documentation for configuring VPN tunnels on FortiGate units (in English) can be found on the manufacturer’s website at https://docs.fortinet.com/document/fortigate/7.2.3/administration-guide/954635/getting-started
Access data for the FortiGate cluster
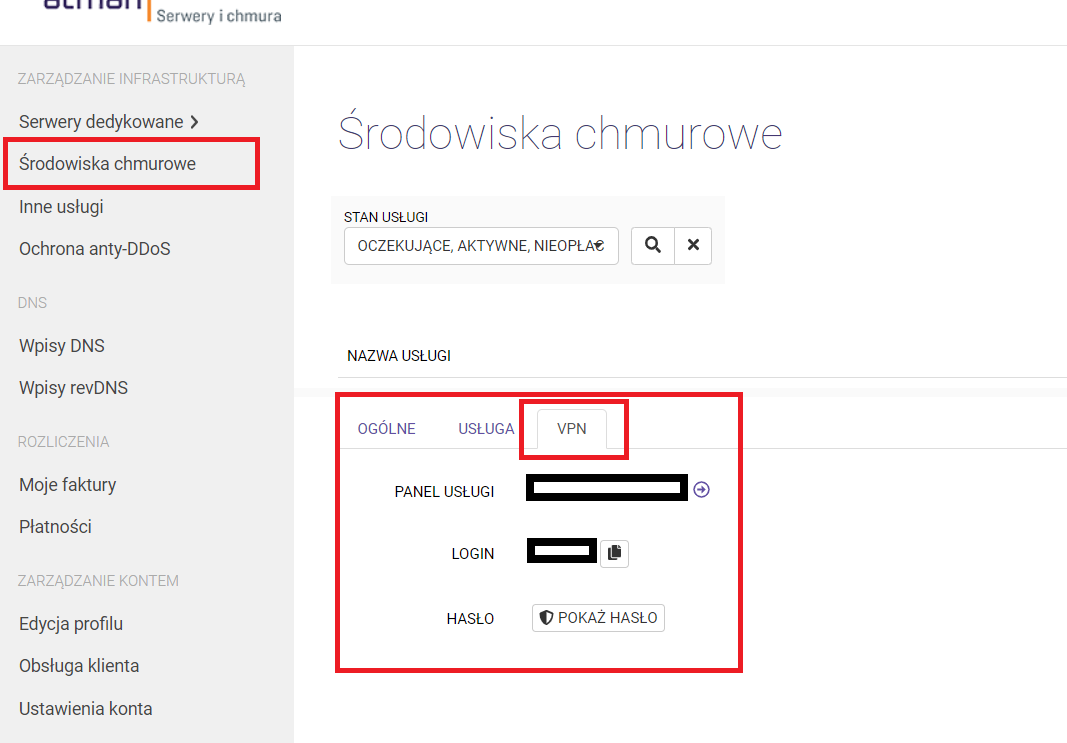
VDOM access in the Fortigate cluster can be found in the Atman Cloud panel - https://panel.atman.pl/my-cloud. Select the Cloud Environments tab and then the VPN tab.
Instructions for migrating OpenStack VPN tunnels to a FortiGate cluster
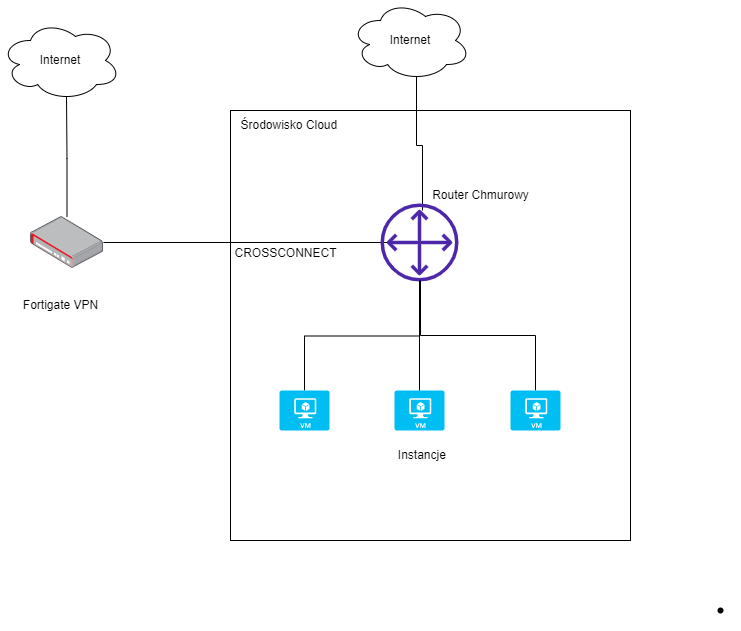
In the new solution, the customer gets one virtual domain (VDOM) on the Fortigat cluster with a separate public IP address. The VDOM cluster is accessed via the https protocol (https://<address_IP_vdom>) and ssh. After logging into the VDOM, the connection address between the FortiGate and the cloud environment (cloud router) and the routing setting on this router must be configured. An overview of the connection architecture of the new solution is shown below.
Configuring the connection between the FortiGate cluster and the cloud environment
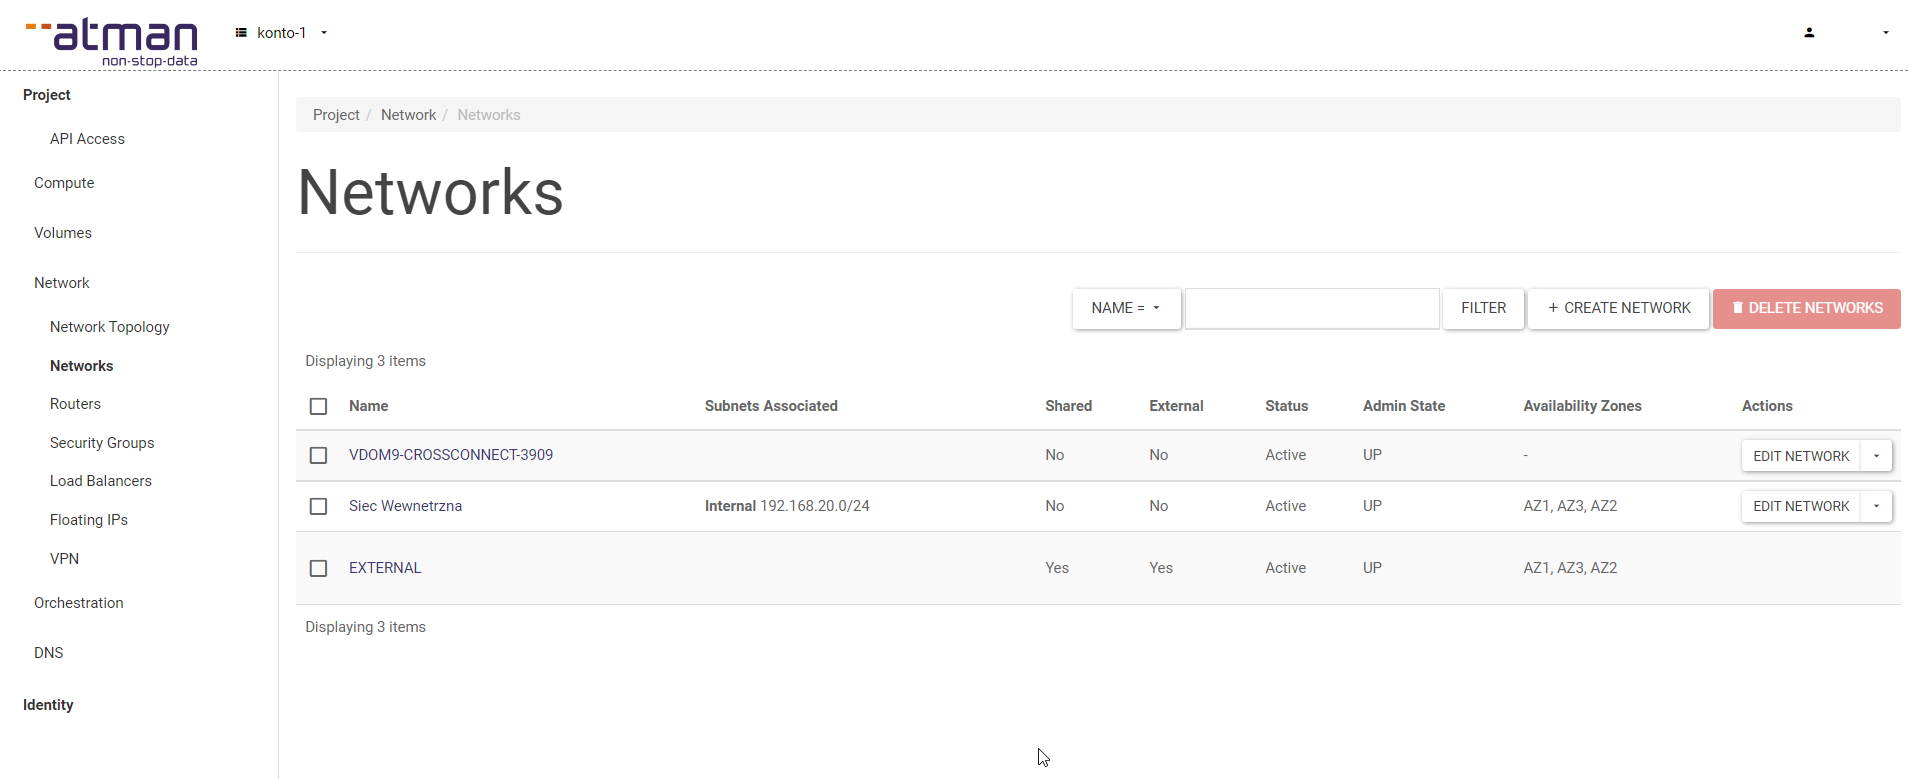
On the OpenStack side, we get a link between the cloud and vdom in the Fortigat cluster. The connector will be visible in the Network -> Networks tab. The network will be added and will have CROSSCONNECT in its name.
In our connection network, we configure the connection address between the cloud router and the vdom in the FortiGate.
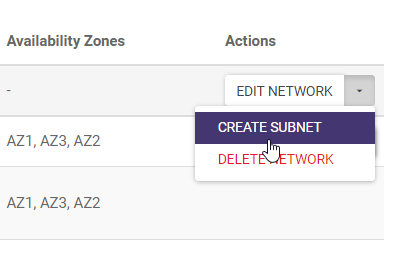
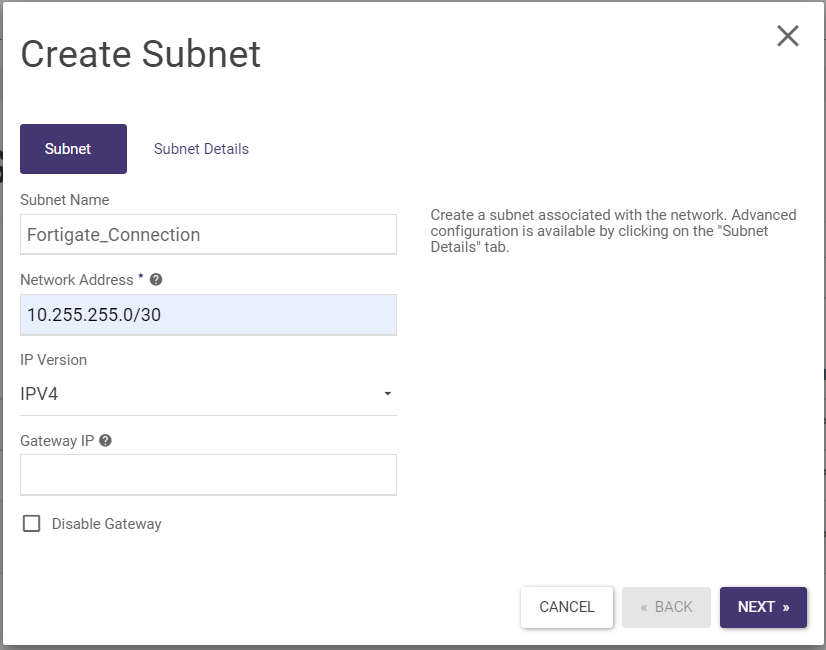
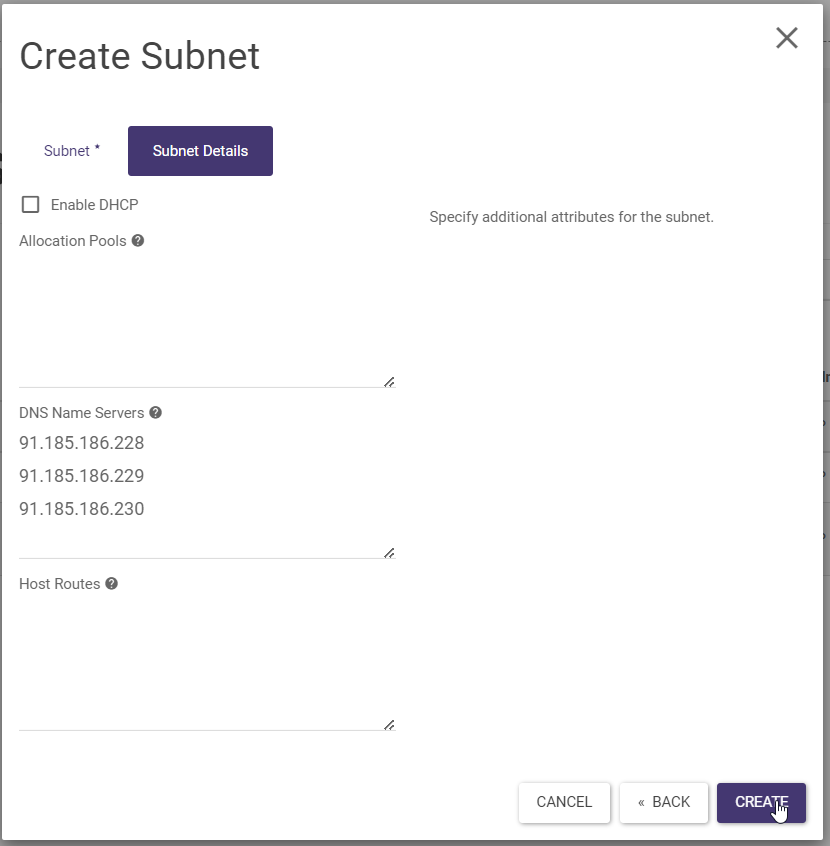
We then fill in the form below. In our example, we have used the address 10.255.255.0/30 but it can also be any other address.
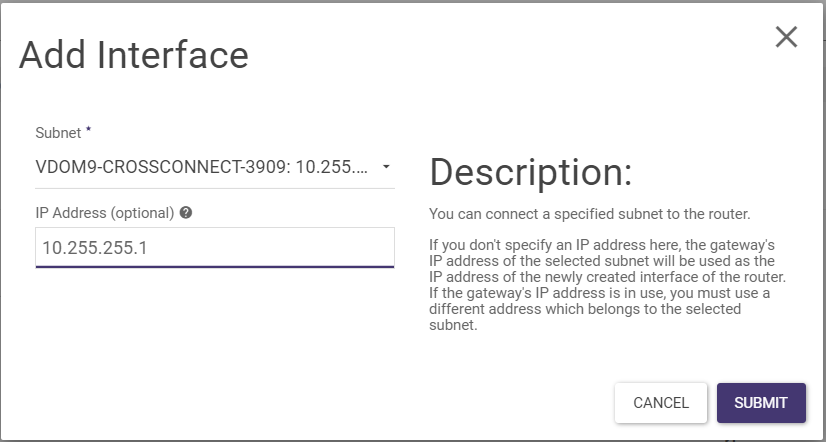
We add the resulting network to the router in OpenStack and set the address on the FortiGate internal interface. To do this, we go to the Network -> Routers tab, then select our router and add the ADD INTERFACE interface.
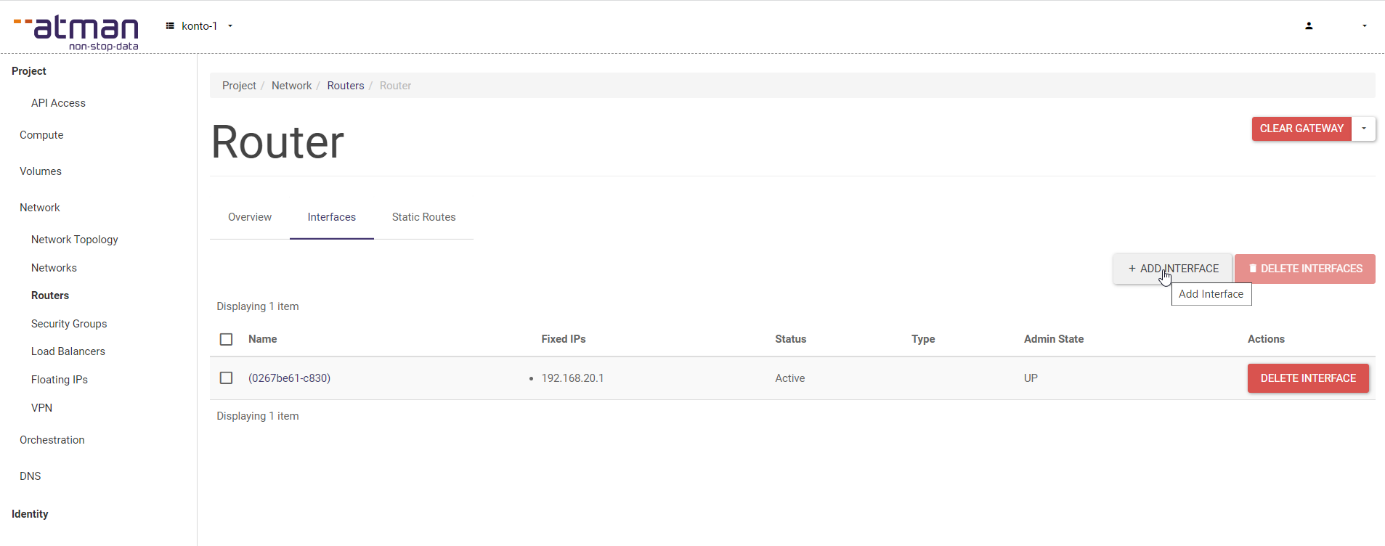
In our example, we will set the address 10.255.255.1 on the router side of OpenStack and the address 10.255.255.2 on the FortiGate side.
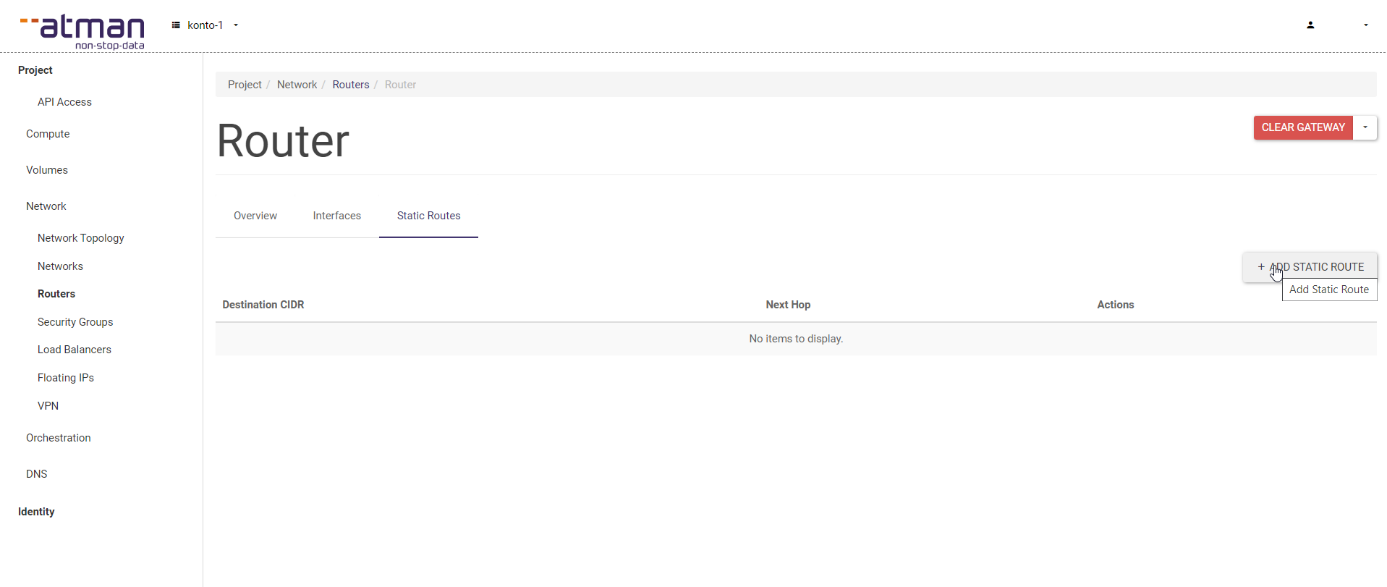
In the Static Routes tab of our router, we add the routes to be reachable via vpn on the FortiGate.
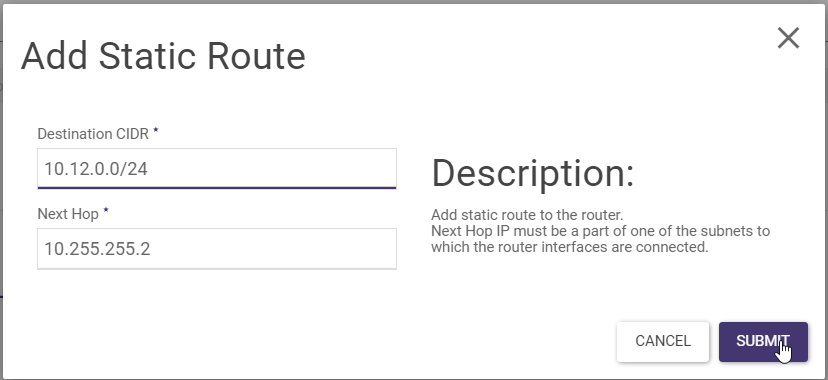
Below is an example of adding a route for the prefix 10.12.0.0/24 to be reached by the FortiGate. The address 10.255.255.2 is the address we have set on the FortiGate.
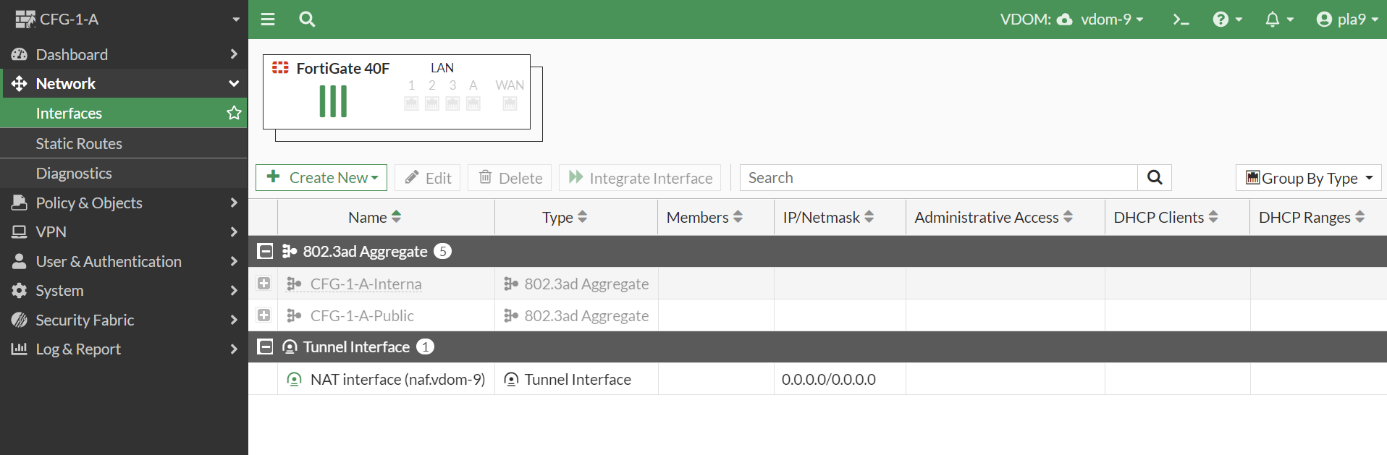
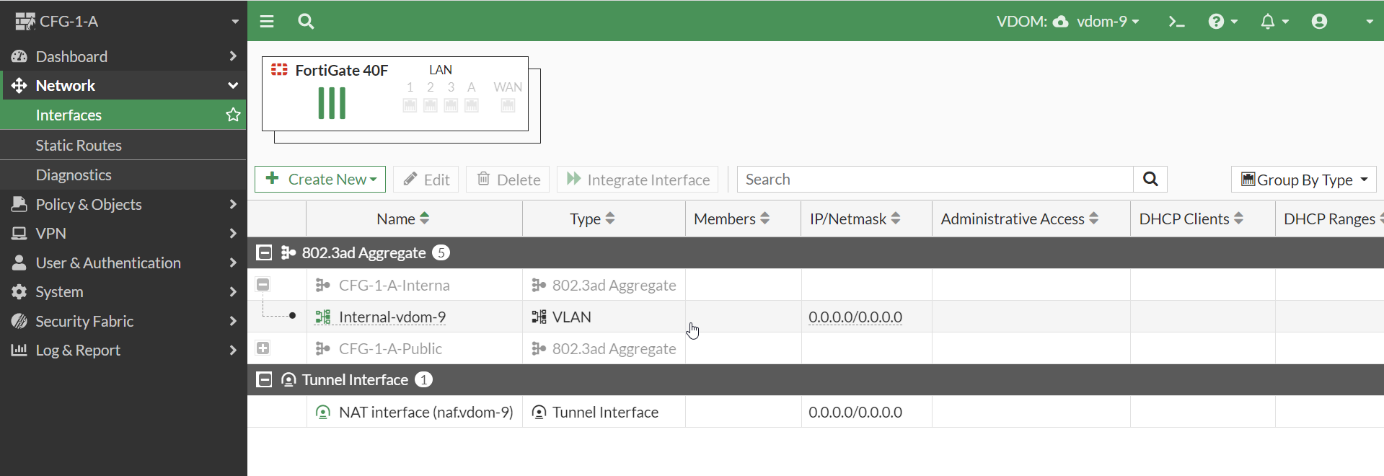
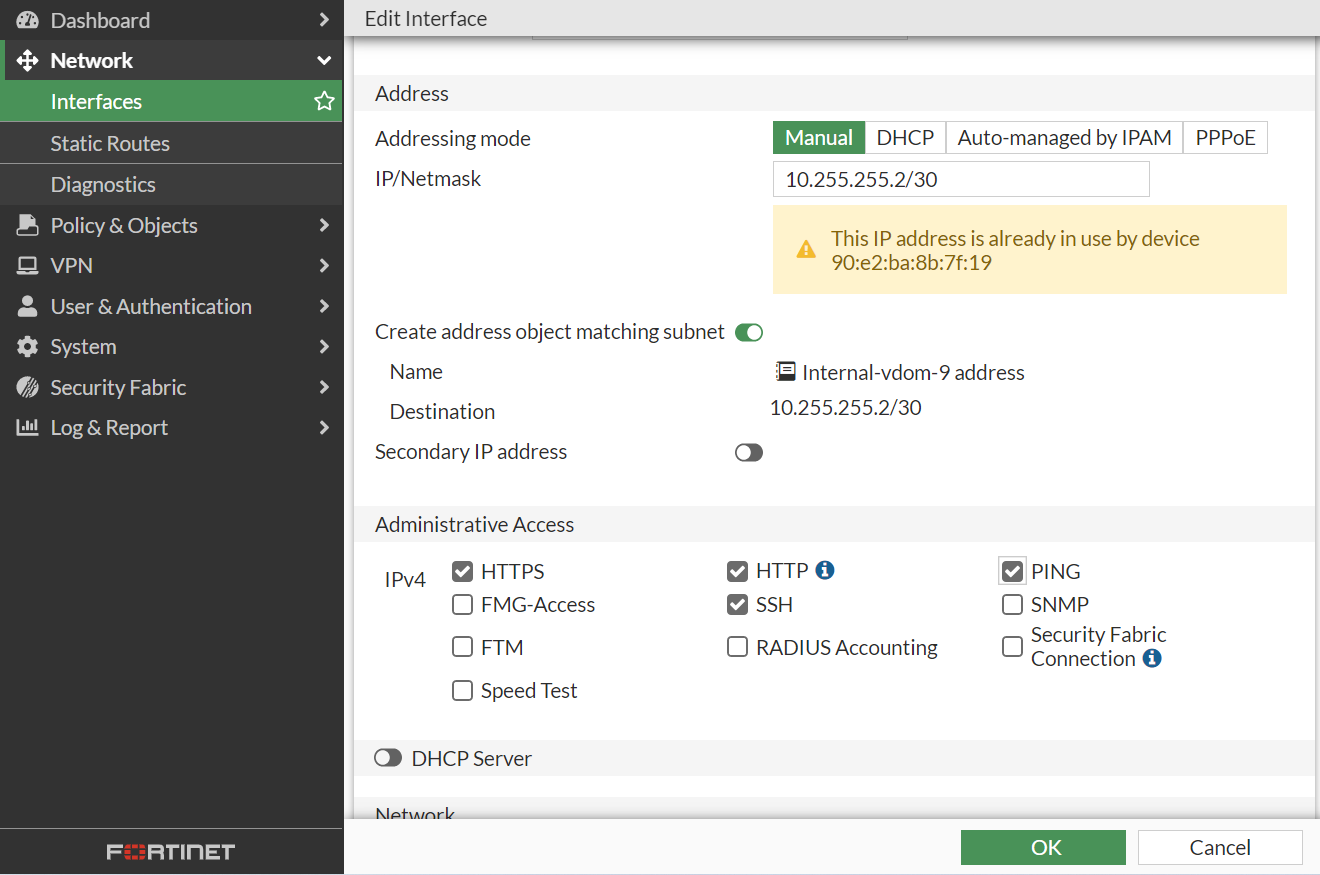
Once we have created the configuration on the cloud environment side then we move on to the configuration on the FortiGate side. To complete the connection to the cloud, we need to set the connection address on the Internal interface. In our case 10.255.255.2/30.
Below we set the connection address. For this we select Addressing mode Manual and IP/Netmask
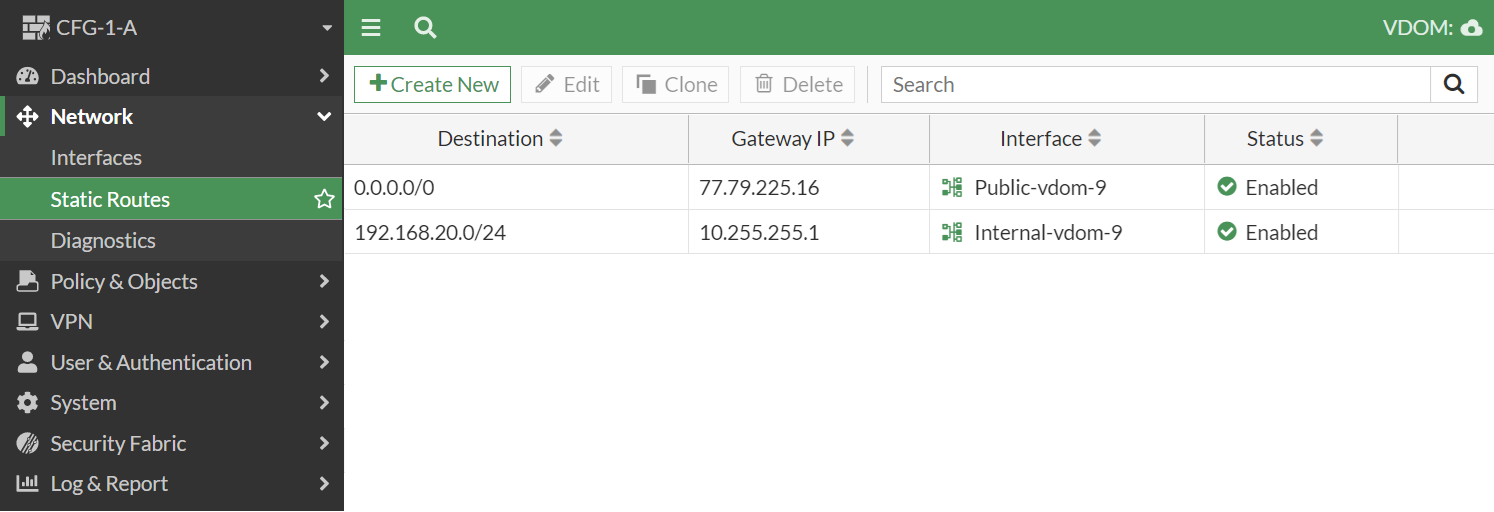
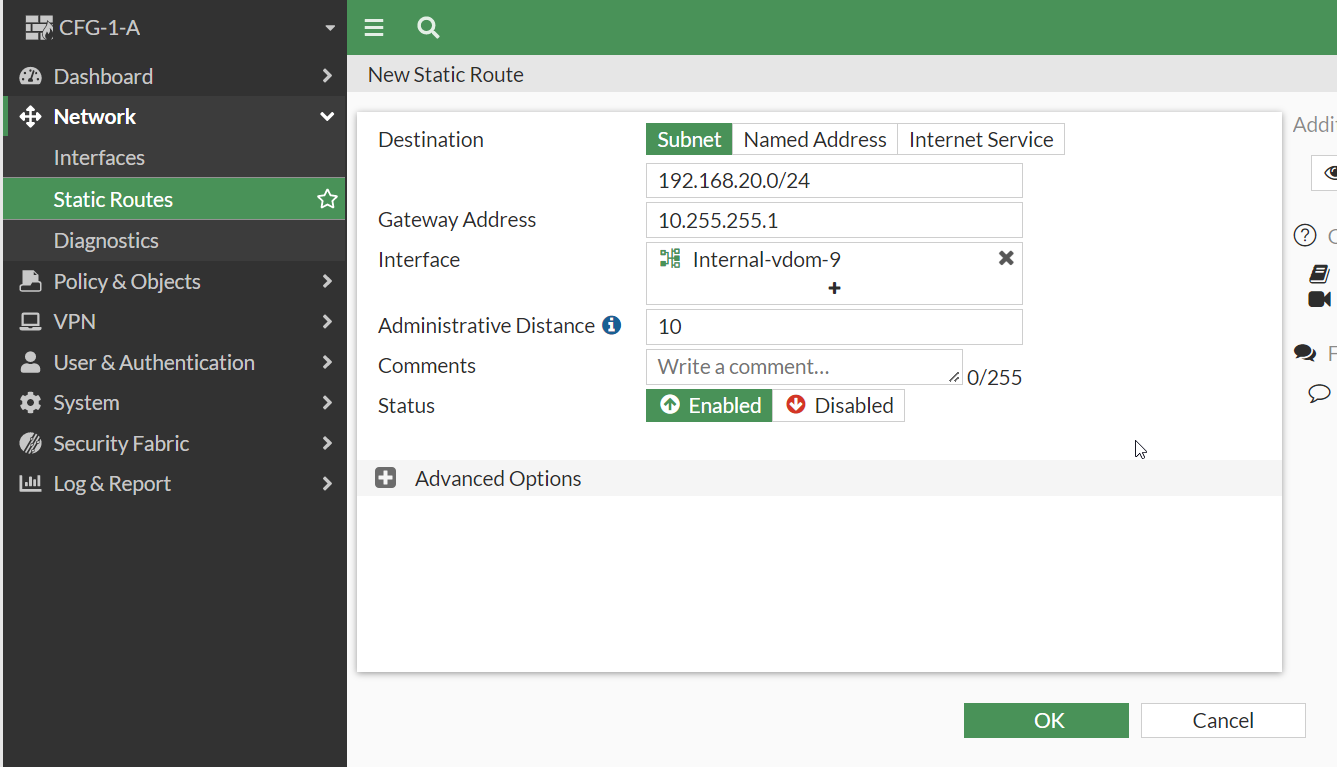
Adding routing on the FortiGate side. Here we add networks that are in a cloud environment and we want to reach them via VPN.
Creation of VPNs
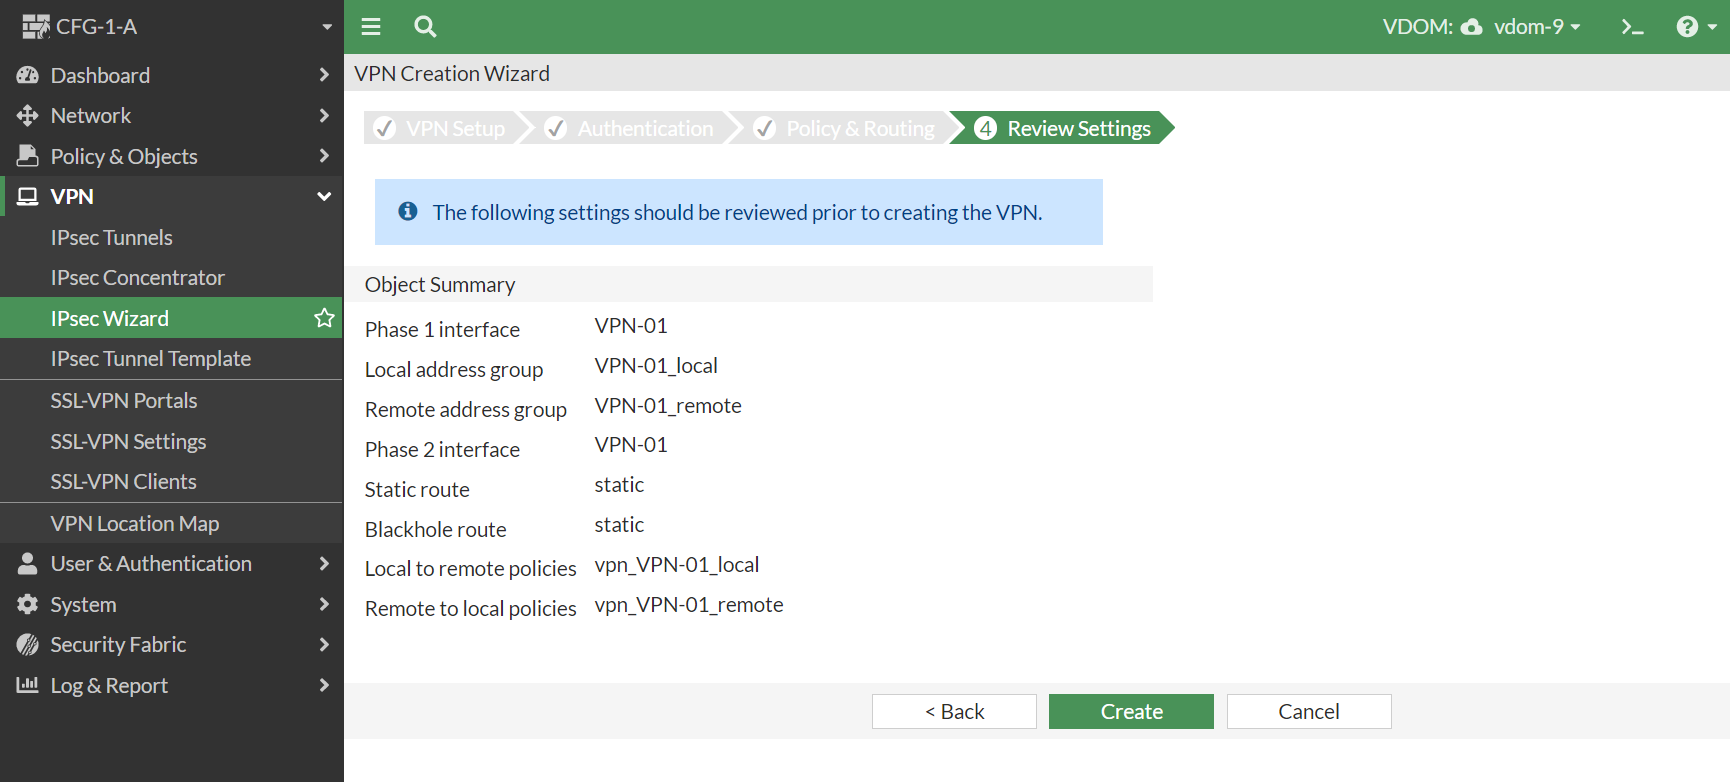
VPN tunnels can be created, for example, under VPN -> IPsec Wizard.
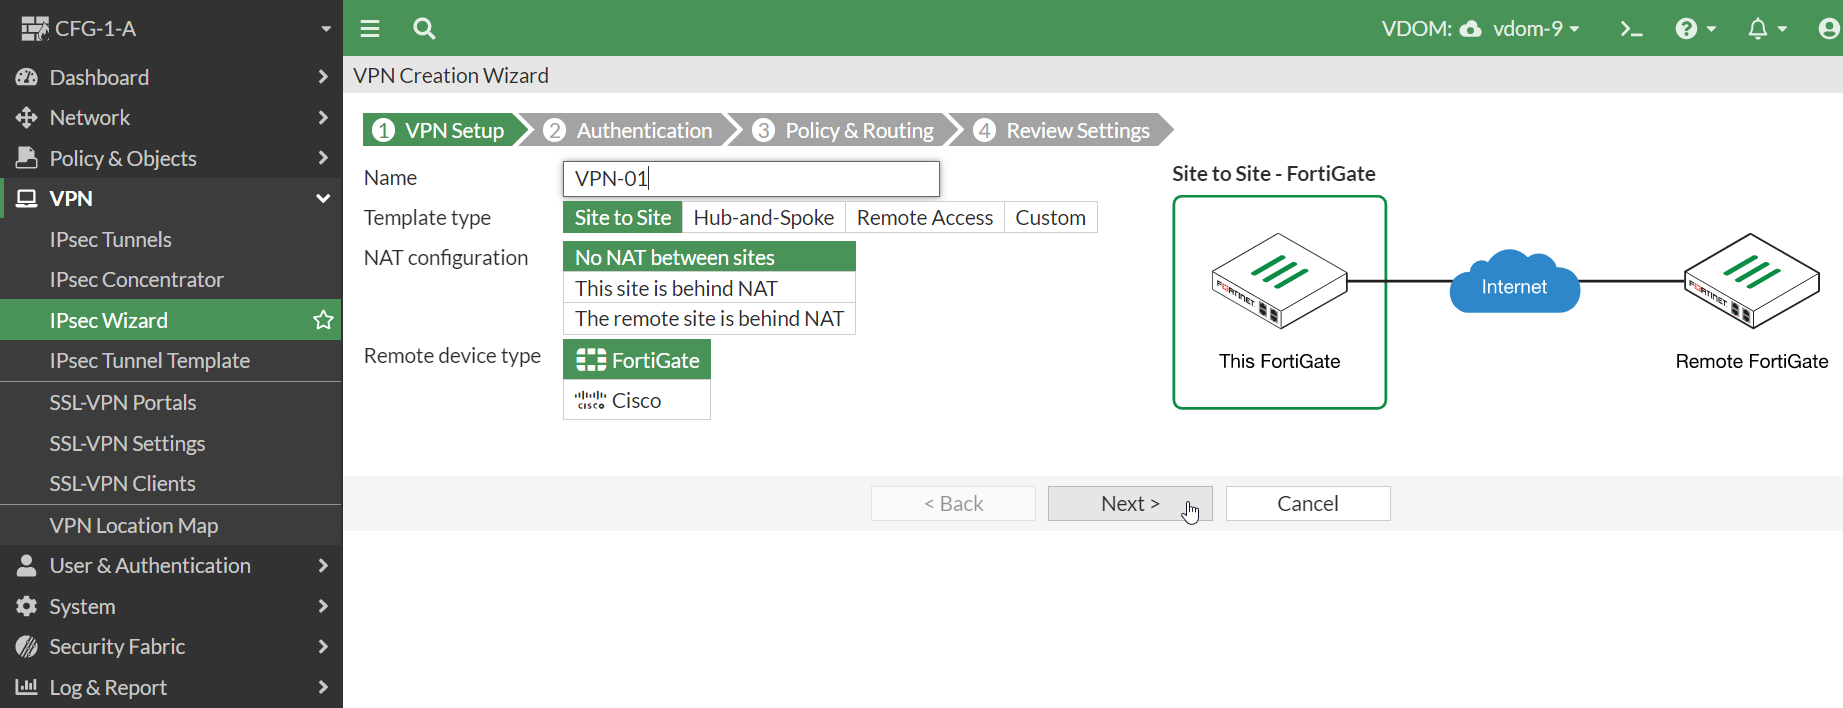
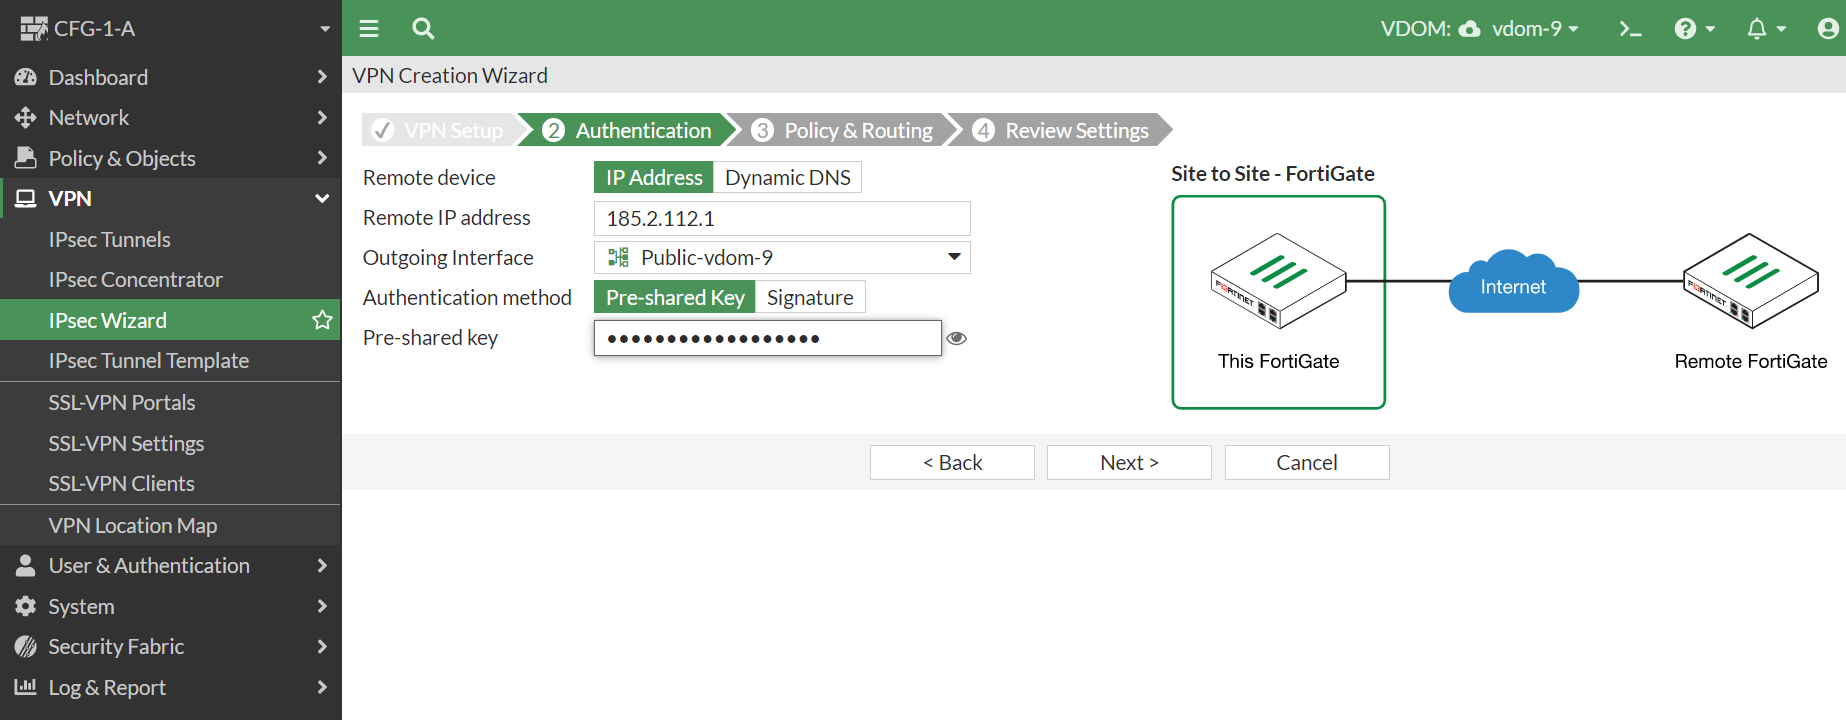
Complete the format. Remote IP Address is the address of the tunnel on the other side, pre-shared key is the key which must be the same on both sides of the tunnel.
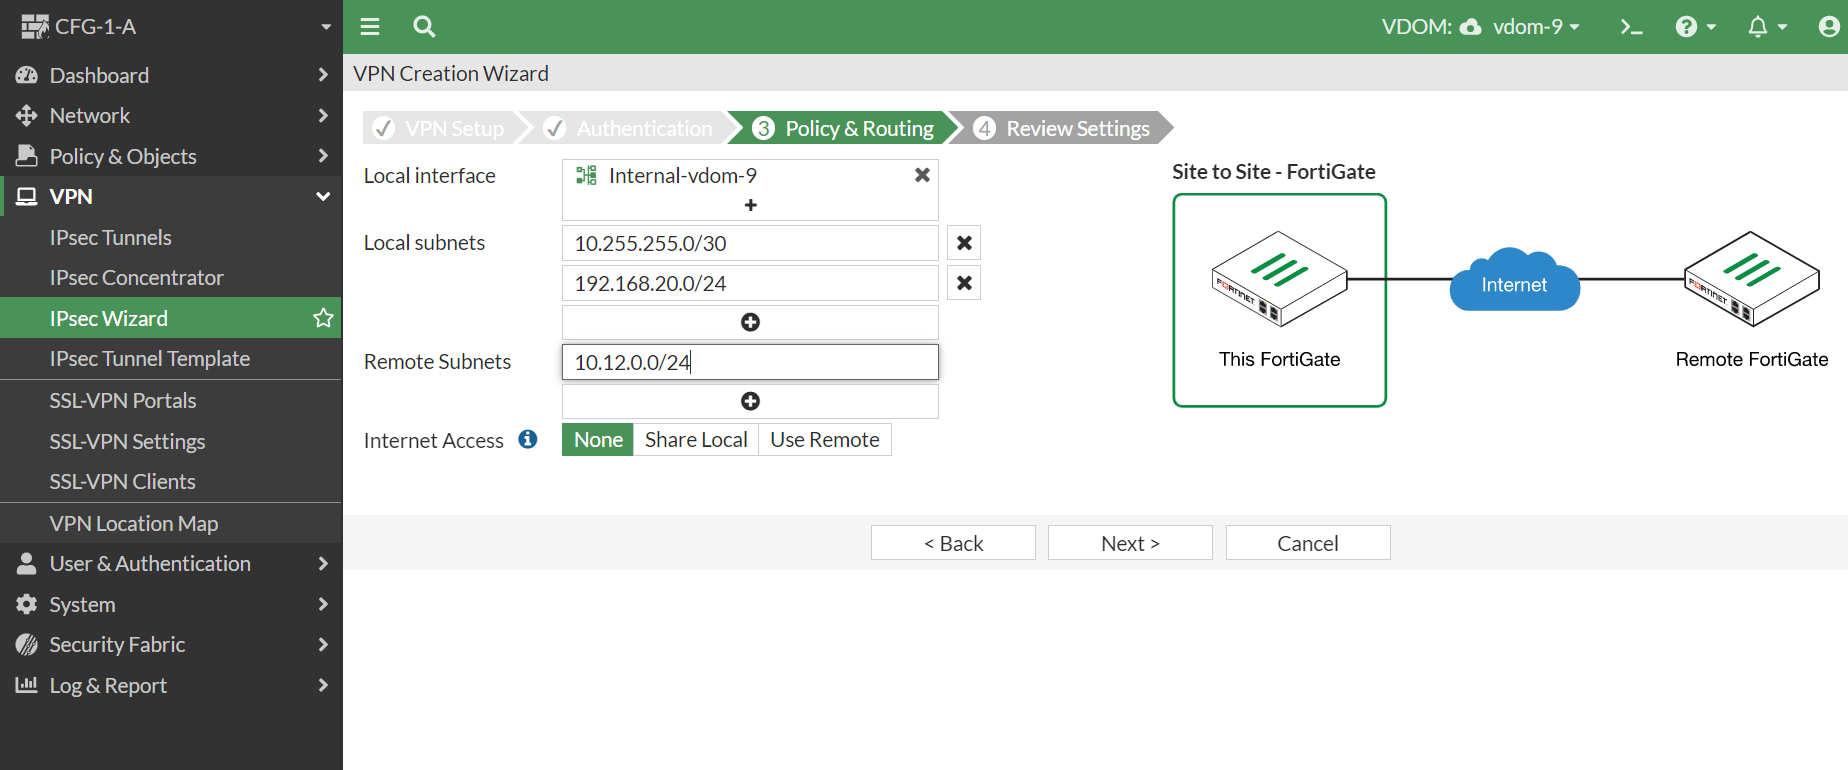
In the next format, we fill in the addresses to be sent through the tunnel. In this case 10.255.255.0/30 and 192.168.20.0/24 are to be terminated on the cloud side. On the other side of the tunnel, the address 10.12.0.0/24 is to be located.
We then click Create and the tunnel configuration is created.