Instances (virtual machines)
Creation of instances
Video instruction available at bottom of page.
STEP 1
From the Project -> Compute- > Instances screen, click LAUNCH INSTANCE.

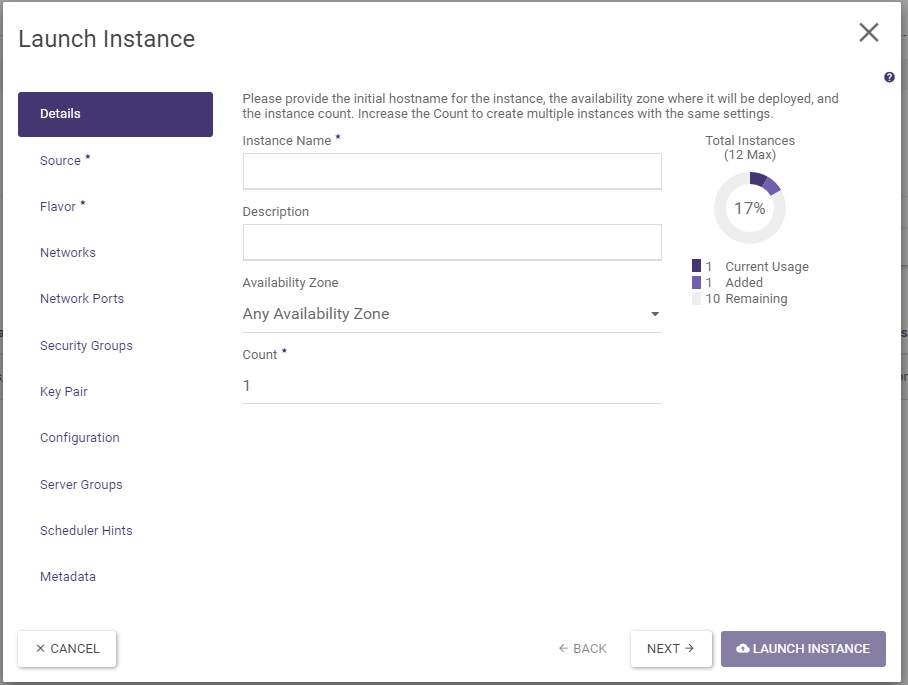
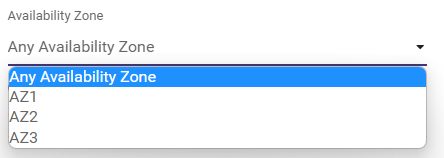
STEP 2
In the Details tab, the name of the instance must be specified, as well as how many such instances are to be created. In addition, it is possible to limit the occurrence/operation of instances to a specific availability zone, the so-called Availability Zone. Availability Zone (for more: see practical notes).
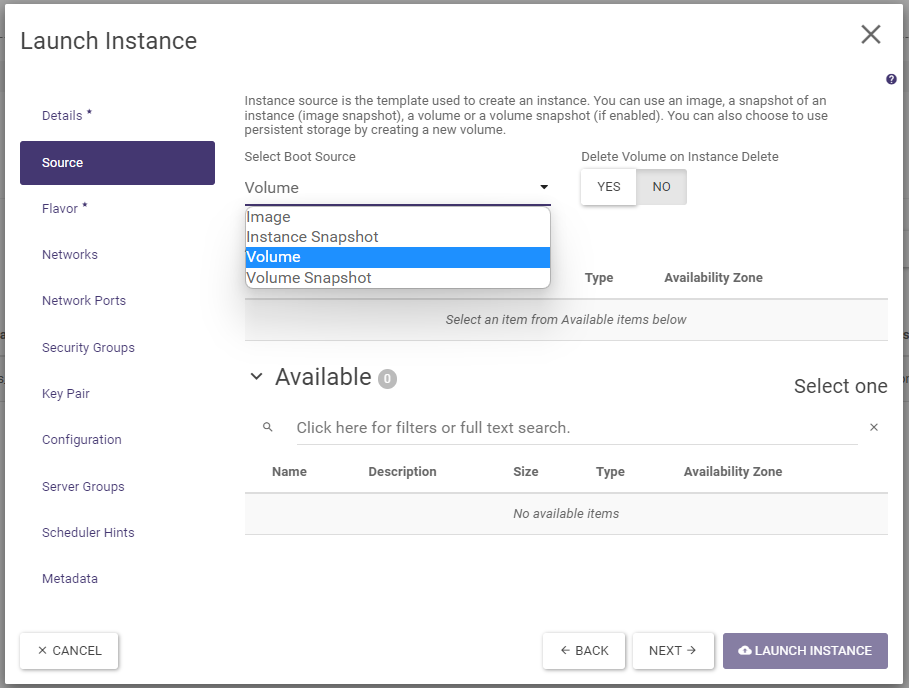
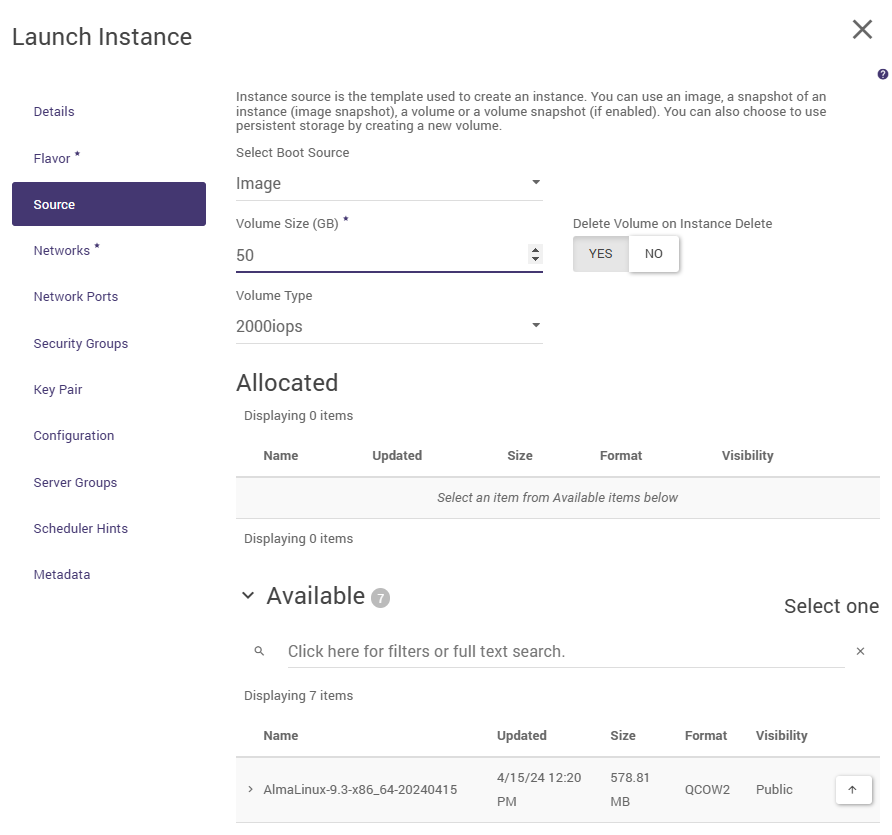
STEP 3
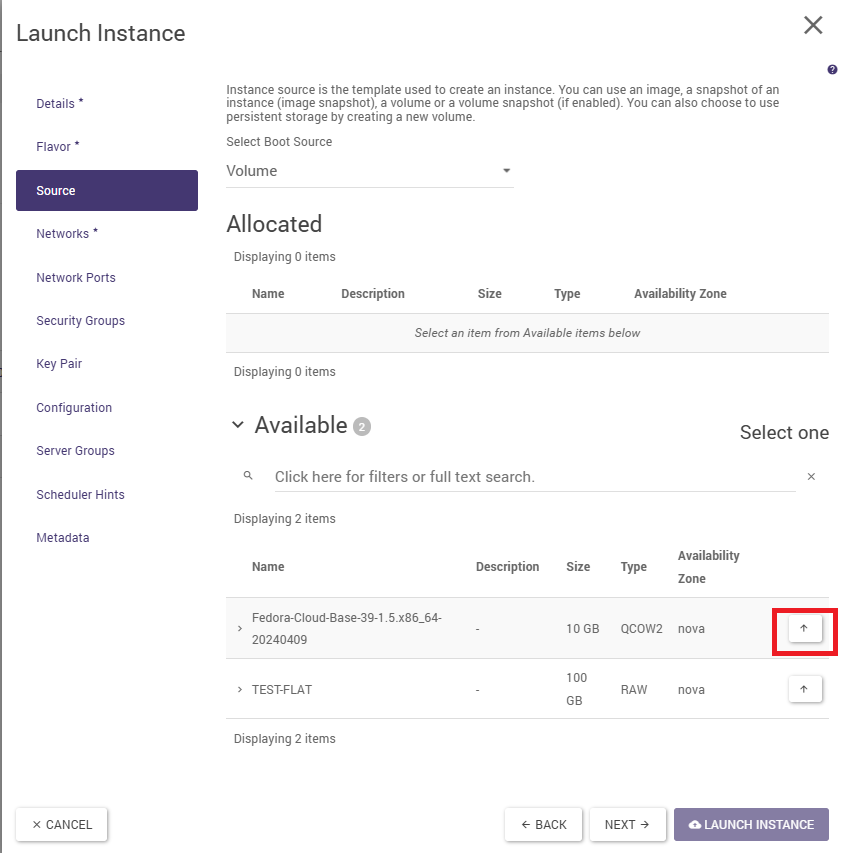
In the Source tab, select the boot source. Selecting the Image value allows you to quickly boot the machine in one step using only the wizard discussed here. Selecting the Volume value is a more versatile way, but it requires the volume to be created first. See also below under “Practical notes “. It is also worth ticking the NO option at “Delete Volume … “, so that the volume can be reused after deleting the instance. If Image is selected as the boot source, the system image must be selected in the Available section by clicking on the button with the arrow pointing upwards.

STEP 4
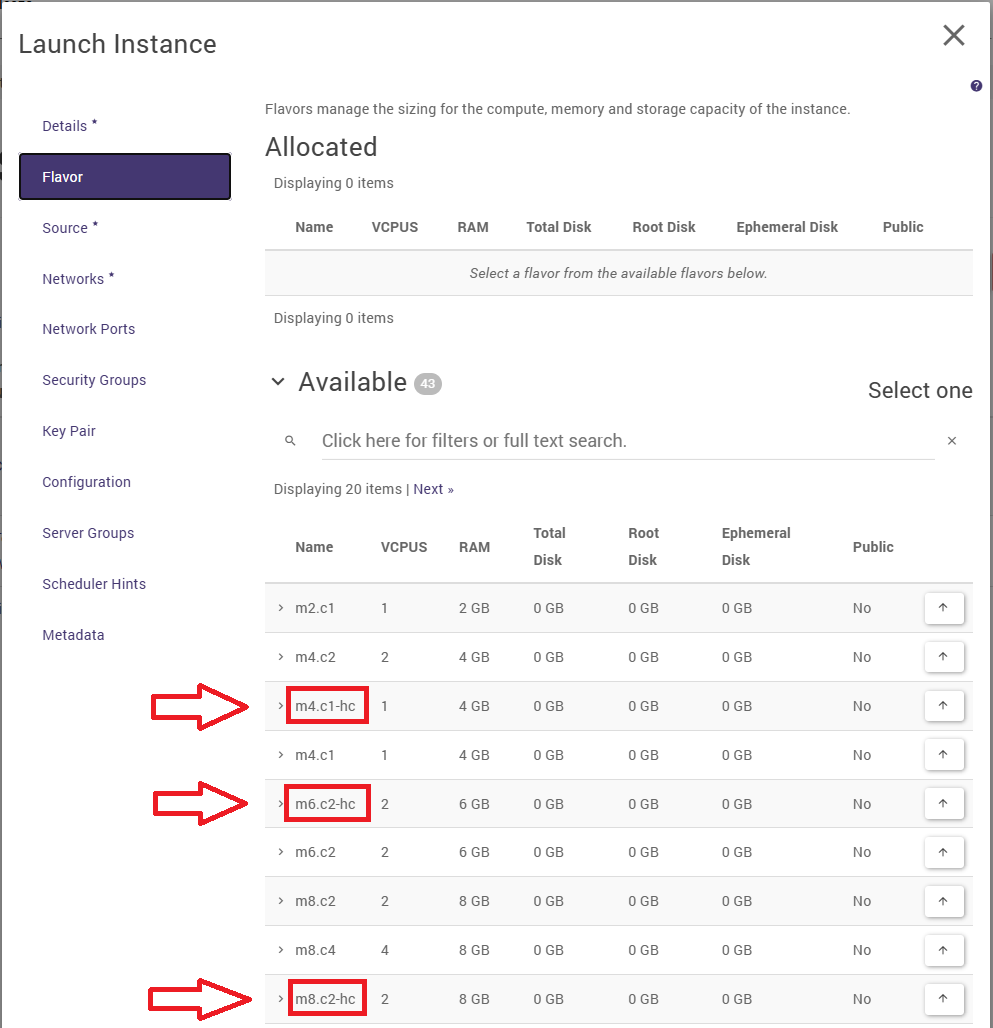
In the Flavors tab, select (by clicking on the button with the up arrow symbol) a flavor - that is, a combination of the number of vCPUs (cores) and the amount of RAM.
The number following the letter ‘m’ indicates the amount of RAM in GB, whilst the number following the letter ‘c’ indicates the number of virtual processors.
UWAGA:
Flavours that utilise high-frequency (HF) processors (vCPU HF) clocked at 3 GHz or above are denoted by the suffix “-hc” at the end of the flavour code, e.g. m8.c2-hc.
They are highlighted with a red border in the screenshot below!
Flavours that use standard processors clocked at 2 GHz or higher do not have this suffix.
STEP 5
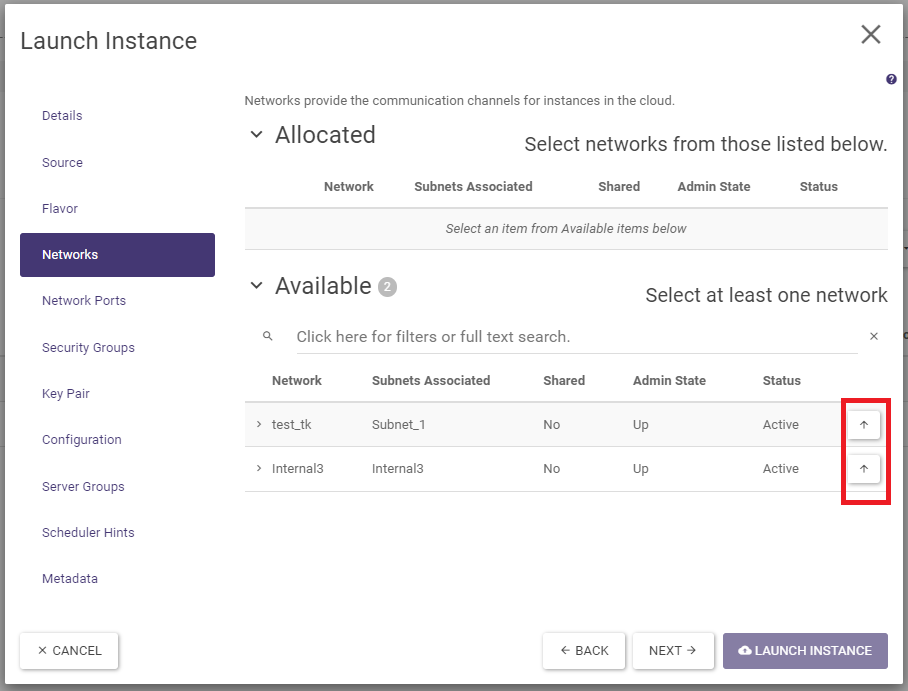
Under the Networks tab, a network can be assigned (by clicking on the button with the up arrow symbol).
STEP 6
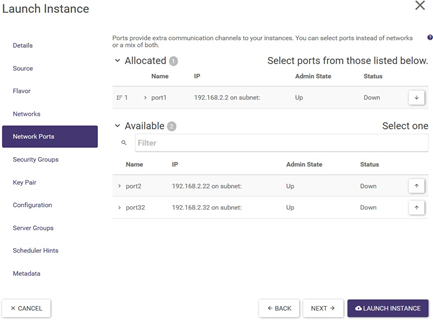
In the Network Ports tab, a port can be assigned (by clicking on the button with the up arrow symbol). In order to successfully complete the instance creation, one of the network tabs must be completed: Networks or Network Ports.
STEP 7
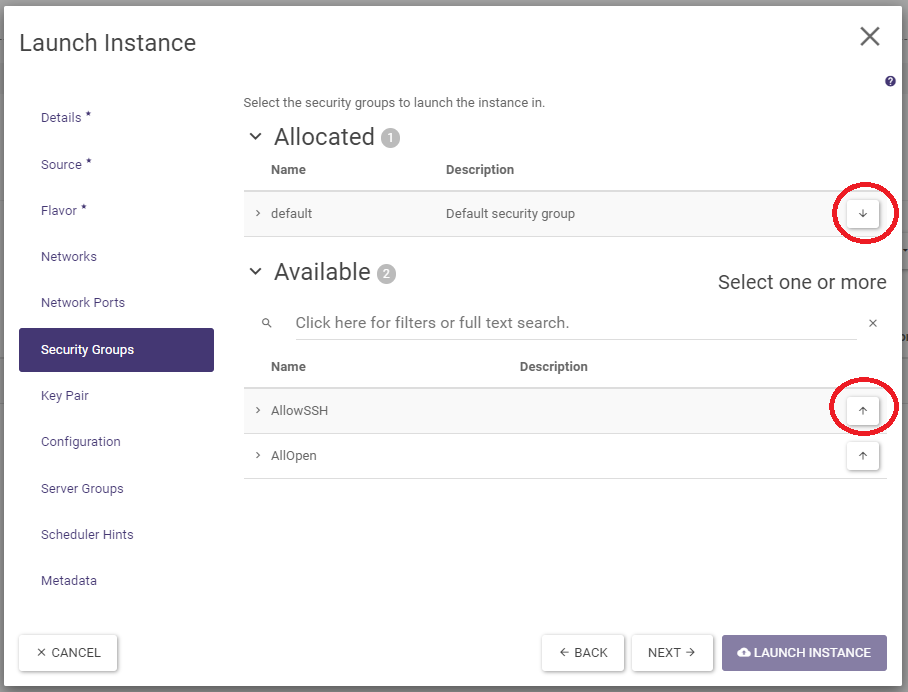
In the Security Groups tab, select the desired security group. Default status of the tab:
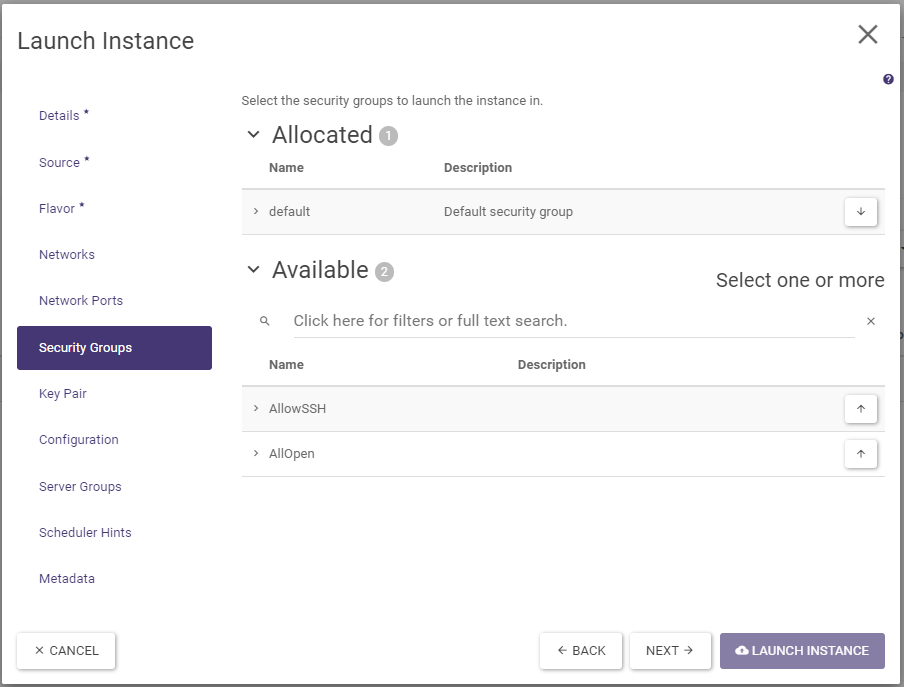
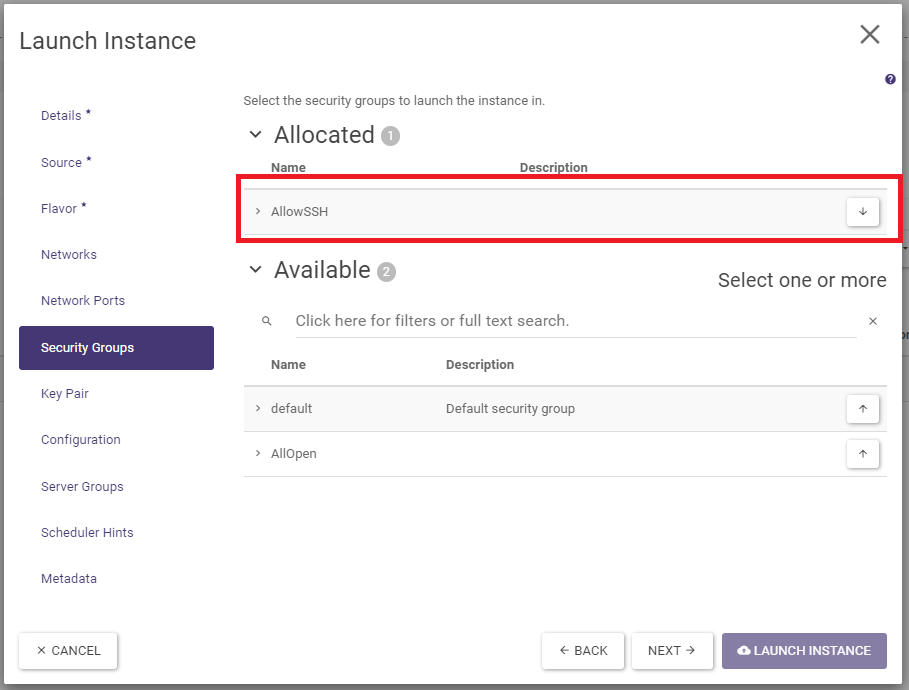
Use the arrow symbol buttons to assign the desired security group:
STEP 8
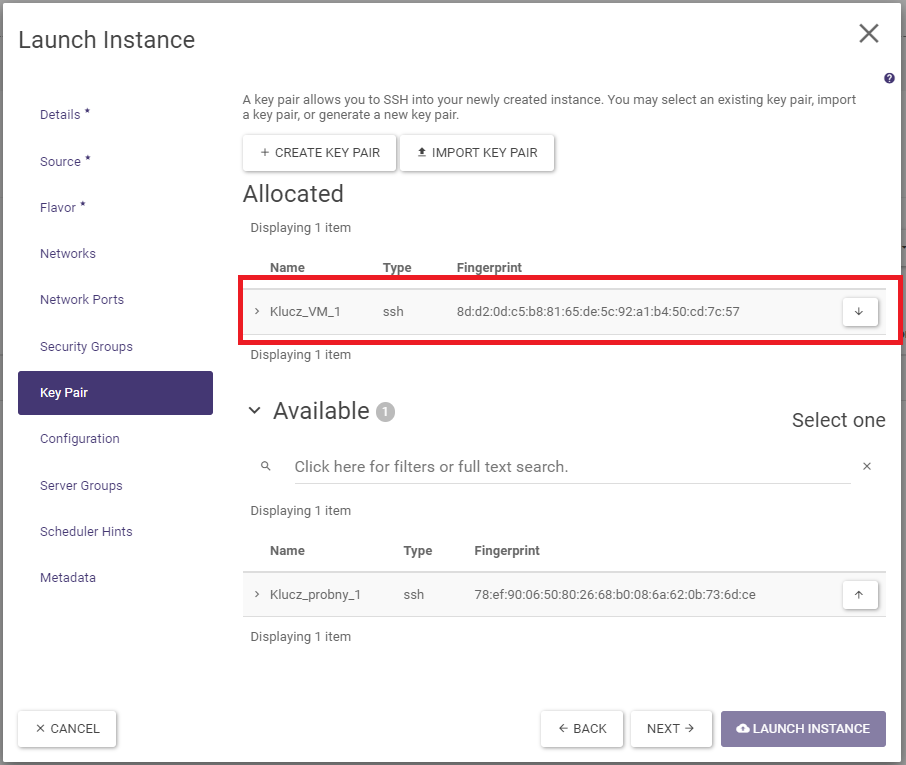
In the Key Pair tab, SSH keys can be set up if the user’s wish is to log in to the instance in this way. Select a previously created key or create one by running + CREATE KEY PAIR or by importing your own key (IMPORT KEY PAIR).
STEP 9
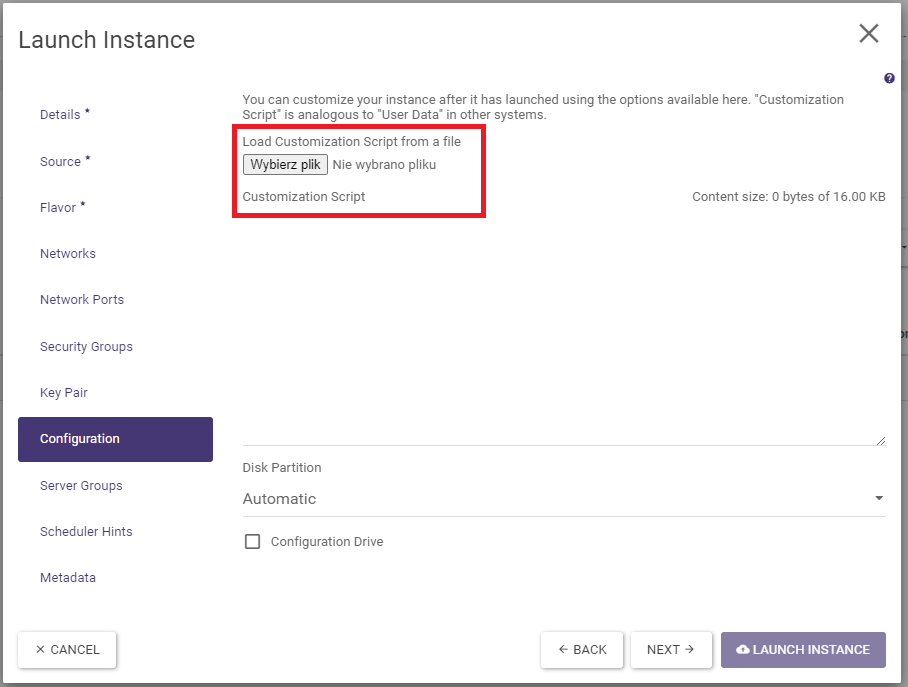
The Configuration tab provides the opportunity to customise the script. One practical application is to set a password for the default user (see practical notes).
STEP 10
The Server Groups, Scheduler Hints and Metadata tabs of this guide are left for very advanced users to explore on their own. They can be skipped when creating an instance. The instance is created by clicking on the Launch Instance button and appears in the list of Instances screen.
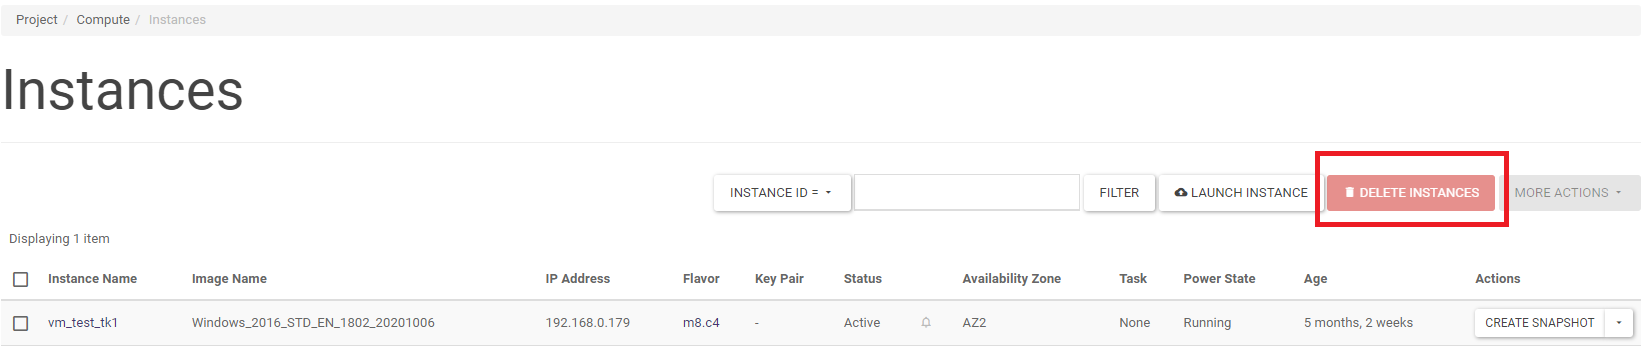
Deleting instances
An instance can be deleted by running the DELETE INSTANCE action on the selected instance in the Project -> Compute -> Instances screen list. A larger number of instances can be deleted by selecting the instances to be deleted in the list and then clicking DELETE INSTANCES.
Recreate the virtual machine
To recreate the VM, it is necessary to delete the instance (without deleting the volume) and then create a new instance using the same volume.
1. Deletion of instances.
We display the list of instances (by selecting Compute/Instances from the menu), click on the arrow in the drop-down menu next to the selected instance and click on Terminate Instance.
2. Re-creation of an instance.
With the volume selected, click on the arrow in the drop-down menu next to the selected volume and click on Launch as Instance. In the window that appears, specify the new virtual machine parameters.
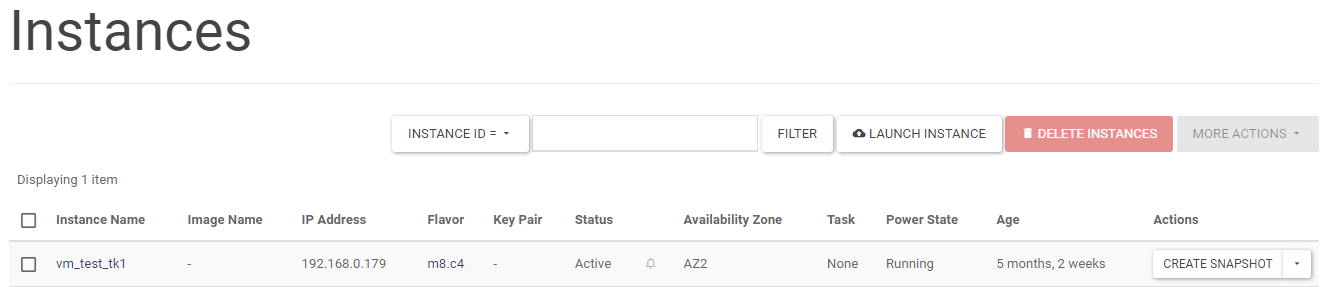
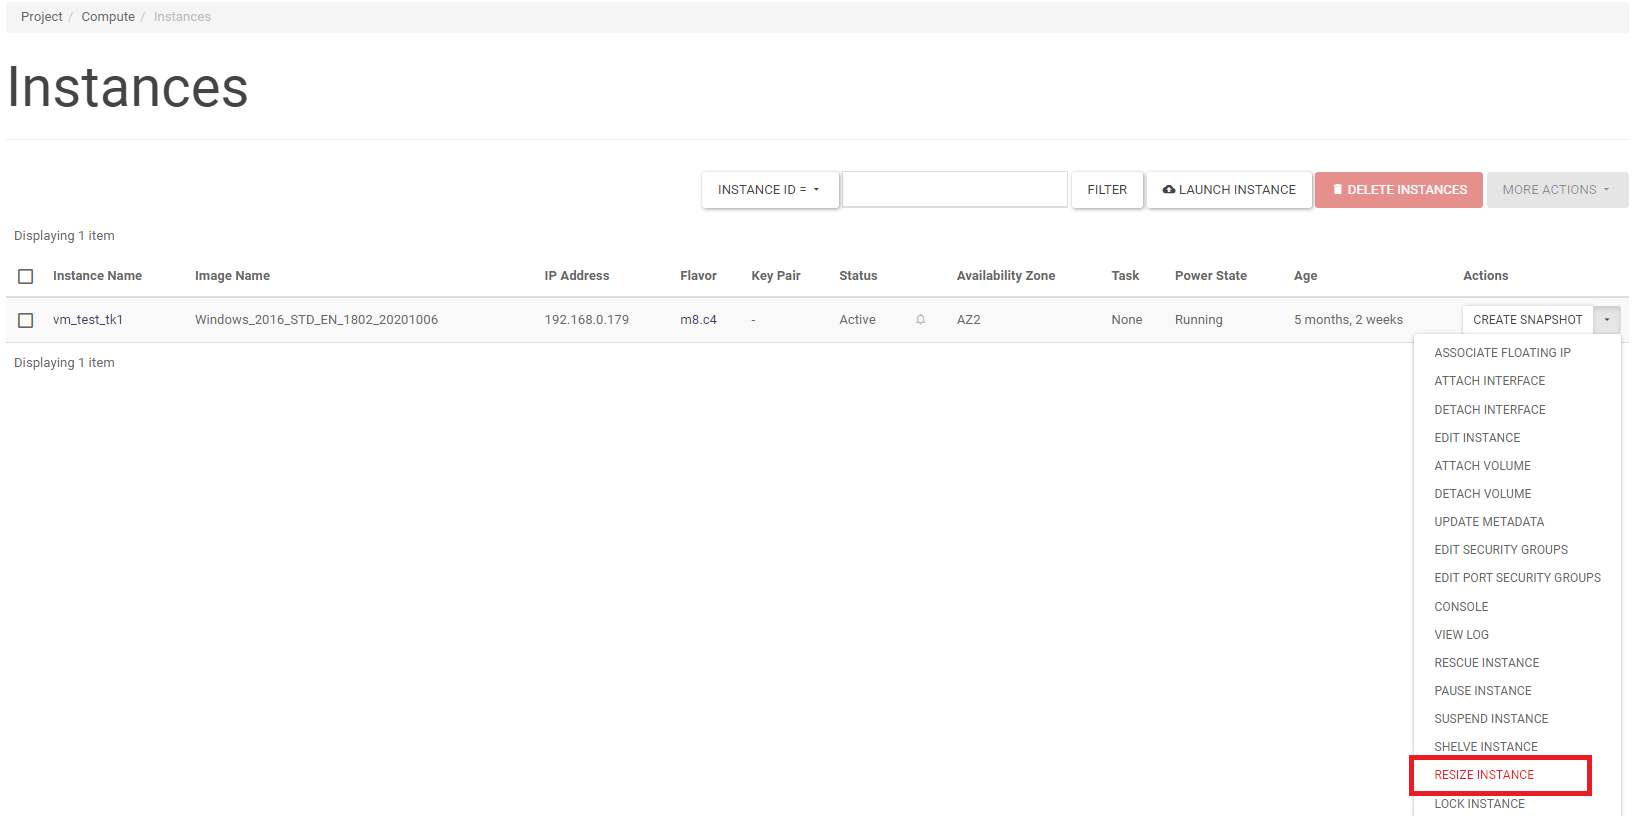
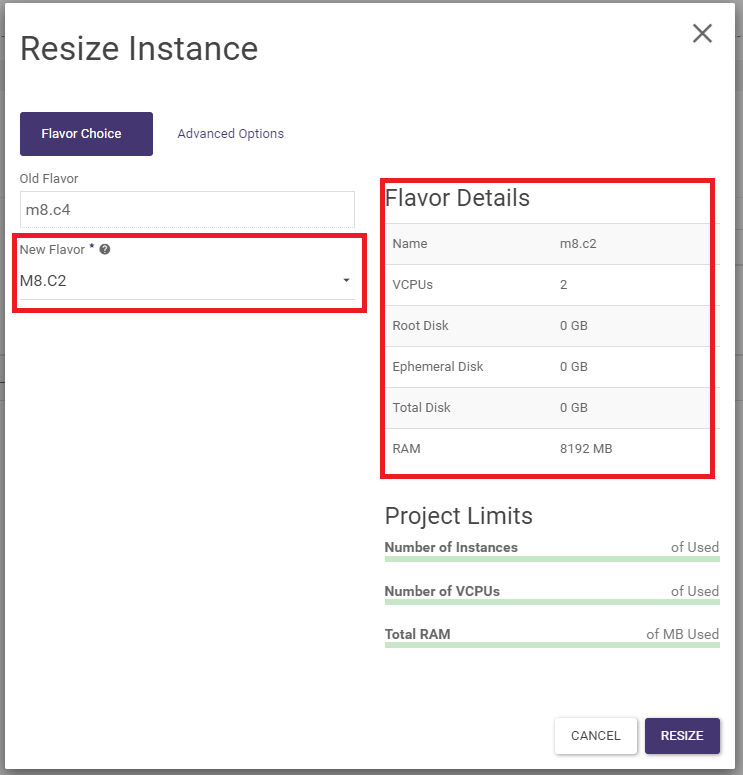
Changing the RAM and vCPU parameters
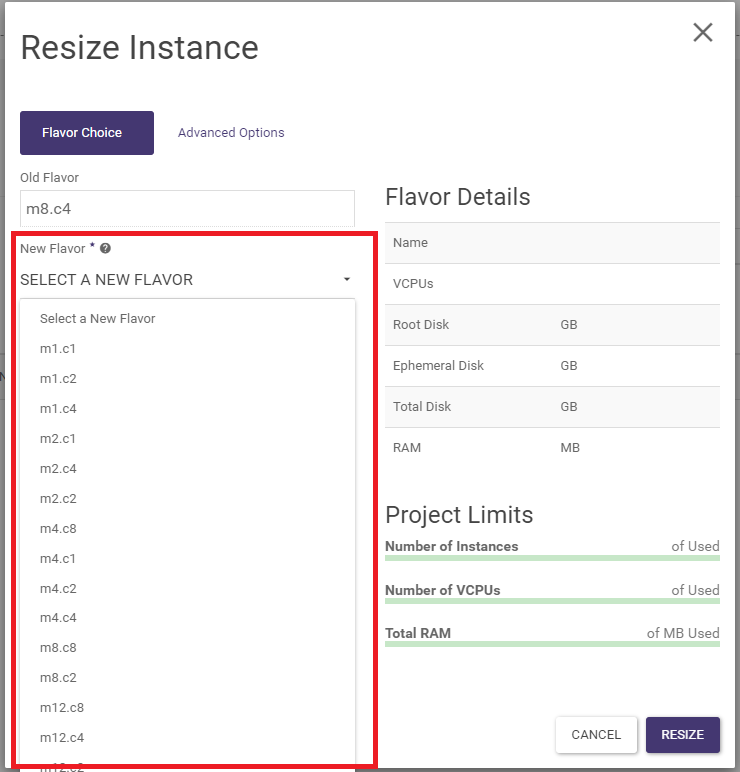
The parameters can be changed by changing the flavor. From the Project -> Compute -> Instances screen, select the RESIZE INSTANCE action. In the wizard, select the new flavor and confirm with the RESIZE button. In the list of instances, a status bar with task information will appear in the TASK field. Once done, click CONFIRM RESIZE/MIGRATE.

Running an instance from your own ISO image
To perform the following steps, an openrc file containing the credentials for the Atman Cloud service APIs is required. For SSO authentication (via auth.atman.pl), configure API account and complete the relevant data in the openrc file.
To install the system from an ISO image, you must first upload it to the image registry of the Atman Cloud service. This can be done by using the openstack CLI client:
openstack image create --private --disk-format iso --container-format bare --file /path/to/iso ImageName
When the image is created, we copy its ID:
Property |
Value |
|---|---|
checksum |
e0a43cbb8b991735c1b38e7041019658 |
container_format |
bare |
created_at |
2019-03-28T09:27:04Z |
disk_format |
iso |
id |
3ecfe11c-309d-474d-b16c-1f98afb79d98 |
min_disk |
0 |
min_ram |
0 |
name |
ImageName |
owner |
1f5c0xx |
protected. |
False |
size |
306184192 |
status |
active |
tags. |
[] |
updated_at |
2019-03-28T09:27:18Z |
virtual_size |
Not available |
visibility. |
private |
We then create a temporary instance by pointing to the image ID:
nova boot \
   --block-device source=image,id=3ecfe11c-309d-474d-b16c-1f98afb79d98,dest=volume,shutdown=preserve,size=1,bootindex=0,bus=ide,type=cdrom \
   --block-device source=blank,dest=volume,size=10,shutdown=preserve,bootindex=1,type=disk,bus=vitrio \
   --nic none \
   --flavor m4.c2 \
InstanceName
Once the instance is running, we can install the system from the ISO using the Console tab in the Atman Cloud panel. During the installation, we select the /dev/vda volume as the system drive. When the installation is complete, we delete the temporary instance and start the new instance from the volume on which we previously installed the system.
Creation of an instance from a volume on a given disk resource
The way to create instances on a given type of disk resource is to create a volume from an image on a given type of storage and create an instance from the volume.
Instances with 8000/15000/25000 IOPS disk resources can be created, for example, as follows.
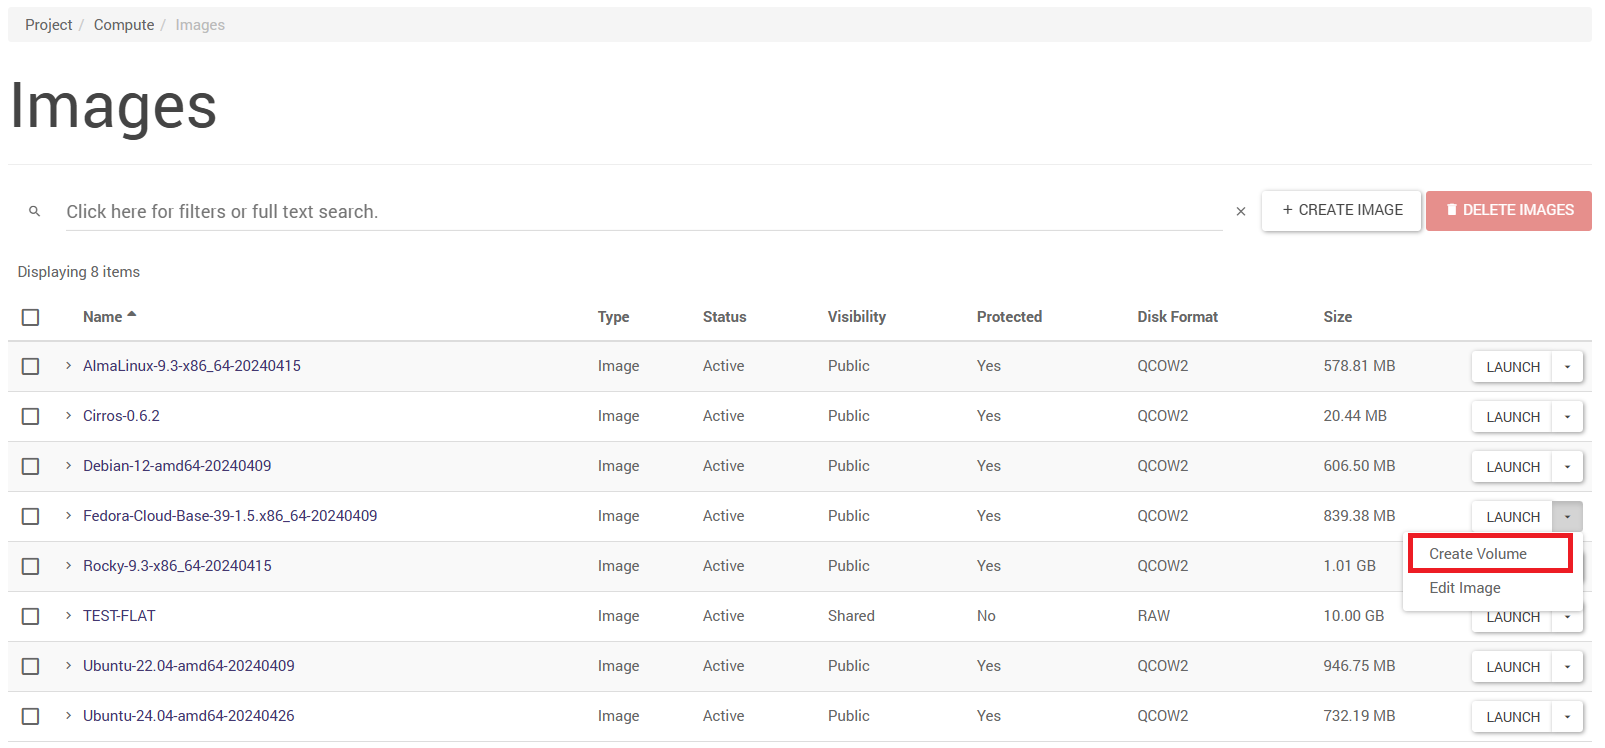
Go to the Project -> Compute -> Images tab.
Then, in the options for the image we want to use to create the instance, we select Create Volume.
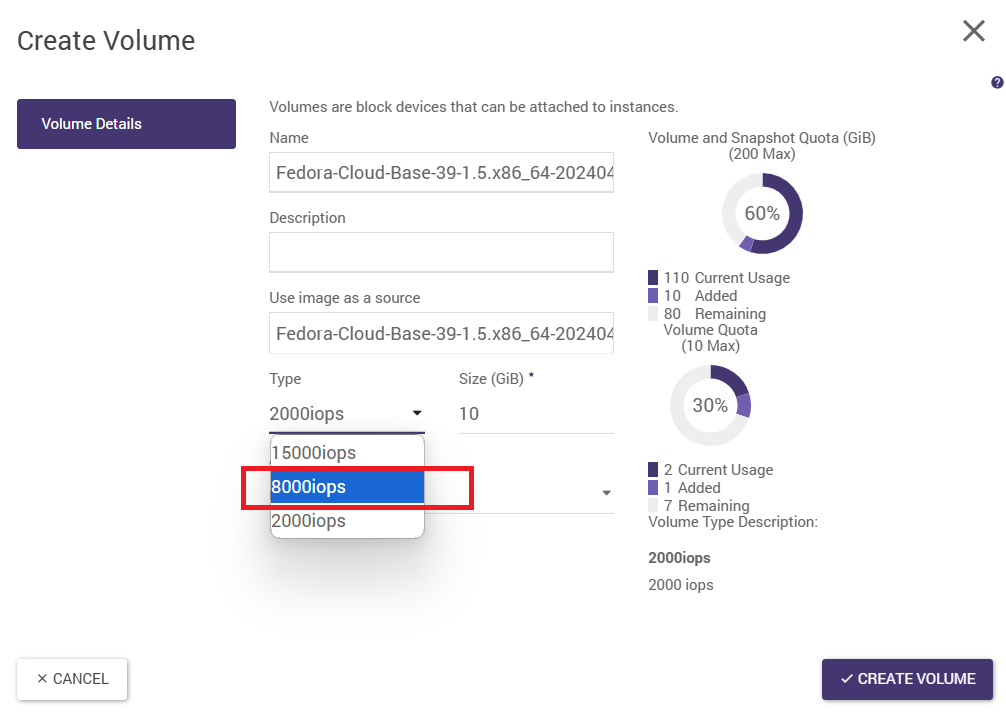
In the window that opens, change the type to 8000 IOPS and click Create Volume.
In the next step, we go to Project -> Volumes -> Volumes. There, we find our volume and select LAUNCH AS INSTANCE in the options.
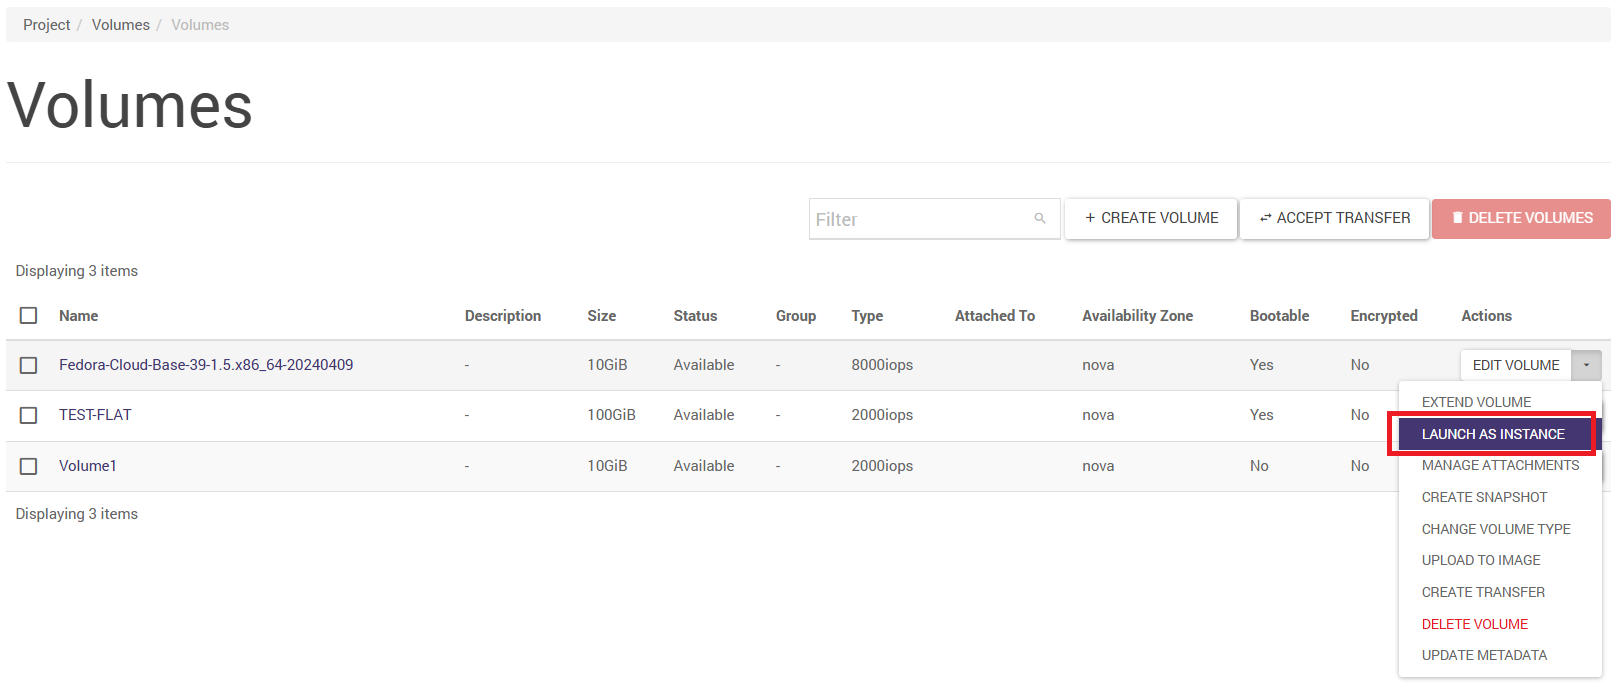
The instance configuration window opens. Further instance configuration is identical to the 2000 IOPS disk resources with one exception. In the Source tab, we change the Select Boot Source options to Volume.
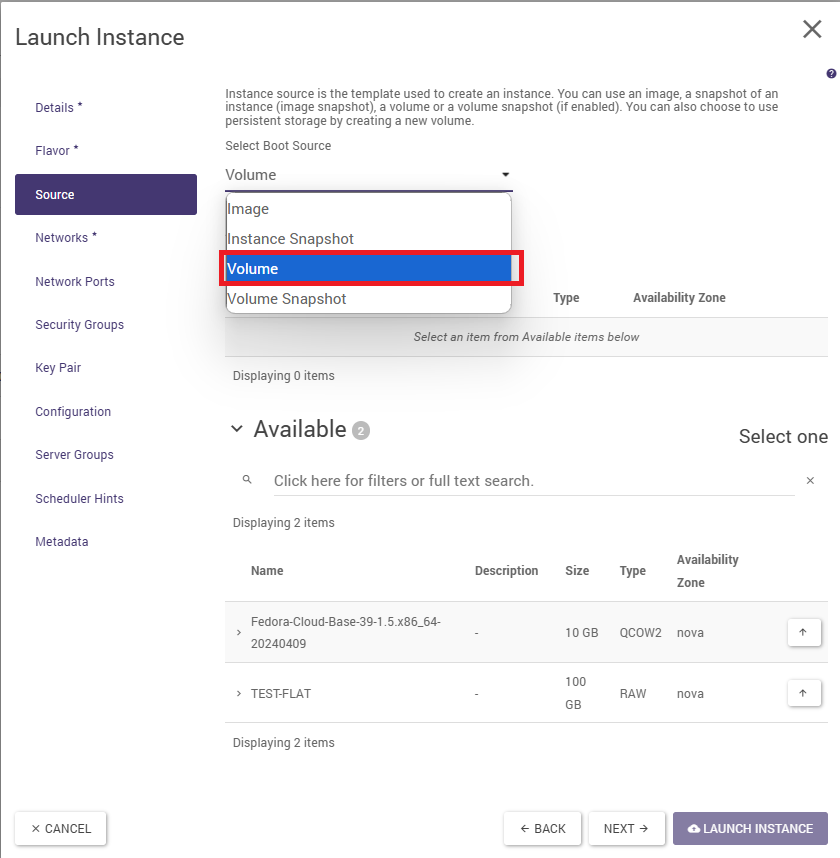
We then select our volume from the list.
We then fill in the required fields in the remaining tabs and click on the LAUNCH INSTANCE icon to launch the instance.
Description of instance states
In the list of instances on the right-hand side of the Project -> Compute -> Instances screen, the user is able to perform a number of actions on their state. The following description shows the meaning of the states.
ACTION |
DESCRIPTION |
|---|---|
PAUSE INSTANCE. |
The state of the machine is stored in RAM. The instance becomes inactive |
SUSPEND INSTANCE. |
Enters a state similar to hibernation - the state of the instance including memory is written to disk, RAM and cores are released - can be allocated to other instances. The instance is deactivated |
RESUME INSTANCE. |
Return to the state before the SUSPEND or PAUSE action. The instance is deactivated, resources released. The state of the instance is not saved |
UNSHELVE INSTANCE. |
Creates and boots the instance from scratch |
LOCK INSTANCE. |
The instance is protected against deletion |
UNLOCK INSTANCE. |
Instance is susceptible to deletion |
SOFT. |
HARD REBOOT Rebooting the instance |
SHUT OFF INSTANCE. |
Exclusion of the instance |
START INSTANCE. |
Enabling instances |
For more information on virtual machine states, see the OpenStack documentation by clicking on the link: https://docs.openstack.org/nova/latest/reference/vm-states.html
Instance states in the PAYG (Pay-As-You-Go) settlement model
In the PAYG billing model, the costs associated with resource consumption in the form of vCPU and RAM are generated for each started hour of operation of the virtual machine in the following states:
active,
stopped,
paused,
resized,
suspended,
migrating.
Irrespective of the state of the virtual machine, the cost of storage space on the block disks is charged over the entire lifetime of the virtual machine.
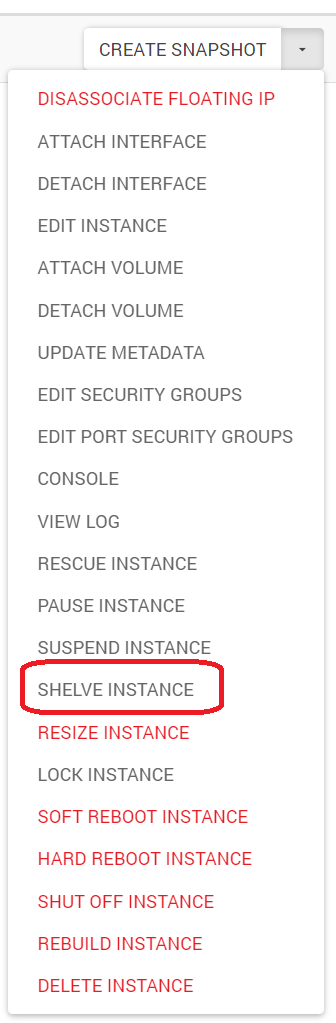
To avoid the costs associated with the use of vCPU and RAM when the virtual machine is not in use, switch the virtual machine to the SHELVED state.
Practical remarks
NOTE 1. Autogeneration of root password.
The administrator password is generated automatically. In order for the password to be assigned and be visible in the instance logs, please note that when using an internal network, DHCP must be enabled - see also chapter “Internal networks”.
NOTE 2. Accessibility zones.
The cloud platform in terms of compute nodes is divided into three zones (AZ - Availability Zones). Each zone is a separate group of node racks (physical servers). By restricting an instance to a particular zone, the user is assured that the instance (virtual machine) will not be located in another zone. This functionality enables the user - if required - to further separate groups of instances from each other.
NOTE 3. Boot source.
Selecting the Image value in the boot source applies the 2000 IOPS disk space type by default. If the user needs to boot an instance with a system disk type of 8000 IOPS, they should create a volume beforehand. Selecting the Volume value is a more universal way - at the volume creation stage, the type can be explicitly specified: 2000 IOPS or 8000 IOPS (or 15000 IOPS if this type is available in the user environment).
NOTE 4. Customisation Script.
For Linux operating systems, it is easy to generate a self-determined password for the default user when creating a machine. For Linux Ubuntu the default user is ubuntu, for Linux CentOS the user centos, for Linux Debian the user debian. In the Customisation Script field, enter:
#cloud-config
password: mysecret
chpasswd: { expire: False }
ssh_pwauth: True
In the case of Linux Debian, such a user must be created - here: debian. In the Customization Script field, enter:
#cloud-config
password: mysecret
ssh_pwauth: True
chpasswd: { expire: False }
system_info:
default_user:
    name: debian
    lock_passwd: true
    sudo: ["ALL=(ALL) NOPASSWD:ALL"]
    shell: /bin/bash
Video instructions